

Blog / Maintenance & Service, Battery Care & Diagnostics, Electric Vehicle (EV) Maintenance, Seasonal

Blog

All Maintenance & Service, Battery Care & Diagnostics, Electric Vehicle (EV) Maintenance, Seasonal Maintenance & Service, Expert Repairs & Diagnostics, Genuine Parts & Accessories, Engine Care & Used Vehicle Guides, Financing & Insurance, Buying Guides, Trade-In Advice, Certified Pre-Owned Automotive News, New Vehicle Reviews, Buying Guides, Financing & Insurance, Seasonal Driving Tips Maintenance & Service, Warranty & Service Contracts, Repair & Diagnostics, Parts & Components New Vehicle Reviews, Buying Guides, Financing & Insurance, Model Comparisons, Automotive News Buying Guides, Financing & Insurance, New Vehicle Reviews, Model Comparisons, Sales & Promotions Used Vehicle Guides, Financing & Insurance, Buying Guides, Vehicle Warranty Information, Pre-Owned Vehicle Trade-In Advice, Financing & Insurance, Buying Guides, Used Vehicle Guides, New Vehicle Maintenance & Service, Parts & Accessories, Vehicle HVAC Care, Seasonal Vehicle Maintenance, DIY Maintenance & Service, Essential Vehicle Care, Preventive Maintenance Tips, Vehicle Longevity Compare Cars Used Vehicle Guides, Financing & Insurance, Buying Guides, Pre-Owned Vehicle Sales, Vehicle Maintenance & Service, Brake Systems & Repair, Vehicle Parts & Accessories, Towing & Load New Vehicle Reviews, Buying Guides, Model Comparisons, Financing & Insurance, Inventory & Sales Tips Vehicle Sales Events, New Vehicle Pricing & Incentives, Financing & Lease Options, Trade-In & Vehicle Sales Process, Financing & Credit Applications, New and Used Vehicle Inventory, Pickup and Vehicle Trade-In Tips, Financing & Insurance, Buying Guides, Dealership Sales Strategies, Inventory Buying Guides, Financing & Insurance, New Vehicle Reviews, Model Comparisons, Technology & Leasing & Lease Deals, Financing & Insurance, New Vehicle Sales, Commercial Vehicle Leasing, Maintenance & Service, Recall Information, Safety & Reliability, Vehicle Ownership Care, Parts & Maintenance & Service, Vehicle Pickup & Delivery, Mobile Service & On-Site Repairs, Oil Change & Community Events & Customer Appreciation, New Vehicle Reviews, Financing & Trade-In Guides, Maintenance & Service, Warranty & Recalls, Repair & Diagnostics, Parts & Accessories, Vehicle Used Vehicle Guides, Financing & Insurance, Buying Guides, New Vehicle Reviews, Commercial Vehicle Maintenance & Service, Automotive Technology & Software Updates, Warranty & Recall Service, Mobile Maintenance & Service, Vehicle Ownership Care, Mobile Repair Services, Genuine Parts & Certified New Vehicle Reviews, Buying Guides, Financing & Insurance, Model Comparisons, Automotive Technology Commercial Truck Sales, Fleet Vehicle Financing, Custom Work Truck Upfits, Commercial Vehicle Dealership Events & Promotions, Financing & Trade-In Options, Maintenance & Service Specials, Maintenance & Service, Mobile Vehicle Services, Vehicle Care & Ownership, Genuine Parts & Repairs, Maintenance & Service, Vehicle Inspections, Oil Change & Fluid Services, Tire Care & Battery Maintenance & Service, Vehicle Lighting & Electrical Systems, Automotive Safety & Inspection, OEM Model Comparisons, New Vehicle Reviews, Technology & Innovation, Safety Features, Buying Guides New Vehicle Reviews, Buying Guides, Financing & Insurance, Model Comparisons, Used Vehicle Guides Commercial Vehicle Sales, Financing & Leasing, Small Business Vehicle Incentives, Fleet Purchasing Commercial Vehicle Sales, Fleet Purchasing & Management, Financing & Leasing for Businesses, New & Community Events, New Vehicle Buying Guides, Financing & Insurance, Maintenance & Service, Local Maintenance & Service, Brake System Care, Vehicle Safety & Inspection, Parts Quality & Replacement, Maintenance & Service, Safety Features, Technology & Innovation, Seasonal Driving Tips, Parts & Maintenance & Service, Tire Care & Repair, Roadside Assistance, Vehicle Safety & Inspections, Maintenance & Service, Tire Care & Repair, Wheel Alignment & Balancing, Suspension Maintenance, Maintenance & Service, Tire Care & Replacement, Vehicle Safety & Handling, Seasonal Vehicle Maintenance & Service, Tire Care & Replacement, Vehicle Safety & Inspection, Emergency Roadside Maintenance & Service, Vehicle Software Updates, Safety Features, Technology & Innovation, Recall & New Vehicle Reviews, Buying Guides, Model Comparisons, Maintenance & Service, Technology & Used Vehicle Guides, Buying Guides, Financing & Insurance, Model Comparisons, Selling Your Car Vehicle Sales Events, New Vehicle Purchasing, Incentives & Discounts, Financing & Pre-Approval, Buying Guides, Financing & Insurance, New Vehicle Reviews, Commercial Fleet Sales, Custom Orders & Buying Guides, Financing & Insurance, Vehicle Inventory & Offers, Dealership Visit Preparation, Buying Guides, New Vehicle Reviews, Financing & Insurance, Commercial Vehicle Sales, Model Commercial Truck Sales, Fleet Purchasing Guides, Financing & Lease Options, Work Truck Commercial Vehicle Sales, Fleet Leasing & Management, Commercial Financing & Tax Incentives, Financing & Insurance, Leasing Benefits, Model Comparisons, Technology & Innovation, Buying Guides Leasing & Financing Options, Buying Guides, Model Comparisons, Negotiation Tips, Inventory & Leasing & Financing Options, Buying Guides, New Vehicle Reviews, Model Comparisons, Technology & Maintenance & Service, Automotive Detailing, Paint Protection & Care, Seasonal Vehicle Care, Maintenance & Service, Automotive Electrical Systems, Battery Care & Replacement, Vehicle Lighting Maintenance & Service, Automotive Fluids & Lubricants, Vehicle Care & Ownership, Dealership Service Maintenance & Service, Automotive Repair, Mobile & Remote Vehicle Service, Warranty & Roadside Maintenance & Service, Brake System Care, Vehicle Safety & Inspection, Automotive Repair Tips, Maintenance & Service, Brake System Care, Vehicle Safety & Inspections, Parts & Repairs, Expert Maintenance & Service, Technology & Innovation, Vehicle Diagnostics & Telematics, Fleet Management Maintenance & Service, Vehicle Care & Longevity, Scheduled Service Packages, Oil Changes & Fluid Maintenance & Service, Vehicle Inspection & Diagnostics, Parts & Repairs, Warranty & Resale Value, Maintenance & Service, Vehicle Interior Care, Technology & Innovation in Service, Professional New Vehicle Reviews, Buying Guides, Financing & Insurance, Model Comparisons, Inventory Highlights New Vehicle Reviews, Buying Guides, Financing & Insurance, Model Comparisons, Inventory Updates New Vehicle Reviews, Buying Guides, Technology & Innovation, Safety Features, Seasonal Driving Tips New Vehicle Reviews, Financing & Insurance, Buying Guides, Used Vehicle Guides, Model Comparisons New Vehicle Reviews, Model Comparisons, Commercial Truck Guides, Technology & Innovation, Buying Guides, Financing & Insurance, Used Vehicle Guides, New Vehicle Reviews, Cross-Border Commercial Leasing Options, Business Fleet Solutions, Financing & Leasing Programs, Commercial Community Engagement & Events, New Vehicle Promotions, Financing & Trade-In Options, Maintenance & Community Events & Dealership News, New Vehicle Promotions & Incentives, Maintenance & Service Community Events & Dealership News, New Vehicle Reviews, Financing & Insurance, Maintenance & Custom Ordering & Build Process, New Vehicle Inventory & Offers, Financing & Trade-In Guidance, East Liverpool, OH Ford Dealer East Liverpool, OH Used Cars Financing & Insurance, Buying Guides, Commercial Vehicle Solutions, Fleet Management, Inventory and Financing & Insurance, Buying Guides, New Vehicle Reviews, Used Vehicle Guides, Automotive Sales Financing & Insurance, Buying Guides, New Vehicle Reviews, Used Vehicle Guides, Automotive Sales & Financing & Insurance, Buying Guides, New Vehicle Reviews, Used Vehicle Guides, Model Comparisons Financing & Insurance, Buying Guides, Used Vehicle Guides, New Vehicle Reviews, Automotive Sales Financing & Insurance, Buying Guides, Used Vehicle Guides, Trade-In Tips, New Vehicle Sales Financing & Insurance, Buying Guides, Vehicle Inventory & Offers, Trade-In & Appraisal, Dealership Financing & Insurance, Buying Guides, Vehicle Trade-In Tips, Dealership Sales Process, New Vehicle Leasing & Financing Options, New Vehicle Leasing Guides, Buying Guides, Inventory Spotlight, Trade Leasing Options, Financing & Insurance, New Vehicle Reviews, Buying Guides, Technology & Innovation Leasing Options, Financing & Insurance, New Vehicle Sales, Buying Guides, Vehicle Inventory Maintenance & Service, Air Conditioning Repair, Genuine Parts & Accessories, Dealer-Authorized Maintenance & Service, Automotive Air Conditioning Repair, Vehicle Cooling System Care, Diagnostic Maintenance & Service, Automotive Detailing & Cleaning, Seasonal Vehicle Care, Vehicle Protection & Maintenance & Service, Automotive Detailing & Paint Care, Vehicle Exterior Protection, Paint Repair Maintenance & Service, Automotive Detailing & Protection, Corrosion & Rust Prevention, Paint & Maintenance & Service, Automotive Detailing, Vehicle Care & Protection, Off-Road Vehicle Maintenance & Service, Automotive Electrical Systems, Battery Care & Replacement, Diagnostics & Maintenance & Service, Automotive Glass Repair, Safety Features, Technology & Innovation, Mobile & Maintenance & Service, Automotive Lighting & Electrical, Vehicle Safety & Visibility, DIY Vehicle Maintenance & Service, Automotive Parts & Accessories, Seasonal Vehicle Care, Vehicle Safety & Maintenance & Service, Automotive Parts & Accessories, Vehicle Air Quality & HVAC Care, Preventive Maintenance & Service, Automotive Parts & Accessories, Vehicle Ownership Care, Engine Care & Maintenance & Service, Automotive Parts & Accessories, Vehicle Safety & Repair, Warranty & Maintenance & Service, Automotive Parts & Components, Vehicle Safety & Repair, Warranty & Service Maintenance & Service, Automotive Parts & Repairs, Vehicle Warranty & Protection, Service Center Maintenance & Service, Automotive Repair Tips, Service Team Selection, Warranty & Service Policies, Maintenance & Service, Automotive Repair, Parts & Accessories, Vehicle Ownership Care, Technology & Maintenance & Service, Automotive Repair, Parts & OEM Components, Vehicle Longevity & Care, Service Maintenance & Service, Automotive Technology & Diagnostics, Vehicle Electronics & Sensors, Seasonal Maintenance & Service, Battery Care & Replacement, Vehicle Electrical Systems, Seasonal Vehicle Maintenance & Service, Brake System Care, OEM Parts & Replacement, Vehicle Safety & Inspections, Maintenance & Service, Brake System Care, Vehicle Repair Tips, Automotive Parts & Components, Maintenance & Service, Brake System Care, Vehicle Safety & Inspections, Parts & Components, Maintenance & Service, Brake System Care, Vehicle Safety Inspections, Automotive Repair Tips, OEM Maintenance & Service, Certified Technician Insights, Warranty & Service Coverage, Genuine OEM Maintenance & Service, Cooling System Repairs, Vehicle Ownership Care, Diagnostic & Maintenance & Service, Diagnostic Services, Vehicle Health & Diagnostics, Service Tips & Advice, Maintenance & Service, Engine Care & Performance, Parts & Accessories, Genuine vs. After Maintenance & Service, Paint Protection & Detailing, Vehicle Exterior Care, Seasonal Vehicle Maintenance & Service, Parts & Accessories, Engine Care & Repair, Vehicle Longevity Tips, OEM Parts Maintenance & Service, Parts & Replacements, Vehicle Care Tips, Seasonal Maintenance, DIY Vehicle Maintenance & Service, Recall Updates & Safety Notices, Genuine Parts & Accessories, Truck Care & Maintenance & Service, Repair & Diagnostics, OEM Parts & Accessories, Warranty & Recall Maintenance & Service, Repair & Diagnostics, Parts & Accessories, Vehicle Ownership Care, Service Maintenance & Service, Repair & Diagnostics, Parts & Components, Preventive Care & Tips, Warranty & Maintenance & Service, Repair & Diagnostics, Tire & Wheel Care, Vehicle Safety & Inspection, Parts Maintenance & Service, Repair & Diagnostics, Warranty & Service Coverage, Genuine OEM Parts & Maintenance & Service, Repair & Parts, Vehicle Ownership Care, Safety Features, Technology & Maintenance & Service, Repair & Parts, Vehicle Ownership Care, Transmission Maintenance & Service, Repair Solutions, Vehicle Ownership Care, Parts & Accessories, Diagnostic Maintenance & Service, Repair Tips & Techniques, Vehicle Care & Ownership Maintenance & Service, Safety Features, Automotive Recalls & Repairs, Parts & Warranty Services, Maintenance & Service, Safety Features, Automotive Recalls & Repairs, Technology & Innovation, Maintenance & Service, Safety Features, Automotive Recalls, Vehicle Ownership Care, Parts & Repairs Maintenance & Service, Safety Features, Parts & Repairs, Vehicle Ownership Care, Automotive Service Maintenance & Service, Safety Features, Recall & Repair Updates, Parts & Repairs, Vehicle Ownership Maintenance & Service, Safety Features, Recall & Safety Campaigns, Vehicle Inspection & Repairs, Maintenance & Service, Safety Features, Recall & Warranty Information, Vehicle Diagnostics & Maintenance & Service, Safety Features, Recall Repairs & Safety Campaigns, Parts & Genuine Maintenance & Service, Safety Features, Recalls & Repairs, Parts & Accessories, Vehicle Ownership Maintenance & Service, Safety Features, Repair & Recall Updates, Parts & Components, Vehicle Maintenance & Service, Safety Features, Repair & Replacement, Vehicle Care & Inspection, Parts & Maintenance & Service, Safety Features, Seasonal Driving Tips, Technology & Innovation, Parts & Maintenance & Service, Safety Features, Technology & Innovation, Automotive Electrical Systems, Maintenance & Service, Safety Features, Technology & Innovation, Automotive News, Parts & Repairs Maintenance & Service, Safety Features, Technology & Innovation, Automotive Parts & Accessories, Maintenance & Service, Safety Features, Technology & Innovation, Automotive Recalls, Parts & Repairs Maintenance & Service, Safety Features, Technology & Innovation, Automotive Recalls, Vehicle Maintenance & Service, Safety Features, Technology & Innovation, Automotive Service Tips, Recall & Maintenance & Service, Safety Features, Technology & Innovation, Parts & Repairs, Seasonal Driving Maintenance & Service, Safety Features, Technology & Innovation, Parts & Repairs, Vehicle Ownership Maintenance & Service, Safety Features, Technology & Innovation, Recall & Warranty Information, Maintenance & Service, Safety Features, Technology & Innovation, Repair & Recall Information, Parts Maintenance & Service, Safety Features, Technology & Innovation, Tire Care & Replacement, Maintenance & Service, Safety Features, Vehicle Inspections, DIY Vehicle Care, Repair & Diagnostics Maintenance & Service, Safety Recalls & Repairs, Vehicle Safety & Compliance, Powertrain & Maintenance & Service, Seasonal Driving Tips, Model Comparisons, Technology & Innovation, Safety Maintenance & Service, Seasonal Driving Tips, Safety Features, Technology & Innovation, Automotive Maintenance & Service, Seasonal Driving Tips, Safety Features, Technology & Innovation, Parts & Maintenance & Service, Seasonal Driving Tips, Vehicle Care & Ownership, Brake System Maintenance, Maintenance & Service, Seasonal Driving Tips, Vehicle Care & Ownership, Parts & Accessories, Safety Maintenance & Service, Seasonal Driving Tips, Vehicle Care & Ownership, Safety Features, Maintenance & Service, Seasonal Driving Tips, Vehicle Care & Protection, Brake Maintenance, Tire Maintenance & Service, Seasonal Driving Tips, Vehicle Care & Warranty, Service Specials & Packages, Maintenance & Service, Seasonal Driving Tips, Vehicle Cooling Systems, Automotive Safety Features, Maintenance & Service, Service Scheduling & Convenience, Vehicle Repair & Diagnostics, Parts & Maintenance & Service, Technology & Innovation, Automotive Service Transparency, Digital Vehicle Maintenance & Service, Technology & Innovation, Safety Features, Parts & Warranty, Vehicle Maintenance & Service, Tire Care & Replacement, Seasonal Vehicle Care, Safety Features, Automotive Maintenance & Service, Tire Care & Replacement, Vehicle Safety & Inspections, Seasonal Vehicle Maintenance & Service, Transmission Care & Repair, Vehicle Fluid Services, Automotive Diagnostics, Maintenance & Service, Transmission Care, Repair & Parts, Vehicle Ownership Care, Common Vehicle Maintenance & Service, Vehicle Care Tips, Parts & Accessories, Seasonal Vehicle Maintenance, Maintenance & Service, Vehicle Detailing & Care, Parts & Accessories, Seasonal Vehicle Preparation, Maintenance & Service, Vehicle Detailing & Cosmetic Care, Automotive Cleaning & Protection, Service Maintenance & Service, Vehicle Detailing & Cosmetic Care, Service Scheduling & Convenience, Maintenance & Service, Vehicle Detailing & Protection, Repair & Inspection, Parts & Accessories, Maintenance & Service, Vehicle Detailing & Protection, Vehicle Care Tips, Seasonal Vehicle Maintenance & Service, Vehicle Diagnostics & Repair, Engine Performance & Troubleshooting, Fuel Maintenance & Service, Vehicle Fluids & Lubrication, Engine Care & Repair, Parts & Accessories, Maintenance & Service, Vehicle Ownership Care, Parts & Accessories, Repair & Diagnostics, Certified Maintenance & Service, Vehicle Repair & Diagnostics, Parts & Accessories, DIY Vehicle Care, Safety Maintenance & Service, Vehicle Repair & Diagnostics, Parts & Accessories, Hybrid & Electric Vehicle Maintenance & Service, Vehicle Repair & Diagnostics, Parts & Accessories, Seasonal Driving Tips, Maintenance & Service, Vehicle Repair & Diagnostics, Parts & Accessories, Service Lane Tips & Maintenance & Service, Vehicle Repair & Diagnostics, Parts & Accessories, Towing & Performance Maintenance & Service, Vehicle Repair & Parts, Service Convenience & Customer Care, Roadside Maintenance & Service, Vehicle Repair Tips, Parts & Accessories, Safety Features, Technology & Maintenance & Service, Vehicle Service Warranties, Repair & Coverage Plans, Ownership & Vehicle Model Comparisons, Buying Guides, New Vehicle Reviews, Financing & Insurance, Inventory Updates Model Comparisons, Buying Guides, New Vehicle Reviews, Technology & Innovation, Safety Features Model Comparisons, Buying Guides, Technology & Innovation, Safety Features, Maintenance & Service Model Comparisons, New Vehicle Reviews, Buying Guides, Technology & Innovation, Financing & Model Comparisons, New Vehicle Reviews, Buying Guides, Technology & Innovation, Safety Features Model Comparisons, New Vehicle Reviews, Safety Features, Technology & Innovation, Seasonal Driving Model Comparisons, New Vehicle Reviews, Technology & Innovation, Buying Guides, Maintenance & Model Comparisons, New Vehicle Reviews, Technology & Innovation, Maintenance & Service, Buying Model Comparisons, Towing & Hauling Guides, Maintenance & Service, Technology & Innovation, New New Vehicle Promotions, Buying Guides, Financing & Insurance, New Vehicle Reviews, Inventory New Vehicle Reviews, Buying Guides, Financing & Insurance, Model Comparisons, Automotive Sales New Vehicle Reviews, Buying Guides, Financing & Insurance, Model Comparisons, Commercial & Work New Vehicle Reviews, Buying Guides, Financing & Insurance, Model Comparisons, Vehicle Customization New Vehicle Reviews, Buying Guides, Financing & Insurance, Model Comparisons, Vehicle Inventory New Vehicle Reviews, Buying Guides, Financing & Insurance, New Vehicle Specials, Trade-In & Value New Vehicle Reviews, Buying Guides, Financing & Insurance, Used Vehicle Guides, Inventory Updates New Vehicle Reviews, Buying Guides, Financing & Insurance, Used Vehicle Guides, Model Comparisons New Vehicle Reviews, Buying Guides, Financing & Insurance, Vehicle Inventory & Specials, Model New Vehicle Reviews, Buying Guides, Financing & Insurance, Vehicle Inventory, Model Comparisons New Vehicle Reviews, Buying Guides, Model New Vehicle Reviews, Buying Guides, Model Comparisons, Financing & New Vehicle Reviews, Buying Guides, Safety Features, Technology & Innovation, Model Comparisons New Vehicle Reviews, Buying Guides, Technology & Innovation, Safety Features, Maintenance & Service New Vehicle Reviews, Financing & Insurance, Buying Guides, New Vehicle Specials, Model Comparisons New Vehicle Reviews, Financing & Insurance, Buying Guides, Technology & Innovation, Automotive New Vehicle Reviews, Model Comparisons, Buying Guides, Technology & Innovation, Safety Features New Vehicle Reviews, Model Comparisons, Financing & Insurance, Technology & Innovation, Safety New Vehicle Reviews, Model Comparisons, Off-Road Adventures, Technology & Innovation, Maintenance & New Vehicle Reviews, Model Comparisons, Safety Features, Technology & Innovation, Buying Guides New Vehicle Reviews, Model Comparisons, Technology & Innovation, Financing & Insurance, Maintenance New Vehicle Reviews, Model Comparisons, Technology & Innovation, Safety Features, Buying Guides New Vehicle Reviews, Model Comparisons, Technology & Innovation, Safety Features, Maintenance & New Vehicle Reviews, Off-Road Capabilities, Outdoor Adventure Vehicles, Technology & Innovation, New Vehicle Reviews, Technology & Innovation, Buying Guides, Maintenance & Service, Model New Vehicle Reviews, Technology & Innovation, Buying Guides, Safety Features, Model Comparisons New Vehicle Reviews, Technology & Innovation, Safety Features, Maintenance & Service, Buying Guides New Vehicle Sales, Financing & Incentives, Trade-In & Appraisal, Special Sales Events, Electric New Vehicle Sales, Financing & Incentives, Trade-In & Value Guides, Manufacturer Promotions, New Vehicle Sales, Financing & Insurance, Buying Guides, Manufacturer Incentives & Discounts, New Vehicle Sales, Vehicle Delivery & Logistics, Financing & Credit Applications, Trade-In & Trucks Used Vehicle Guides, Financing & Insurance, Buying Guides, Model Comparisons, Local Dealership Vehicle Sales Events, Financing & Leasing, Trade-In & Trade-Up Guides, New Vehicle Inventory Vehicle Sales Events, New Vehicle Buying Guides, Financing & Incentives, Dealership Inventory Vehicle Sales Events, New Vehicle Pricing, Financing & Credit Applications, Trade-In & Loyalty Vehicle Sales Process, Online Vehicle Purchasing, Financing & Loan Approval, Trade-In & Vehicle Vehicle Sales Promotions, New Vehicle Buying Guides, Financing & Credit Applications, Dealership Vehicle Sales Promotions, New Vehicle Buying Guides, Financing & Incentives, Trade-In & Valuation, Vehicle Sales, Online Car Buying, Financing & Incentives, Trade-In Guides, New Vehicle Delivery
f

Why Does Ford Technician Certification Matter for Vehicle Repairs?

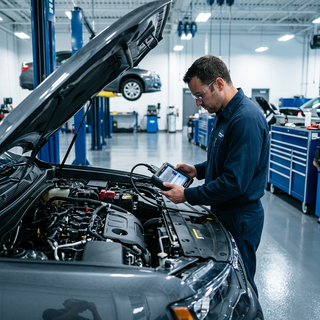
Ford technician certification matters because modern Ford vehicles utilize complex network architectures, specialized computer module programming, and exact mechanical tolerances that require brand-specific technical expertise. A certified technician completes structured factory instruction to accurately diagnose electronic trouble codes, service high-voltage electric or EcoBoost powertrains, and execute manufacturer recall procedures without trial-and-error part replacement, protecting overall vehicle performance and supporting factory warranty coverage. Vehicles today function as mobile computer networks. A single Ford truck or SUV can contain up to 80 individual electronic control units communicating across high-speed controller area network (CAN-bus) lines. When an engine management light or safety system warning appears, standard multi-brand diagnostic code readers often display generic failure codes that miss underlying Ford-specific module errors. A technician who has completed manufacturer certification understands how these proprietary systems interact, allowing for precise fault isolation and correct repair procedures. Beyond digital diagnostics, mechanical standards on components such as twin-independent variable camshaft timing systems, 10-speed automatic transmissions, and integrated trailer brake controllers demand exact torque specifications and specialized assembly techniques. Factory-trained service specialists receive hands-on instruction using official shop manuals and specialized service tools engineered exclusively for Ford lineups. This specialized training reduces diagnostic time, prevents unnecessary component replacements, and ensures every repair restores the vehicle to original factory engineering standards. For complete ownership care and specialized diagnostics, local drivers can visit our service center on Pennsylvania Avenue to speak directly with our team. If you notice unusual drivability symptoms or require routine maintenance, give us a call at (330) 462-7578 or schedule a service appointment online at your convenience. Table of Contents What Specific Training and Requirements Define a Ford-Trained Technician? What Is Required to Achieve advanced Ford service training status? Why Are Factory Diagnostic Tools and Module Updates Essential for Modern Fords? Can a Mechanic Be Both ASE Certified and Ford Trained? Will Servicing a Ford at an Independent Shop Void the Factory Warranty? Common Questions About Ford Technical Training and Vehicle Service Schedule Factory-Trained Service at Tri State Ford What Specific Training and Requirements Define a Ford-Trained Technician? A Ford-trained technician is defined by completing structured educational tracks administered through Ford Motor Company, combining online technical modules, hands-on classroom instruction, and practical dealership experience. Candidates progress through technical career entry programs like STST (Service Technician Specialty Training) or college-level ASSET (Automotive Student Service Educational Training) courses to master Ford-specific electrical wiring, powertrain management, and chassis control systems. The path to factory credentialing involves multiple structured training tiers: STST Curriculum: Instructor-led classroom and web-based training modules focusing on specific vehicle systems, including engine repair, automatic transmissions, steering and suspension, climate control, and advanced electronics. ASSET Program: A two-year college program partnering higher education institutions with Ford dealerships, balancing classroom instruction with paid dealership co-op work experience. advanced Ford training: A streamlined pathway allowing experienced mechanics holding Automotive Service Excellence certifications to gain credit for general knowledge while completing Ford-specific technical coursework. introductory technical training: An introductory partnership connecting high schools and technical centers with Ford web-based training modules to build foundational knowledge. dealership apprenticeship: A formal dealership apprenticeship structure encompassing 18 to 24 months of training, incorporating about 2,000 hours of hands-on experience and roughly 400 hours of classroom learning across gas, hybrid, and electric vehicle systems. The daily commute across the rolling hills along State Route 170 in Calcutta subjects brake rotors, suspension bushings, and transmission clutches to continuous load shifts. Technicians trained directly by the manufacturer understand how these regional driving conditions accelerate wear on specific Ford components. Rather than relying on generic service guidelines, certified mechanics apply exact fluid specifications, updated software recalibrations, and genuine Motorcraft components tailored to maintain vehicle durability. To maintain vehicle performance without disrupting your daily routine, our team offers options like Ford Mobile Service for light maintenance at your home or workplace. For those performing their own routine maintenance, you can also order genuine OEM Ford parts directly through our service center. What Is Required to Achieve advanced Ford service training status? Achieving advanced Ford service training status requires a technician to earn and continuously maintain Master status across three core specialty tracks—chassis, powertrain, and electronics—for five consecutive calendar years. This credential represents the highest level of service expertise achievable within the Ford dealership network, demanding hundreds of hours of advanced coursework and regular practical examinations. To earn Master certification in each individual track, technicians must complete all foundational and advanced classroom labs, pass comprehensive written examinations, and demonstrate hands-on diagnostic proficiency. The requirements across the three core areas include: Powertrain Master Track: Mastery of engine overhaul procedures, turbocharger diagnostics, fuel-injection mapping, and multi-speed automatic transmission rebuilding. Chassis Master Track: Advanced certification in anti-lock braking systems, electronic stability controls, power steering calibrations, four-wheel-drive transfer cases, and air suspension systems. Electrical/Electronics Master Track: Comprehensive expertise in body control modules, multiplex wiring diagnostics, CAN-bus network troubleshooting, and Ford Co-Pilot360 driver-assist radar and camera alignments. Holding Senior Master status is not a one-time achievement. Vehicle technology evolves rapidly with new model years, introducing updated electrical architectures, high-voltage battery management systems, and over-the-air software capabilities. Senior Master technicians must complete annual update courses and recertification exams every year to retain their active status. Our service team observes that drivers coming in with intricate electrical or multi-system warnings benefit from having Senior Master technicians analyze the live data stream. When complex drivability issues arise, having top-tier technical expertise available ensures accurate fault identification on the first visit. For added maintenance convenience, owners can utilize Ford Pick-Up & Delivery to have their vehicle serviced by our trained staff without leaving home. Why Are Factory Diagnostic Tools and Module Updates Essential for Modern Fords? Factory diagnostic tools and software module updates are essential because contemporary Ford vehicles rely on complex computer software to operate engine management, safety sensors, transmission shift points, and cabin electronics. Specialized diagnostic hardware like the FDRS (Ford Diagnostic & Repair System) and IDS (Integrated Diagnostic Software) interfaces directly with factory servers to read proprietary diagnostic trouble codes and perform computer module reflash updates. General aftermarket scan tools used by non-affiliated repair facilities typically read only generic OBD-II emission codes. While an aftermarket tool might indicate a generic misfire, factory diagnostic software can isolate whether the issue stems from an injector driver signal, a variable camshaft solenoid fault, or a software calibration mismatch inside the powertrain control module. Computer module updates perform several critical functions on modern vehicles: Software Reflashing: Installing updated manufacturer code to fix drivability glitches, improve shift quality, or optimize fuel delivery without physical part replacement. Sensor Calibration: Aligning radar units, camera modules, and steering angle sensors following alignment or bumper service to ensure Ford Co-Pilot360 features function accurately. Guided Component Testing: Executing automated diagnostic sequences that test individual solenoids, relays, and actuators under precise operating conditions. Key and Module Initialization: Security handshake programming required when installing new engine computers, body control modules, or key fobs. Navigating the riverfront slopes in East Liverpool places sustained loads on vehicle transmissions and hill-descent systems. When software updates become available to refine clutch engagement or braking assist software under heavy loads, factory diagnostic equipment ensures those updates are applied correctly. Non-subscribed repair facilities without active access to Ford technical databases cannot reflash or update these proprietary vehicle computers. Can a Mechanic Be Both ASE Certified and Ford Trained? Automotive mechanics can hold both Automotive Service Excellence (ASE) certifications and official Ford factory training credentials simultaneously. Many professional dealership technicians carry active ASE certifications alongside their specialized manufacturer credentials to demonstrate both general automotive knowledge and brand-specific technical expertise. The National Institute for Automotive Service Excellence (ASE) evaluates a technician's understanding of general mechanical and electrical principles through standardized national examinations. ASE certifications cover universal system fundamentals across all vehicle makes and models, such as basic hydraulics, electrical testing theory, and mechanical steering geometry. In contrast, Ford factory training builds upon general mechanical skill by focusing exclusively on Ford engineering, component designs, and proprietary electronic systems. The table below outlines how these two professional credentials complement each other: Certification Type Governing Body Primary Focus Area Testing and Verification ASE Certification National Institute for Automotive Service Excellence Universal automotive repair principles, industry-standard diagnostics, and general mechanical theory across all vehicle brands. Standardized national written exams and verified two-year hands-on work experience requirement. Ford Factory Training Ford Motor Company Technical Career Entry System Brand-specific vehicle architectures, FDRS software reflash procedures, EcoBoost engine diagnostics, and Ford warranty standards. Proctored web modules, hands-on regional center training labs, and mandatory annual update testing. Ford's FAST (Ford Accepted Service Training) program specifically recognizes active ASE certifications, granting experienced mechanics course equivalency credits for general automotive fundamentals. This allows skilled mechanics to transition into specialized Ford training tracks faster, mastering model-specific software and diagnostic tools without repeating entry-level mechanical instruction. Will Servicing a Ford at an Independent Shop Void the Factory Warranty? Servicing a Ford vehicle at an independent repair shop does not void your factory warranty, provided routine maintenance is performed according to manufacturer guidelines and detailed service records are preserved. Under the federal Magnuson-Moss Warranty Act, automobile manufacturers cannot invalidate a vehicle's factory warranty simply because maintenance was completed by a non-dealership facility or using high-quality aftermarket parts. To protect your warranty coverage when using independent service facilities, vehicle owners must keep complete documentation for every maintenance procedure. Essential record-keeping practices include: Detailed Invoices: Retaining receipts that state the date, vehicle mileage, vin number, specific service performed, and exact part numbers installed. Correct Part Specifications: Ensuring non-OEM oil filters, air filters, and synthetic fluids meet the exact Ford material specifications listed in your owner's manual. Maintenance Schedule Adherence: Completing oil changes, tire rotations, spark plug replacements, and fluid flushes within the recommended mileage and time intervals. While routine maintenance like oil changes and tire rotations can legally be performed at independent shops, factory warranty repairs, safety recall campaigns, and complex software reflash procedures must be completed by an authorized Ford dealership. If an independent shop installs an incorrect component or damages a system during repair, any secondary damage caused by that improper service will not be covered under the factory warranty. Using authorized dealership service eliminates documentation friction during future warranty claims because every service record, factory software update, and genuine Motorcraft part installation is automatically logged directly into Ford's centralized vehicle history database. Common Questions About Ford Technical Training and Vehicle Service What specific training and requirements define a Ford-Trained Technician? Ford's technical training program includes comprehensive web modules, rigorous exams, and practical labs to ensure technician proficiency. Training paths like STST and ASSET cover brand-specific electrical networks, EcoBoost powertrains, and high-voltage systems. Can independent shops perform Ford software and computer module updates? Independent shops can only perform module updates if they maintain active subscriptions to Ford's proprietary FDRS or IDS software and possess compatible vehicle communication hardware. Non-subscribed independent shops cannot reflash or calibrate Ford computer modules. What is required to achieve advanced Ford service training status? Earning Senior Master status requires a technician to maintain Master credentials across chassis, powertrain, and electrical specialty tracks for five consecutive years. Technicians must also complete annual update courses on new model year technologies to keep their Senior Master credential active. Can a mechanic be both ASE certified and Ford trained? Mechanics frequently hold both credentials. ASE certification validates general automotive repair knowledge across all vehicle makes, while Ford factory training provides brand-specific expertise on Ford engineering, diagnostic software, and repair procedures. Will servicing a Ford at an independent shop void the factory warranty? Routine service at an independent shop does not void the factory warranty under federal law, provided maintenance meets manufacturer standards and receipts are kept. However, official warranty repair work and recall campaigns must be performed at an authorized dealership. For additional guidance on maintaining your vehicle's performance, view our routine battery testing and replacement guides online. If you need expert diagnostic support, you can reach our team directly at (330) 462-7578 or get step-by-step driving routes for finding our East Liverpool dealership. Schedule Factory-Trained Service at Tri State Ford Maintaining the safety, performance, and long-term value of your Ford requires specialized equipment and up-to-date technical training. From complex computer module reprogramming to routine brake and suspension care, relying on certified service professionals ensures every repair is executed according to exact manufacturer engineering standards. Contact our team today to schedule your next maintenance appointment and keep your vehicle running smoothly for years to come. © 2026 Tri State Ford. All rights reserved. Ford Technician Certification Benefits in East Liverpool OH | Tri State Ford
f

What Should You Do If Your Check Engine Light Starts Flashing?

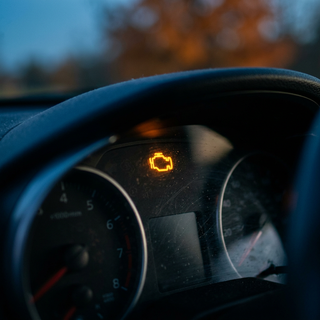
If your check engine light starts flashing, you must immediately ease off the gas pedal, avoid hard acceleration or heavy towing, pull over to a safe location, and turn off the engine. A blinking light indicates a severe, active engine misfire that dumps unburned fuel directly into the exhaust system, creating an urgent risk of catalytic converter overheating and catastrophic mechanical damage. Continuing to drive with a flashing light can destroy expensive emission components within minutes. Understanding the difference between a steady illumination and a flashing warning is essential for every vehicle owner. A solid check engine light signals a stored diagnostic code for a non-emergency fault, such as an evaporative emissions leak, a loose gas cap, or a malfunctioning oxygen sensor. While a steady light warrants prompt attention during your next routine maintenance visit, a blinking indicator demands emergency action. The vehicle engine control module triggers a flashing alert specifically when an active misfire reaches a severity threshold capable of causing immediate thermal destruction downstream in the exhaust system. When a flashing light occurs, safely signal and navigate your vehicle to the shoulder or a nearby parking area away from active traffic. Once parked, switch off the ignition to cut the fuel supply to the misfiring cylinder. Inspect the dashboard for additional warning indicators, such as elevated engine coolant temperature or low oil pressure readings. Do not attempt to continue driving to your destination, even if the vehicle feels like it is running smoothly at cruising speeds. Arranging for professional towing is the safest choice to protect your vehicle from thousands of dollars in secondary exhaust and engine damage. Our factory-trained Ford service team at 1503 Pennsylvania Ave can accurately scan your onboard diagnostic system, identify the precise root cause of the misfire, and execute trusted repairs using original equipment parts. If you experience a sudden warning on the road, reach out to our service advisors at (330) 462-7578 to coordinate towing and fast diagnostic scheduling. Table of Contents How Do Faulty Spark Plugs and Ignition Coils Trigger an Engine Misfire? Can Driving With a Flashing Check Engine Light Destroy Your Catalytic Converter? What Diagnostic Trouble Codes and Battery Resets Mean for a Flashing Engine Light What Immediate Steps Should You Take If Your Vehicle Shakes or Loses Power? What Is the Estimated Cost to Repair Misfires Versus Replacing a Damaged Catalytic Converter? Common Questions About Flashing Check Engine Lights and Engine Misfires Protect Your Engine with Professional Ford Service in East Liverpool How Do Faulty Spark Plugs and Ignition Coils Trigger an Engine Misfire? Faulty spark plugs or failing ignition coils trigger an engine misfire by failing to deliver the high-voltage electrical arc required to ignite the compressed air-fuel mixture inside the cylinder combustion chamber. Without proper spark ignition, the fuel mixture passes through the cylinder unburned during the exhaust stroke, registering as a combustion failure with the engine control module. This misfire alters engine crankshaft speed, prompting the computer to flash the check engine light. Internal combustion engines rely on precise synchronization between fuel delivery, air intake, compression, and electrical spark timing. Modern vehicles utilize a coil-on-plug ignition configuration where an individual ignition coil sits directly atop each spark plug. The engine control module signals the ignition coil to convert low battery voltage into high-voltage electrical pulses, often exceeding 30,000 volts, which jump across the spark plug electrode gap. Over time, several mechanical degradation factors disrupt this vital process: Spark Plug Electrode Wear: Millions of electrical firings cause the metal center and ground electrodes on the spark plug to wear down, widening the plug gap. A wider gap demands higher voltage from the coil to create a spark, eventually causing intermittent or total spark collapse under heavy engine loads. Carbon and Oil Fouling: Deposits from unburned fuel, carbon buildup, or leaking valve stem seals coat the spark plug tip, short-circuiting the electrical arc and preventing ignition. Ignition Coil Insulation Breakdown: Internal coil windings experience extreme thermal cycling under the hood. As the epoxy or silicone insulation breaks down, electrical current shorts internally, resulting in a weak or absent spark at the plug. Moisture and Oil Contamination: Leaking valve cover gaskets can flood spark plug wells with engine oil, degrading the rubber boots on the ignition coil and causing high-voltage spark arcing directly to the engine block instead of the spark plug. When combustion fails, the affected cylinder produces zero power stroke force, creating an immediate imbalance along the engine crankshaft. Sensor arrays monitoring crankshaft position detect this microscopic drop in rotational speed during the cylinder firing order. If the system detects repeated misfire cycles within a set number of engine revolutions, the computer logs a cylinder-specific fault code and immediately flashes the malfunction indicator lamp to alert the driver. For suburban commuters driving along State Route 170 in Calcutta, keeping up with recommended spark plug replacement intervals is one of the most practical steps to prevent sudden ignition coil stress and unexpected highway misfires. If your vehicle is approaching its factory maintenance mileage threshold, you can easily schedule a service appointment online to have our certified technicians inspect and refresh your ignition components before issues develop. Can Driving With a Flashing Check Engine Light Destroy Your Catalytic Converter? Driving with a flashing check engine light can permanently destroy your catalytic converter because raw, unburned fuel enters the hot exhaust stream and ignites directly inside the catalytic converter honeycomb structure. This secondary ignition raises internal converter operating temperatures far beyond safe limits, melting the internal ceramic core and destroying the precious metal catalyst coatings within minutes of driving. The catalytic converter is designed to clean harmful exhaust gases using internal precious metals, including platinum, palladium, and rhodium. Under normal operating conditions, treated exhaust entering the converter ranges between 800 degrees Fahrenheit and 1,200 degrees Fahrenheit. However, when an ignition coil or spark plug fails, every exhaust stroke pumps a full charge of unburned gasoline vapor and oxygen directly into the red-hot exhaust manifold. CYLINDER MISFIRE PROCESS 1. Spark plug or ignition coil fails to ignite air-fuel mixture. 2. Unburned gasoline vapor passes into the exhaust manifold. 3. Raw fuel enters the hot catalytic converter core. 4. Fuel ignites inside the core, driving temperatures past 1,600°F. 5. Ceramic honeycomb structure melts, deforms, and clogs exhaust. When raw fuel hits the hot ceramic honeycomb of the catalytic converter, it combusts uncontrolled inside the narrow flow channels. Internal operating temperatures quickly spike beyond 1,600 degrees Fahrenheit, reaching levels hot enough to melt the ceramic substrate. As the internal structure melts and collapses, it creates a physical restriction in the exhaust system. This restriction leads to severe engine backpressure, significant power loss, severe overheating, and in extreme cases, underbody vehicle fires. Our technicians frequently see drivers ask whether a brief misfire can damage the exhaust, and the reality is that unburned fuel entering a hot exhaust system ignites directly inside the catalytic converter, causing rapid thermal damage. Even if the misfire clears intermittently, cumulative thermal stress weakens the internal precious metal washes, leading to premature catalyst efficiency failure codes and expensive emissions component replacements later on. What Diagnostic Trouble Codes and Battery Resets Mean for a Flashing Engine Light Diagnostic trouble codes retrieved from the engine control module pinpoint which cylinder is misfiring, while disconnecting the vehicle battery merely clears stored code memory without repairing the underlying mechanical fault. Attempting to clear a flashing engine light by disconnecting the battery terminal only temporarily turns off the dashboard light while allowing destructive misfires to continue damaging your engine upon restart. When an engine misfire triggers a flashing alert, the vehicle computer stores specific Diagnostic Trouble Codes ( DTCs) in its memory. These five-digit alphanumeric codes provide a roadmap for certified technicians performing targeted diagnostic testing: P0300: Indicates a random or multiple cylinder misfire, suggesting system-wide issues such as low fuel pressure, intake vacuum leaks, or a faulty mass air flow sensor. P0301 through P0308: Indicates an active misfire on a specific cylinder number (e.g., P0301 for cylinder 1, P0302 for cylinder 2), directing technicians directly to that cylinder's spark plug, ignition coil, fuel injector, or compression sealing. P0420 / P0430: Indicates that catalyst system efficiency has dropped below threshold limits, often appearing after extended driving with an uncorrected engine misfire. When drivers bring a misfiring vehicle to our service bay, they often ask if disconnecting the battery clears the issue, but our service team explains that clearing the computer memory only hides the light until the next misfire occurs. Disconnecting the 12-volt battery disconnects power to the engine control module, resetting temporary fault memory and clearing system readiness monitors required for state safety and emissions testing. However, as soon as the engine restarts and completes a few crankshaft revolutions, the hardware failure remains. The computer detects the missing combustion event, re-logs the misfire code, and flashes the warning light once again. Relying on battery resets poses significant risks beyond uncorrected misfires. Clearing system memory erases valuable freeze-frame data—a snapshot of engine speed, coolant temperature, fuel trim, and load conditions captured at the exact moment the fault occurred. Our factory-trained technicians rely on this freeze-frame data alongside specialized diagnostic scan tools to isolate root causes accurately. If your vehicle experiences electrical reset attempts or low-voltage symptoms alongside engine alerts, our team can perform full computer diagnostics and comprehensive routine battery and electrical maintenance to ensure your electrical system supports proper engine management. What Immediate Steps Should You Take If Your Vehicle Shakes or Loses Power? Statistics show that over 70% of engine misfires cause noticeable shaking or power loss, signaling the need to stop driving immediately. Physical shaking and severe power reduction indicate that one or more engine cylinders have stopped contributing power, creating severe mechanical vibration and putting your drivetrain under intense stress. A severe engine misfire directly alters engine smoothness and vehicle drivability. Drivers typically experience several distinct physical warning signs alongside the blinking dashboard icon: Severe Engine Vibration: The vehicle chassis shudders violently, particularly at low engine speeds or while stopped at traffic lights, caused by uncompensated rotational mass on the crankshaft. Hesitation and Stumbling: Depressing the accelerator pedal results in a delayed response, jerking, or lack of power as the engine struggles to rev on fewer active cylinders. Exhaust Sputtering and Odors: An abnormal popping or sputtering sound comes from the tailpipe, accompanied by a strong smell of unburned raw gasoline or sulfur. Limp-Home Mode Activation: The engine computer may limit transmission gear selection and engine speed to protect internal components from further stress. Navigating the steep river bluffs in East Liverpool requiring steady engine power can make a sudden loss of acceleration especially hazardous during busy traffic hours. Follow these critical safety steps if power drops unexpectedly: Activate Hazard Lights: Turn on your emergency hazard flashers immediately to alert surrounding motorists that your vehicle is experiencing a mechanical emergency. Smoothly Transition Off the Road: Ease off the throttle and steer gently toward the right shoulder, an emergency turnout, or a safe parking lot. Avoid sudden braking or abrupt steering maneuvers. Turn Off the Engine: Once safely parked, move the gear selector to park, set the parking brake, and turn off the ignition to stop fuel flow and prevent further heat buildup in the exhaust. Call for Professional Towing: Do not attempt to restart or limp the vehicle home. Contact a professional towing service to transport your car directly to a certified repair facility. While addressing urgent engine repairs, vehicle owners can explore our current Ford service and parts information for helpful information on essential maintenance. For long-term vehicle planning or replacing an aging model, customers can also review options for custom vehicle configurations to build a dependable vehicle tailored to daily family needs. What Is the Estimated Cost to Repair Misfires Versus Replacing a Damaged Catalytic Converter? Addressing an engine misfire early by replacing spark plugs or ignition coils typically costs between $200 and $600, whereas ignoring the warning and replacing a heat-damaged catalytic converter can cost between $1,000 and $2,500 or more. Timely maintenance prevents a minor electrical replacement from escalating into a major exhaust overhaul. Repair Service Estimated Parts & Labor Cost Range Key Factors Influencing Cost Primary Risk of Delaying Service Spark Plug Replacement $150 – $350 Number of cylinders, plug material (Iridium/Platinum), intake plenum removal requirements Accelerated ignition coil wear, rough idling, reduced fuel economy Single Ignition Coil Replacement $180 – $350 OEM coil vs aftermarket, cylinder access ease, labor rates Continuous cylinder misfire, raw fuel entering exhaust system Full Set Ignition Coils & Plugs $400 – $750 Engine layout (Inline-4 vs transverse V6), labor time, original equipment parts quality Widespread misfires, total engine power loss, catalyst destruction Catalytic Converter Replacement $1,000 – $2,500+ Vehicle make/model, direct-fit OEM assembly, integrated manifold design, labor complexity Failed emissions inspection, engine exhaust blockage, potential vehicle fire The substantial cost difference stems directly from component materials and labor complexity. Replacing a spark plug or ignition coil involves straightforward electrical component replacement. On inline-four engines, ignition coils sit right on top of the engine valve cover, requiring minimal labor time. Even on complex V6 engines where accessing the rear cylinder bank requires removing the upper intake manifold, labor remains manageable compared to major exhaust work. In contrast, catalytic converters contain precious metals like platinum and rhodium, making the physical replacement part costly. Additionally, exhaust fasteners frequently rust and seize due to extreme heat cycles, requiring specialized shop equipment, cutting, and welding to remove and replace damaged units. Using genuine original equipment manufacturer parts ensures precise fitment, correct heat ranges, and factory-level durability. Low-quality aftermarket spark plugs or off-brand coils often fail prematurely under heavy thermal stress, leading to repeated misfire events. Vehicle owners seeking original components for home maintenance or professional repair can conveniently order genuine Ford parts directly through our dedicated dealership parts department. Common Questions About Flashing Check Engine Lights and Engine Misfires Q: Can I drive my vehicle a short distance if the check engine light is flashing? Driving with a flashing check engine light is not safe, even for short distances. A flashing light indicates an active engine misfire that pumps unburned fuel directly into your exhaust system, risking catalytic converter failure within minutes. Safely pull over, turn off the engine, and arrange for towing to a qualified service facility to prevent severe secondary damage. Q: Will a flashing check engine light turn off on its own if the misfire stops? If an intermittent misfire pauses, the check engine light may stop flashing and remain steady solid. However, the underlying mechanical fault remains stored as a Diagnostic Trouble Code in the computer memory. The misfire will likely return under similar driving loads, so you should have the system diagnosed promptly by a certified technician. Q: Why does my car shake violently when the check engine light flashes? The shaking occurs because one or more cylinders are not firing, creating an immediate power imbalance along the engine crankshaft. Without equal power contributions from every cylinder during the combustion order, the engine produces heavy mechanical vibrations that transfer directly through the motor mounts into the passenger cabin. Q: How do technicians determine which cylinder is causing the misfire? Technicians connect a professional OBD-II diagnostic scan tool to retrieve stored diagnostic codes such as P0301 or P0304, which identify the exact cylinder experiencing ignition failure. They then perform live-data monitoring, ignition scope testing, and compression checks to isolate whether the root cause stems from the spark plug, ignition coil, fuel injector, or internal valve sealing. Q: Can a loose gas cap cause the check engine light to flash? A loose gas cap causes a steady, solid check engine light by triggering an evaporative emissions leak code, but it will never cause the light to flash. A flashing check engine light is reserved exclusively for severe engine misfires that threaten immediate, physical damage to downstream catalytic converter components. Protect Your Engine with Professional Ford Service in East Liverpool A flashing check engine light is your vehicle’s most urgent warning signal, indicating a severe misfire that requires immediate expert care. Ignoring a blinking alert risks turning a simple spark plug or ignition coil replacement into a costly exhaust replacement. Stopping safely and seeking professional diagnostic service is the best way to safeguard your vehicle's engine and longevity. At Tri State Ford, our team of factory-certified technicians possesses the specialized diagnostic equipment, technical expertise, and genuine OEM Ford parts required to restore your vehicle to peak operating condition. We provide clear explanations, straightforward pricing, and reliable service care to keep your vehicle running safely on the road. Do not risk driving with an active engine misfire. If your check engine light is flashing or displaying warning alerts, stop driving and contact our experienced service department at (330) 462-7578 or visit our East Liverpool service facility for trusted diagnostic analysis and expert vehicle repair. © 2026 Tri State Ford. All rights reserved. Check Engine Light Flashing? East Liverpool OH Experts | Tri State Ford

d

What Should You Do When Your Check Engine Light Comes On?

When your check engine light turns on, check whether the dashboard indicator is solid or flashing. A solid warning light requires scheduling a diagnostic scan within a few days, while a flashing light signals an active engine misfire that requires pulling over immediately to prevent catastrophic catalytic converter damage. For a solid light, check that your gas cap is tight, observe whether the engine shakes or loses power, and contact a service center to retrieve the stored trouble codes. Navigating the steep riverfront bluffs in East Liverpool places added load on an engine, making early attention to dashboard warning lights essential for preventing premature mechanical wear. If the illumination is steady and the vehicle continues to accelerate smoothly without unusual noises, smells, or temperature spikes, you can safely complete your current drive before arranging a computer scan. If you notice hesitation, unusual vibrations, or power loss alongside a steady warning light, reduce your speed and avoid heavy acceleration. Contact (330) 462-7578 to speak with our service department, or stop by our East Liverpool service center so our technicians can inspect the stored diagnostics. Table of Contents What Are the Most Common Reasons for a Check Engine Light to Come On? What Does a Flashing Check Engine Light Mean and What Immediate Action Should You Take? What Is an OBD-II Code and How Does It Store Diagnostic Information? What Does a Professional Diagnostic Scan Cost and Does Insurance Cover Repairs? Frequently Asked Engine Diagnostic Questions Schedule Reliable Engine Diagnostics with the Service Team What Are the Most Common Reasons for a Check Engine Light to Come On? A check engine light turns on when the engine control unit detects an operational anomaly that exceeds factory emissions or combustion specifications. The most frequent triggers include a loose fuel cap, a failing oxygen sensor, a dirty mass airflow sensor, worn spark plugs or ignition coils, and a degraded catalytic converter. Loose or Damaged Fuel Cap: The evaporative emissions system tests fuel tank pressure to prevent gasoline vapors from escaping. A loose, cracked, or missing fuel cap alters system pressure and triggers a warning code. Tightening the cap often resolves the fault after several normal drive cycles. Failing Oxygen Sensor: The oxygen sensor measures unburned oxygen in the exhaust stream to help optimize the air-fuel mixture. A degraded sensor sends incorrect readings to the engine computer, reducing fuel efficiency and potentially clogging exhaust components over time. Dirty Mass Airflow Sensor: The mass airflow sensor measures the volume of air entering the engine intake. Accumulations of dirt or oil disrupt these readings, causing air-fuel imbalances that lead to rough idling and hesitation. Ignition System Wear: Worn spark plugs or failing ignition coils prevent complete combustion inside the cylinders, causing subtle misfires that trigger diagnostic trouble codes. Catalytic Converter Efficiency Loss: The catalytic converter converts harmful exhaust gases into less toxic emissions. When upstream components like spark plugs or oxygen sensors fail and are left unserviced, unburned fuel can degrade the internal honeycomb structure of the converter. Short trips around State Route 170 in Calcutta involve frequent stop-and-go driving, which highlights subtle engine hesitation caused by sensor errors long before total component failure occurs. Addressing minor sensor warnings early preserves engine efficiency and protects vital powertrain components. What Does a Flashing Check Engine Light Mean and What Immediate Action Should You Take? A flashing check engine light indicates a severe, active engine misfire that allows unburned fuel to pour directly into the exhaust system, creating extreme heat that can destroy the catalytic converter within minutes. When the warning light blinks continuously, you must immediately reduce speed, pull over safely out of traffic, turn off the ignition, and arrange for towing assistance. During an active misfire, unburned gasoline leaves the engine cylinder and ignites inside the red-hot catalytic converter. This intense heat causes the internal ceramic honeycomb structure to melt or collapse, resulting in an expensive exhaust replacement that could have been avoided by stopping promptly. Driving even a few miles with a blinking warning light dramatically increases total repair costs. Ease off the accelerator pedal gently without making sudden vehicle maneuvers. Signal and pull into a safe parking lot or onto a wide road shoulder away from moving traffic. Turn off the engine immediately to stop the flow of unburned fuel into the exhaust. Inspect the instrument cluster for elevated temperature readings, low oil pressure warnings, or secondary indicators. Call for emergency towing rather than attempting to restart or drive the vehicle. If your vehicle experiences an emergency warning on the road, utilize Ford Roadside Assistance: (800) 241-3673 to transport your vehicle directly to an authorized service facility. Factory-backed roadside programs ensure certified transportation and direct coordination with expert service advisors. What Is an OBD-II Code and How Does It Store Diagnostic Information? An OBD-II code is a standardized five-character alphanumeric code stored by the engine control unit whenever an onboard sensor detects operating parameters outside factory limits. These diagnostic trouble codes specify the exact electronic circuit or mechanical system experiencing a fault, preserving freeze-frame operating data from the precise moment the failure occurred. The code structure follows a systematic format that guides technical diagnosis: First Character (Category): "P" represents Powertrain (engine and transmission), "B" indicates Body, "C" denotes Chassis, and "U" identifies Network/Communication faults. Second Character (Code Type): "0" indicates a generic code standardized across all vehicle manufacturers, while "1" designates a manufacturer-specific code tailored to proprietary engine systems like Ford EcoBoost technology. Third Character (Subsystem): Numbers 1 through 8 pinpoint specific vehicle systems, such as fuel metering, ignition systems, emissions controls, or transmission functions. Fourth and Fifth Characters (Fault Designation): These final numbers identify the precise component issue, such as P0300 for a random/multiple cylinder misfire or P0301 for a misfire isolated specifically to cylinder number one. When a trouble code sets, the computer records a snapshot of engine parameters called freeze-frame data. This snapshot captures vehicle speed, engine rpm, coolant temperature, fuel trim percentages, and manifold pressure at the moment of failure. Professional technicians analyze this stored data alongside live sensor readings to isolate root causes rather than replacing components at random. What Does a Professional Diagnostic Scan Cost and Does Insurance Cover Repairs? A professional diagnostic scan pricing can vary, so please contact our service department for current pricing, which covers computer diagnostics, electrical system pin tests, freeze-frame data analysis, and physical component inspections by certified technicians. Standard auto insurance policies do not cover mechanical repairs resulting from wear and tear, though factory powertrain warranties and extended service plans cover internal mechanical failures. While automotive parts stores often offer free code readings, a simple code scan only reveals the symptom rather than the underlying cause. For instance, code P0171 indicates a lean fuel mixture, but the underlying fault could be a vacuum leak, a failing fuel pump, a clogged fuel injector, or a dirty airflow sensor. Professional labor includes hands-on testing to verify the failed component before repairs begin. Diagnostic & Repair Category Typical Cost Range Coverage Availability Professional Computer Diagnostic Scan Contact for current pricing Service Plan / Warranty Spark Plug & Ignition Coil Service Contact for current pricing Extended Warranty / Powertrain Oxygen Sensor Replacement Contact for current pricing Emissions Warranty Mass Airflow Sensor Cleaning/Replacement Contact for current pricing Powertrain / Service Plan Catalytic Converter Replacement Contact for current pricing Federal Emissions Warranty ( 8 years or 80,000 miles) Major emissions control devices—specifically the catalytic converter and the engine control module—are covered by a federal emissions warranty for 8 years or 80,000 miles on light-duty vehicles. If your vehicle falls within these age and mileage limits, major emissions components may be replaced at no out-of-pocket cost. To address an active warning light before minor sensor issues turn into major repairs, schedule a diagnostic appointment with our certified service department. Our facility uses factory diagnostic equipment and stocks genuine OEM replacement parts to ensure every repair meets original manufacturing standards. You can also order OEM replacement parts directly through our dedicated parts department. Frequently Asked Engine Diagnostic Questions How does a loose gas cap trigger the check engine light? Q: How does a loose gas cap trigger the check engine light? A loose, cracked, or improperly seated gas cap prevents the evaporative emissions system from maintaining vacuum pressure in the fuel tank. The engine control computer detects this pressure loss during routine self-tests and interprets it as a fuel vapor leak, illuminating the warning light and storing a small-leak evaporative emissions code. Tightening the cap firmly until it clicks restores system pressure, though the light may require several normal drive cycles to clear automatically. Can a weak or dead battery cause a check engine light to turn on? Q: Can a weak or dead battery cause a check engine light to turn on? A weak battery, failing alternator, or severe voltage drop during engine starting can cause sensitive electronic modules to drop below operational thresholds. This temporary low-voltage condition leads sensors to register false readings or drop communication with the main control module, setting transient electrical fault codes. Having a service technician test your electrical system helps differentiate between genuine component failures and voltage-related diagnostic codes. How many drive cycles does it take for a check engine light to turn off after a repair? Q: How many drive cycles does it take for a check engine light to turn off after a repair? Most engine control computers require three to five consecutive drive cycles without detecting a fault to turn off the check engine light automatically. A complete drive cycle requires starting the engine when cold, accelerating to normal highway speeds, maintaining steady cruising for several minutes, and slowing to a complete stop. Alternatively, technicians clear stored codes directly using professional diagnostic tools once repairs are completed. Will an active check engine light cause my vehicle to fail state inspections? Q: Will an active check engine light cause my vehicle to fail state inspections? An illuminated check engine light results in an automatic failure during official state safety and emissions testing. Even if you clear the diagnostic codes manually using a handheld code reader immediately before an inspection, the vehicle's internal emissions monitors will register as incomplete or not ready, requiring you to drive the vehicle through required test cycles before inspection approval can be granted. Is it safe to drive short distances with a solid check engine light? Q: Is it safe to drive short distances with a solid check engine light? Driving short distances with a solid warning light is generally acceptable provided the engine displays no severe shaking, power loss, strange odors, or abnormal gauge readings. However, continuing to drive for weeks without retrieving the diagnostic code can lower fuel economy, increase tailpipe emissions, and allow minor sensor issues to cause secondary damage to components like the catalytic converter. Schedule Reliable Engine Diagnostics with the Service Team Prompt diagnostic attention protects your vehicle's long-term engine performance, preserves daily fuel economy, and prevents minor component faults from developing into costly mechanical repairs. Our service center provides accurate trouble code scanning, detailed system testing, and transparent repair recommendations backed by factory-certified technicians. Whether you need a routine system scan, sensor replacement, or comprehensive battery maintenance and testing, our team delivers the trusted care your vehicle needs to stay safe on the road. Visit Tri State Ford at 1503 Pennsylvania Ave, East Liverpool, OH 43920 or contact our service advisors directly at (330) 462-7578 to schedule your engine diagnostic evaluation today. © 2026 Tri State Ford. All rights reserved. Check Engine Light Guide in East Liverpool OH | Tri State Ford

5

Do OBD-II Trouble Codes Tell You Which Part to Replace?

An OBD-II diagnostic trouble code does not specify which part needs to be replaced. Instead, a code identifies a specific system, circuit, or operational threshold where the vehicle computer detected readings outside normal parameters. Determining the exact failing component requires hands-on physical inspection, electrical testing, and live sensor monitoring to distinguish between a broken part, a failed sensor, a wiring defect, or a mechanical engine issue. Modern vehicles contain dozens of electronic sensors constantly transmitting operational data to the powertrain control module. When a sensor reports a value that falls outside pre-programmed parameters for a set duration, the module stores a five-character code and illuminates the check engine light. A code such as P0171 indicates that the system is running lean on bank one, meaning the engine computer is detecting excess oxygen in the exhaust. That lean condition could stem from a torn intake boot, a stuck-open purge valve, low fuel pressure, or a leaking vacuum hose. Replacing the oxygen sensor simply because it reported the lean mixture wastes money without resolving the underlying air or fuel imbalance. Relying solely on a code reader leads drivers to replace perfectly functioning components. Diagnostic trouble codes serve as a starting map for professional technicians rather than a direct prescription. Proper vehicle care involves using specialized diagnostic equipment to trace electrical continuity, check vacuum integrity, and monitor live sensor signals under real load conditions. To get a precise diagnosis for your vehicle, visit our East Liverpool service center or contact our team directly at (330) 462-7578 to speak with a factory-certified technician. Table of Contents What Information Is Contained Within a Standard 5-Digit DTC? Why Can Multiple Trouble Codes or Wiring Issues Mask the Real Problem? Can a Clogged Catalytic Converter Cause Codes That Look Like Engine Misfires? How Much Does Professional Diagnostic Testing Cost and How Does It Save Money? Does Replacing the Part Named in a Trouble Code Fix Your Vehicle? Frequently Asked Questions About Vehicle Diagnostics Schedule Comprehensive Vehicle Diagnostics at Tri State Ford What Information Is Contained Within a Standard 5-Digit DTC? A standard five-character Diagnostic Trouble Code ( DTC) contains structured data that reveals the affected vehicle system, whether the code is standardized or manufacturer-specific, and the precise subsystem experiencing an anomaly. Each position in the alphanumeric code narrows down the electrical or mechanical monitoring parameter without pinpointing the exact physical component failure. Understanding how a five-digit code is constructed helps clarify what the vehicle computer is actually reporting. The Society of Automotive Engineers established a uniform structure for all OBD-II compliant vehicles: First Character (System Category): A letter designating the primary system. P represents the Powertrain (engine, transmission, and fuel systems), B denotes the Body (airbags, climate control, lighting), C covers the Chassis (anti-lock brakes, steering, suspension), and U signifies Network and Communication systems. Second Character (Code Type): A number indicating standardized versus enhanced diagnostic definitions. A 0 or 2 represents a generic code standardized across all vehicle manufacturers, whereas a 1 or 3 indicates a manufacturer-specific code tailored to proprietary software logic. Third Character (Subsystem Category): A number identifying the specific vehicle subsystem. Within powertrain codes, 1 and 2 specify fuel or air metering, 3 indicates the ignition system or misfire detection, 4 covers auxiliary emission controls, 5 relates to vehicle speed and idle control, 6 points to computer output circuits, and 7 or 8 references the transmission system. Fourth and Fifth Characters (Fault Identifier): A two-digit number pinpointing the specific failure condition, such as a particular cylinder misfire or a circuit high/low voltage state. For example, code P0301 translates to a powertrain system fault ( P), generic standard ( 0), ignition or misfire subsystem ( 3), occurring specifically on cylinder one ( 01). While this structure directs attention to cylinder one, it does not reveal whether the misfire stems from a worn spark plug, a failed ignition coil, a clogged fuel injector, or lost cylinder compression. Drivers noticing an active warning light can schedule a professional diagnostic appointment to have certified technicians analyze stored codes alongside live system data. Why Can Multiple Trouble Codes or Wiring Issues Mask the Real Problem? Multiple trouble codes and wiring defects mask the underlying problem because modern vehicle control units rely on shared electrical circuits, common sensor grounds, and cascading feedback loops. A single physical failure—such as a corroded ground wire, a blown fuse, or a damaged harness—can alter reference voltages across several sensors simultaneously, triggering a cascade of false diagnostic codes for completely functional parts. When an engine management system detects an initial failure, secondary systems often react to compensate for the malfunction. An unmetered vacuum leak creates an improper air-fuel ratio, prompting the powertrain control module to log a P0171 lean condition. As the engine computer attempts to correct the fuel mixture by adjusting fuel delivery, combustion becomes unstable, subsequently setting a P0300 random misfire code. Replacing ignition components based on the misfire code leaves the vacuum leak active, causing the replacement parts to foul quickly while the original issue persists. Vehicle computers record diagnostic data in distinct stages that aid in sorting primary faults from secondary reactions: Pending Codes: Stored when the control module detects an operational anomaly during a single driving cycle. Pending codes do not immediately illuminate the check engine light, as the computer waits to verify whether the fault persists across subsequent drive cycles. Confirmed Codes: Established when an anomaly recurs across mandatory evaluation cycles, illuminating the malfunction indicator lamp on the instrument cluster. Freeze-Frame Data: A stored snapshot of real-time engine parameters captured at the exact moment a code sets. This includes engine speed, coolant temperature, fuel trim percentage, vehicle speed, and intake manifold pressure. Reviewing freeze-frame data allows technicians to determine whether multiple codes occurred simultaneously or developed sequentially over time. Physical wiring damage, such as a chafed harness touching an engine block, can pull sensor reference lines to ground and set five or six unrelated sensor codes at once. Identifying these electrical anomalies requires digital multimeters and circuit testing before attempting to order OEM replacement parts for components that may be entirely healthy. Can a Clogged Catalytic Converter Cause Codes That Look Like Engine Misfires? A clogged catalytic converter can directly cause fault codes that resemble primary engine misfires by creating excessive exhaust backpressure that prevents cylinders from expelling spent gases. This trapped exhaust gas dilutes the incoming air-fuel charge during the intake stroke, resulting in incomplete combustion and triggering random cylinder misfire codes like P0300. Inside a catalytic converter, a dense ceramic honeycomb substrate processes engine exhaust to reduce harmful emissions. Over time, internal melting from unburned fuel or heavy carbon accumulation can block the narrow passages within the substrate. When exhaust flow is restricted, spent gases back up into the exhaust manifold and cylinder head. During the exhaust stroke, the piston encounters high physical resistance pushing against trapped exhaust. When the intake valve opens for the next cycle, residual exhaust gas occupies space intended for fresh air and fuel, causing misfires across multiple cylinders. Diagnosing this condition requires distinguishing between a primary misfire that damages the converter and a restricted converter that causes misfires: Primary Misfire leading to Converter Damage: Raw fuel from a failing spark plug enters the hot catalytic converter, igniting inside the substrate and melting the ceramic core. In this scenario, misfire codes like P0301 appear first, followed later by a P0420 catalyst efficiency code. Converter Restriction leading to Misfires: Physical internal collapse or carbon clogging creates backpressure first, generating a P0420 or catalyst pressure condition before secondary P0300 random misfire codes appear due to poor cylinder scavenging. Technicians verify exhaust restrictions by removing the upstream oxygen sensor and connecting a dedicated pressure gauge to measure exhaust manifold backpressure. Normal backpressure remains below 1.5 PSI at engine idle and below 3.0 PSI at 2,500 RPM. When driving across the gently rolling hills around Calcutta, high engine loads can make an exhaust restriction noticeably worse, causing severe power loss when trying to accelerate up grade. How Much Does Professional Diagnostic Testing Cost and How Does It Save Money? A professional vehicle diagnostic test typically costs between $85 and $150 at independent repair facilities and $100 to $250 at factory-authorized dealerships, representing roughly one to one-and-a-half hours of certified technician labor. This investment saves vehicle owners hundreds or thousands of dollars by accurately identifying the root cause of a failure before replacing expensive components unnecessarily. A basic code scan offered by retail auto parts stores merely retrieves the five-digit alphanumeric string stored in computer memory. A full professional diagnostic testing session goes significantly deeper, utilizing specialized equipment to test components directly. Diagnostic testing includes connecting advanced scan tools to monitor live-data streams, checking sensor signal waveforms with digital oscilloscopes, performing smoke tests to locate vacuum or evaporative emissions leaks, and executing pinpoint pin-out voltage checks at harness connectors. Consider the financial comparison between guessing based on a code and investing in proper diagnosis: Scenario A (Parts Replacement Based on Code): A vehicle sets code P0135, defined as an oxygen sensor heater circuit malfunction. Assuming the sensor is bad, a car owner purchases and installs a new OEM oxygen sensor for $200. The check engine light returns immediately because the actual cause was a melted wiring harness or a $5 blown circuit fuse. Total spent: $205+ with the problem unresolved. Scenario B (Professional Pinpoint Diagnostics): A certified technician charges $120 for a diagnostic testing session. The technician checks voltage at the oxygen sensor connector, identifies zero voltage supply, traces the circuit back to a blown fuse caused by a pinched wire, repairs the wire, and replaces the fuse. Total spent: $125 with the vehicle fully repaired. Our service advisors frequently observe drivers arriving with a stored P0300 code assuming they need four new ignition coils, only for our diagnostic pinpoint testing to reveal a simple vacuum leak at an intake manifold gasket. Spending money on systematic diagnosis eliminates trial-and-error parts replacement, protecting your repair budget while ensuring long-term vehicle reliability. Does Replacing the Part Named in a Trouble Code Fix Your Vehicle? Replacing the part named in a trouble code description fails to fix the vehicle problem in a substantial number of cases because diagnostic codes identify system conditions rather than broken parts. A code definition describes the symptom detected by an electronic control unit, leaving the underlying cause—whether electrical, mechanical, or sensor-related—unresolved until thorough diagnostic testing is performed. A common example involves code P0420, defined as "Catalyst System Efficiency Below Threshold." The code name mentions the catalytic converter, leading many drivers to assume the converter must be replaced immediately. In practice, a P0420 code sets when the downstream oxygen sensor detects oxygen levels fluctuating too rapidly behind the catalyst. That condition can be caused by an upstream exhaust manifold leak drawing in outside air, a contaminated oxygen sensor, a sticking fuel injector, or an engine misfire. Replacing a $1,200 catalytic converter while ignoring an air leak or an rich-running fuel condition will destroy the new converter in short order. A complete repair process follows a structured path beyond part installation: Code Extraction and Freeze-Frame Analysis: Retrieving stored, pending, and historical codes while recording operational metrics at the time of failure. Pinpoint Component and Circuit Testing: Using specialized tools to verify ground integrity, power supply, signal output, and physical mechanical function. Targeted Repair or Component Replacement: Fixing the verified root cause, whether it is a sensor, wiring repair, hose replacement, or internal engine component. Verification and Drive Cycle Reset: Clearing stored codes and performing a controlled test drive under conditions matching the original freeze-frame data to verify that all onboard monitors complete and the fault does not recur. When navigating steep riverfront bluffs near East Liverpool, a vehicle that has only had a code cleared without root-cause repair will quickly trigger the check engine light again under heavy climb conditions. Before spending money on unneeded components, visit our service department location or give our service advisors a call to discuss your vehicle's symptoms. You can also explore current service offers and specials to save on essential routine maintenance and professional diagnostic testing. Frequently Asked Questions About Vehicle Diagnostics Q: What is the difference between a pending code and a confirmed code? A pending trouble code indicates that the engine control module detected a system malfunction during a single driving cycle, but the fault has not yet persisted long enough to confirm a persistent failure. A confirmed code occurs after the same fault is detected across multiple consecutive driving cycles, which then officially triggers the check engine light on your dashboard. Q: Why does a check engine light flash instead of staying solid? A flashing check engine light indicates a severe engine misfire that is actively allowing unburned fuel to pass into the exhaust system. This raw fuel ignites inside the catalytic converter, driving temperatures above safe operating thresholds and causing irreversible thermal damage to the converter substrate within minutes. Drivers should reduce speed immediately and pull over safely when the light flashes. Q: Can a weak or dying car battery cause random trouble codes to appear? Yes, low system voltage or a failing battery can cause vehicle control modules to record multiple spurious trouble codes. Electronic sensors rely on stable reference voltages from the engine control unit; when battery voltage drops during cranking or driving, sensors send erratic signals that the computer interprets as system faults across chassis, body, and powertrain circuits. Q: What is freeze-frame data and how do technicians use it? Freeze-frame data is an automated snapshot of vehicle sensor parameters recorded by the engine control module at the exact instant a diagnostic trouble code is triggered. It captures operational metrics including engine speed, vehicle speed, engine load, fuel trim values, and coolant temperature. Technicians review this data to recreate the exact driving conditions under which an intermittent fault occurred. Q: Will clearing a trouble code with an OBD-II scanner fix my car for an emissions inspection? Clearing a trouble code with a basic scanner resets the check engine light, but it also erases all internal OBD-II readiness monitors. State emissions inspection programs check whether these readiness monitors have completed their self-diagnostic cycles. The vehicle computer will register an "incomplete" status until the vehicle is driven through specific drive cycles, at which point any unaddressed fault will illuminate the check engine light again. Schedule Comprehensive Vehicle Diagnostics at Tri State Ford Accurate vehicle repair begins with thorough, professional diagnostics rather than guesswork. Diagnostic trouble codes provide valuable direction, but identifying the true cause of an illuminated check engine light requires expert inspection, advanced diagnostic tools, and pinpoint electrical testing. Addressing warning lights promptly prevents minor sensor or vacuum issues from escalating into costly mechanical repairs. Our factory-trained service technicians at Tri State Ford possess the specialized scanning equipment, factory technical databases, and hands-on experience necessary to diagnose complex driveability issues correctly the first time. Whether your vehicle displays a steady warning light or experiences subtle performance changes, our service team provides transparent evaluation and dependable repair solutions tailored to your vehicle's exact needs. Take the next step in protecting your vehicle's performance and long-term reliability. To book a diagnostic evaluation, call our team at (330) 462-7578, visit our service center at 1503 Pennsylvania Ave in East Liverpool, or use our convenient online service scheduling portal to reserve your appointment today. © 2026 Tri State Ford. All rights reserved. OBD-II Diagnostic Insights in East Liverpool OH | Tri State Ford
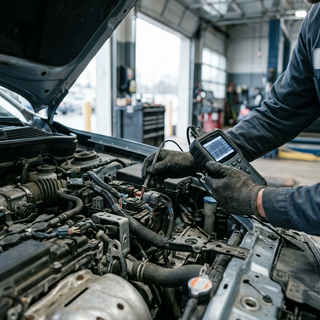
f

How Often Do Brake Pads Need to Be Replaced?

Brake pads typically last between 40,000 and 60,000 miles under normal driving conditions, though overall wear ranges from 20,000 to 70,000 miles depending on friction material, driving habits, and vehicle weight. Physical pad thickness determines safety far more accurately than odometer readings: replacement planning should begin when friction material wears down to 1/4 inch (approximately 6 mm), and new pads must be installed before the lining reaches 3 to 4 mm (or 3/32 of an inch). Friction lining on a brand-new brake pad measures about 12 mm thick. As you drive, the friction material gradually wears away against the spinning metal rotor to bring your vehicle to a controlled stop. Front brake pads handle roughly 60% to 70% of the stopping load due to forward weight transfer during deceleration, causing them to wear out faster than rear pads. Routine multi-point inspections provide the most dependable way to track pad wear over time. During standard maintenance services, our technicians measure remaining pad material across all four wheels using specialized thickness gauges. Catching thin pad lining early prevents severe metal-on-metal contact, preserving the smooth surface of your brake rotors and preventing costly damage to brake calipers. Vehicle size and regular cargo weight also play a significant role in wear schedules. For instance, a compact crossover like the Ford Escape with a 1.5L engine and all-wheel drive experiences different braking friction demands than a fully loaded three-row Ford Explorer equipped with a 2.3L engine and four-wheel drive. Drivers navigating steep riverfront bluffs in East Liverpool place extra thermal strain on their braking systems, making regular physical thickness measurements essential. If you suspect your vehicle requires a brake check, you can visit our East Liverpool service center on Pennsylvania Ave or give our team a quick call to consult with an advisor. Table of Contents What Factors Cause Brake Pads to Wear Out Faster? How Does Ceramic Brake Pad Lifespan Compare to Semi-Metallic? What Is the Average Cost to Replace Both Brake Pads and Rotors? Do OEM Brake Pads Last Longer Than Aftermarket Alternatives? Common Questions About Brake Maintenance and Lifespan Schedule Professional Brake Service at Tri State Ford What Factors Cause Brake Pads to Wear Out Faster? Driving environment, vehicle load, braking technique, and pad compound directly dictate how quickly brake pad lining degrades over time. Aggressive stop-and-go traffic, frequent high-speed braking, carrying heavy payloads, and navigating steep terrain all accelerate friction wear, causing pads to need replacement far earlier than the 60,000-mile mark. Urban commuting involves constant acceleration and deceleration cycles that create sustained heat buildup within the brake caliper assembly. This friction heat breaks down the pad's chemical bonding agents faster than steady open-highway driving. Commuters traveling along State Route 170 in Calcutta frequently encounter traffic light cycles and lower speed limits, which subjects brake components to repeated stop-and-go friction throughout daily driving. Braking habits significantly alter component longevity. Drivers who coast early when approaching red lights or downhill grades allow air to cool the rotors and pads, reducing thermal stress. Conversely, late, heavy foot pressure on the brake pedal generates intense surface friction that rapidly shaves away pad material. Riding the brake pedal continuously while descending long hills keeps the pad pressed against the rotor, generating extreme heat that can glaze pad surfaces and reduce stopping power. Vehicle mass and towed weight create additional stopping resistance. Heavy-duty haulers and full-size trucks like the Ford F-150 require substantially more hydraulic clamping pressure to bring heavy loads to a complete stop. When towing trailers or carrying full passenger loads, the extra kinetic energy converts directly into friction heat, accelerating pad degradation across both axles. Environmental elements like road salt, moisture, and debris also contribute to premature wear. Winter road treatments accelerate corrosion on caliper slide pins and backing plates. Sticky or binding caliper pins prevent the pad from fully retracting away from the rotor after you release the brake pedal, causing the pad to drag continuously and wear down unevenly. How Does Ceramic Brake Pad Lifespan Compare to Semi-Metallic? Ceramic brake pads generally last between 50,000 and 70,000 miles, whereas semi-metallic brake pads typically last between 30,000 and 50,000 miles. Ceramic compounds utilize dense ceramic fibers combined with copper or non-ferrous filler materials, creating a durable surface that withstands daily wear while producing minimal dust and noise. Semi-metallic brake pads contain between 30% and 65% metal content by weight, incorporating steel fibers, iron powder, and graphite alloys. This metallic construction offers superior heat dissipation and high initial bite, making semi-metallic pads well-suited for heavy-duty towing and high-stress applications. However, the harder metallic fibers act more aggressively against the rotor surface and wear down faster under normal passenger vehicle operation than refined ceramic formulations. Organic or non-asbestos organic (NAO) brake pads represent a third category, made from materials like glass, rubber, resin, and Kevlar. Organic pads deliver soft, quiet braking performance but wear out quickly, often lasting only 25,000 to 35,000 miles. They are primarily selected for lighter vehicles or budget applications where high heat resistance is not required. Brake Pad Material Type Typical Service Lifespan Primary Advantages Best Suited For Organic (NAO) 25,000 – 35,000 miles Quiet operation, low rotor wear Light passenger cars, gentle city driving Semi-Metallic 30,000 – 50,000 miles High heat tolerance, excellent stopping power Heavy towing, trucks, performance applications Ceramic 50,000 – 70,000 miles Extended longevity, low dust, ultra-quiet Daily commuting, family crossovers, sedans Choosing the correct friction material depends on your vehicle type and primary driving demands. While ceramic pads provide maximum mileage and cleaner wheels for everyday driving, semi-metallic pads remain the preferred choice for drivers who regularly push their vehicles through heavy work cycles. What Is the Average Cost to Replace Both Brake Pads and Rotors? Replacing both brake pads and rotors averages between $250 and $500 per axle, which translates to $500 to $1,000 for a comprehensive four-wheel service including parts and labor. Exact costs fluctuate based on vehicle classification, rotor design, caliper configuration, and whether specialized ceramic pads are selected. Labor charges typically account for half of the total invoice. Replacing rotors involves removing the wheel assembly, unbolting the brake caliper and mounting bracket, cleaning hub contact surfaces, compressing caliper pistons, and torquing all hardware to precise factory specifications. Larger vehicles with complex rear electronic parking brake mechanisms require electronic service mode activation prior to disassembly, slightly increasing total labor time. Brake rotors do not always require replacement during every pad service. Rotors generally last through two complete sets of brake pads—roughly 50,000 to 70,000 miles—provided the pads are changed before wear indicators scratch or groove the rotor face. During a pad replacement, technicians measure rotor thickness with a micrometer to verify that enough metal remains above the discard-limit spec cast into the rotor housing. If a rotor meets thickness safety standards and exhibits no deep scoring or thermal warping, it can sometimes be resurfaced on a precision brake lathe to restore a flat friction face. However, modern vehicle rotors are manufactured with thinner, lighter castings to optimize fuel efficiency. Consequently, replacing worn rotors with fresh units often provides superior thermal stability and longer service life compared to machining thin metal. Delaying pad replacement past the 3 mm safety mark rapidly escalates repair costs. When pad friction lining disappears completely, the steel backing plate grinds directly against the cast-iron rotor. This metal-on-metal friction destroys the rotor surface in short order and can overheat hydraulic caliper pistons, transforming a routine pad service into a complete system overhaul. Do OEM Brake Pads Last Longer Than Aftermarket Alternatives? Original equipment manufacturer (OEM) brake pads deliver reliable, standardized longevity because they are formulated to match the exact weight, rotor metallurgy, and hydraulic leverage of your specific vehicle. Premium aftermarket ceramic pads can match OEM pad life under ideal conditions, but entry-level aftermarket options often wear unevenly or degrade faster under thermal stress. Factory Ford Motorcraft pads undergo rigorous testing to ensure balanced friction performance across wide temperature ranges. OEM engineers select specific pad friction formulations that balance pad life, rotor preservation, noise suppression, and pedal feel. This precise engineering minimizes premature dusting, squealing, and pad glazing. Generic aftermarket pads frequently use a single friction compound across dozens of different vehicle models to reduce manufacturing costs. A compound designed broadly for multiple vehicle platforms may prove too soft for heavy SUVs or too hard for lighter passenger cars, leading to accelerated wear or increased rotor surface damage. When maintaining your braking system, ordering genuine Motorcraft replacement parts guarantees factory fitment and predictable wear life without guessing about compound compatibility. Matching OEM pads with factory-spec rotors ensures consistent stopping distance and protects your braking hardware over tens of thousands of miles. Common Questions About Brake Maintenance and Lifespan Our service team receives many questions about brake squeals, warning lights, pedal feel, and proper inspection habits. Here are clear answers to common questions regarding brake care. Q: What does a high-pitched squealing sound from brakes indicate? A high-pitched squeal while applying the brakes usually indicates that your brake pads have worn down to approximately 3 mm of remaining friction material. Most quality pads feature built-in metal wear indicators—small spring-steel tabs that contact the spinning rotor to produce a deliberate, high-frequency sound. This noise serves as an acoustic warning that it is time to schedule a pad replacement before metal backing plates contact and ruin the rotor surface. Q: What is the minimum safe thickness for brake pads? The absolute minimum safe brake pad thickness is 3/32 of an inch (roughly 3 mm). Operating a vehicle with pad material thinner than 3 mm significantly increases stopping distances and risks immediate metal-on-metal rotor damage. Service centers recommend planning a pad replacement as soon as measurements show 1/4 inch (about 6 mm) of material remaining, ensuring you schedule maintenance well before hitting critical wear limits. Q: How often should brake rotors be replaced? Brake rotors typically last between 50,000 and 70,000 miles, generally outlasting two sets of brake pads under standard driving conditions. Technicians measure rotor thickness with a precision micrometer during every brake inspection. If the rotor face is grooved, heat-cracked, warped, or worn below the manufacturer's minimum thickness threshold, new rotors must be installed alongside fresh pads to ensure safe braking performance. Q: Why do front brake pads wear out faster than rear brake pads? Front brake pads wear faster because physics shifts vehicle weight forward onto the front axle whenever you press the brake pedal. This dynamic weight transfer forces the front braking assembly to absorb 60% to 70% of the total stopping force. Because rear brakes manage less stopping load, rear pads often last significantly longer than front sets. Q: What causes a brake pedal to feel soft or squishy? A soft or squishy brake pedal points to air trapped within the hydraulic brake lines, degraded brake fluid, or a leaking brake component. As brake fluid ages, it absorbs atmospheric moisture, lowering its boiling point and creating compressible steam pockets under heavy braking. A sinking pedal requires immediate professional inspection to flush the hydraulic fluid or repair master cylinder seals. If your vehicle exhibits squealing, pedal vibration, or thin pad measurements, you can easily schedule a multi-point inspection online with our certified service team. Schedule Professional Brake Service at Tri State Ford Maintaining healthy brake pads and rotors keeps your vehicle stopping safely on every daily commute and family journey. Whether your vehicle requires a routine thickness measurement, fresh fluid, or a complete pad and rotor replacement, our certified technicians provide expert service using factory-approved parts. Our service department provides transparent digital vehicle inspections, thorough hardware cleaning, and precision installation tailored to your specific Ford model. We also handle comprehensive vehicle maintenance, including routine battery checks and multi-point inspections, to keep your vehicle performing reliably year-round. Visit our local Ford dealership at 1503 Pennsylvania Ave, East Liverpool, OH 43920, or call (330) 462-7578 to speak directly with an expert service advisor and book your appointment today. © 2026 Tri State Ford. All rights reserved. Vehicle specification data © JATO Dynamics Limited. Brake Pad Replacement in East Liverpool OH | Tri State Ford
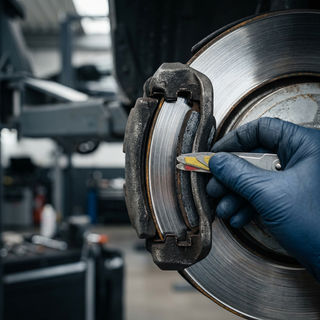
d

What Causes a Car to Shake When Braking?

A car shakes when braking primarily due to disc thickness variation across the brake rotors, uneven friction material deposits on the rotor face, sticking caliper slide pins, or worn front suspension bushings. When brake pads clamp down on an uneven metal surface or compromised mechanical hardware, the resulting hydraulic force fluctuations send rapid pulses through the brake pedal and steering wheel. Braking relies on smooth, consistent contact between the brake pad friction material and the spinning iron surface of the brake rotor. When a vehicle decelerates, friction transforms kinetic energy into heat. If that heat is distributed unevenly, or if mechanical components fail to release smoothly, the uniform surface of the rotor breaks down. Even a microscopic variation in rotor thickness—as thin as a fraction of a millimeter—causes the brake pad to catch and release rapidly as the wheel rotates. Mechanical issues elsewhere in the wheel assembly can also generate or magnify this shaking. Corroded caliper pistons, seized guide pins, loose wheel bearings, or degraded rubber suspension bushings prevent the braking system from maintaining flat, even contact against the rotor hub. When navigating the steep descents along the riverfront bluffs of East Liverpool, this uneven contact generates intense thermal cycles that rapidly worsen vibration. Identifying the underlying cause of brake vibration requires a comprehensive inspection of the entire friction assembly. Drivers noticing pedal pulsation or wheel shimmy can visit our service center location on Pennsylvania Ave or give our service team a quick call at (330) 462-7578 to have our factory-trained technicians inspect the full system. Table of Contents How Do Warped Rotors and Uneven Pad Deposits Cause Brake Pulsation? Does Your Steering Wheel or Brake Pedal Shake? Pinpointing the Issue How Sticking Calipers, Seized Pins, and Worn Suspension Cause Shaking Warped Rotors vs. Unbalanced Wheels: Key Symptom Differences What Is the Cost of Replacing Brake Pads and Rotors? Common Questions About Brake Shaking and Expert Service Care How Do Warped Rotors and Uneven Pad Deposits Cause Brake Pulsation? Brake pulsation occurs when brake rotors develop uneven thickness or localized friction material buildup, forcing the brake pads to jump across high and low spots as the wheel turns. This physical oscillation transfers directly through the hydraulic brake fluid and suspension components, reaching the driver's foot and hands during deceleration. Many drivers assume a warped rotor is physically bent like a wavy metal plate. In modern vehicles, true structural warping from mechanical bending is quite rare. Instead, brake pulsation is usually caused by disc thickness variation (DTV) or uneven friction material transfer. Disc Thickness Variation: When a rotor spins through a misaligned caliper or against worn pads, specific areas of the disc wear down faster than others. As the brake pad squeezes a rotor that varies in thickness around its circumference, the hydraulic pressure inside the brake lines surges and drops with every wheel revolution. Friction Material Deposit: During aggressive stopping or prolonged heavy braking, temperatures between the pad and rotor spike dramatically. If a driver brings the car to a complete stop and holds the brake pedal down firmly while the brakes are scorching hot, binding resin from the brake pad melts directly onto that single spot on the rotor face. Lateral Runout: Minor wobble in the rotor's rotation, often caused by rust scale on the wheel hub or improper lug nut torque, causes the disc to contact the inner and outer pads unevenly during normal driving, eventually shaving high spots into the disc face. Over time, those hot spots on the rotor undergo a metallurgical change, transforming into a dense carbon-iron compound that wears at a different rate than the surrounding cast iron. Once these friction patches form, standard braking friction becomes uneven. Replacing degraded components with factory-spec hardware restores a smooth stopping surface, and our parts department can assist you to order genuine OEM Ford rotors and pads engineered specifically for your vehicle's braking system. Does Your Steering Wheel or Brake Pedal Shake? Pinpointing the Issue Shaking felt in the steering wheel during braking signals uneven front brake rotors or worn front steering and suspension components, whereas pulsation felt primarily through the brake pedal points to rear rotor thickness variation or anti-lock brake system engagement. Because front brakes handle roughly 70 percent of a vehicle's stopping force, friction variations on the front axle transmit feedback directly through the steering knuckles, tie rods, and steering column. If the steering wheel oscillates side-to-side in your hands when slowing down from highway speeds, the front brake rotors or front control arm bushings are almost always the friction source. When rear brake rotors suffer from thickness variation, the diagnostic feedback travels a different path: Rear braking forces act directly on the chassis and hydraulic line pressure rather than the front steering geometry. Vibration from rear rotors travels through the brake fluid column back up to the master cylinder, creating a rhythmically pulsing brake pedal under your foot. Severe rear rotor unevenness can also create a low-frequency hum or a subtle body vibration felt in the driver's seat frame. It is also critical to distinguish mechanical brake rotor pulsation from normal anti-lock braking system (ABS) operation. An active ABS system rapidly pulses the brake pedal only during heavy emergency braking or on slippery surfaces to prevent wheel lockup, accompanied by an instrument cluster warning light and a rapid mechanical chatter. If pedal pulsation occurs during light, routine deceleration on dry pavement without an ABS light, the cause is mechanical rotor or caliper wear. How Sticking Calipers, Seized Pins, and Worn Suspension Cause Shaking Sticking brake calipers and frozen slide pins force brake pads to drag continuously against the rotor face, generating extreme localized heat that warps metal discs and triggers severe vibration. A disc brake caliper uses hydraulic pressure from a piston to push brake pads against the rotor. To maintain even pressure on both sides of the disc, floating calipers slide back and forth on steel guide pins protected by rubber dust boots. If moisture penetrates those rubber boots, rust forms on the guide pins, freezing the caliper in place. Continuous Dragging: A seized guide pin prevents the outer pad from retracting when you release the brake pedal, leaving the pad rubbing constantly against the spinning rotor. Extreme Heat Buildup: Continuous friction raises rotor temperatures well beyond normal operational ranges, glazing the brake pad friction layer and creating severe thermal hot spots on the rotor surface. Vehicle Pulling: A stuck caliper exerts uneven drag on one side of the vehicle, often causing the car to pull toward the stuck side during normal driving and vibrate violently when the brakes are applied. Worn suspension hardware acts as an amplifier for these brake system defects. Components like tie rod ends, lower ball joints, and rubber control arm bushings are designed to absorb road shock and keep the front tires firmly aligned. When these steering linkages develop mechanical play, they can no longer damp the feedback from minor brake rotor variations. As a result, a tiny rotor imperfection that would normally go unnoticed turns into a harsh shake throughout the entire front assembly. Warped Rotors vs. Unbalanced Wheels: Key Symptom Differences Unbalanced wheels cause a continuous floorboard or steering wheel vibration that persists at constant highway speeds regardless of brake pedal pressure, whereas warped brake rotors produce vibration strictly when depressing the brake pedal. Diagnostic Factor Warped Brake Rotors Unbalanced Wheels / Damaged Tires Primary Trigger Pressing the brake pedal Vehicle speed (typically 50–70 mph) Cruising Behavior Smooth and quiet Constant vibration or rhythmic hum Pedal Feedback Rhythmic pulsing underfoot Stationary and steady pedal feel Steering Feedback Shimmy occurs only while decelerating Continuous wheel vibration at speed Primary Cause Disc thickness variation or heat spots Uneven tire weight, lost wheel weight, bent rim Isolating these symptoms saves troubleshooting time. Suburban commutes along State Route 170 highlight this distinction clearly: if a car hums and vibrates continuously while cruising at 45 mph, wheel balance or tire damage is the primary suspect. However, if the ride remains completely smooth until you apply the brakes for a stoplight, the issue resides squarely within the braking friction system. What Is the Cost of Replacing Brake Pads and Rotors? Professional brake pad and rotor replacement averages $250 to $500 per axle depending on vehicle size and friction material specifications, while DIY replacement parts generally cost $80 to $200 per axle. While replacing brake components at home saves initial labor expenses, professional service eliminates common installation mistakes that cause rapid recurrence of brake shaking. Home repairs without specialized precision tools carry hidden technical risks: Hub Cleaning: Failing to remove microscopic rust scale from the wheel hub surface with a wire wheel before installing new rotors creates lateral runout right out of the box. Fastener Torque: Uneven lug nut or caliper mounting bolt torque warps brand-new rotors within a few hundred miles of driving. Slide Pin Service: Reusing dry or corroded caliper slide pins causes immediate pad binding and localized heat damage on new rotors. Pad Bed-In Procedure: Skipping the critical thermal bed-in process prevents friction material from transferring evenly across the new disc surface. Investing in factory-certified service ensures that hub surfaces are measured for runout, slide pins are cleaned and lubricated with high-temperature silicone grease, hardware clips are replaced, and wheel fasteners are torqued precisely to factory specifications. Common Questions About Brake Shaking and Expert Service Care Q: Can bad tires cause a car to shake when braking? Worn, unevenly treaded, or separated tires can amplify vibration during braking because deceleration transfers vehicle weight onto the front tire contact patches. If a tire has flat spots, broken internal steel belts, or severe cupping, the increased downward load during stopping forces the tread imperfections against the pavement, creating a distinct shudder through the steering column and chassis. Q: Is it safe to drive with a shaking brake pedal? Driving with a shaking brake pedal is unsafe because vibration reduces the contact surface between the brake pad and rotor, increasing stopping distances and stressing front suspension linkages. Severe brake pulsation indicates irregular friction or overheating, which can lead to brake fluid boiling, reduced hydraulic pressure, or catastrophic friction material failure during an emergency stop. Q: Can warped brake rotors be resurfaced instead of replaced? Warped brake rotors can often be resurfaced on a brake lathe if the metal disc retains sufficient thickness above the manufacturer's discard limit. Machining removes high spots and restores a flat surface. However, if the rotor has deep thermal heat spots, heavy corrosion grooves, or thin metal specifications, complete replacement with new OEM rotors is necessary for long-term safety. Q: How long do brake pads and rotors typically last? Brake pads generally last between 30,000 and 70,000 miles, while brake rotors typically last between 50,000 and 70,000 miles depending on driving habits, vehicle weight, and road conditions. Driving in hilly terrain, hauling heavy loads, or aggressive stop-and-go commuting accelerates heat buildup and friction wear, requiring more frequent brake inspections. Q: Why does my brake pedal vibrate only at high highway speeds? Brake pedal vibration occurring exclusively at highway speeds is caused by minor disc thickness variation or subtle lateral runout that is too small to feel at lower city speeds. Because the wheel rotates significantly faster at 60 mph, the brake pad impacts rotor surface high spots much more frequently per second, turning minor friction variations into noticeable pedal pulses. Smooth, dependable stopping power is essential for everyday driving confidence and family safety. Our technicians see vehicles every week with minor brake vibrations that are easily corrected before they lead to premature suspension wear or rotor damage. To restore smooth braking performance, stop by our East Liverpool service center, give our service department a call, or easily schedule a service appointment online today. © 2026 Tri State Ford. All rights reserved. Brake Vibration Causes in East Liverpool OH | Tri State Ford
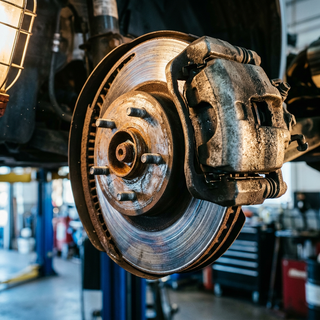
t

How Do You Tell If Your Car Battery Is Failing?

A failing car battery displays observable warning signs, including sluggish engine cranking, dimming headlights during engine idle, audible clicking when turning the ignition key, visible terminal corrosion, and a static charge dropping below 12.4 volts. When starting the engine feels hesitant or electrical accessories flicker during startup, the battery is losing its capacity to sustain adequate electrical load and requires a professional conductance test. https://www.youtube.com/watch?v=4M8i9Q19yW0 Under normal operating conditions, a standard vehicle battery functions dependably for three to five years. However, chemical degradation inside the battery cells occurs continuously due to seasonal temperature swings and electrical demand. Internal lead plates gradually sulphate, reducing the active surface area needed to generate starting current. As this chemical wear progresses, the starter motor receives less electrical amperage, forcing it to work harder and turn the engine over more slowly. Recognizing these subtle cues early prevents complete starting failure during morning commutes or winter travel. Our technicians routinely observe that vehicle owners who schedule a battery check at the first sign of a slow crank avoid emergency towing situations later in the season. Checking terminal connections for tightness and testing the battery charge during routine maintenance keeps your electrical system operating smoothly. For trusted battery testing or professional component evaluations, drivers can visit our service center location on Pennsylvania Ave or give our service department a direct call at (330) 462-7578 to speak with a technician. Table of Contents 7 Signs Your Car Battery Might Not Survive Cold Winter Weather How Do Voltage Readings and CCA Ratings Reveal Battery Health? Is the Battery or the Alternator Causing Your Electrical Issues? What Is the Price Difference and Advantage of AGM vs Standard Lead-Acid Batteries? Common Questions About Battery Testing and Charger Costs How to Schedule Winter Battery Service 7 Signs Your Car Battery Might Not Survive Cold Winter Weather A car battery likely will not survive severe winter conditions if it exhibits slow cranking, dim exterior lights, terminal corrosion, a swollen case, an operating age over three years, electrical glitches, or repeated jump-starts. Freezing temperatures reduce available chemical power by up to 50 percent at 0°F while simultaneously requiring roughly 30 percent more electrical energy to turn over cold, thickened engine oil. Sluggish Engine Crank: When turning the key or pressing the start button, the engine turns over slowly or hesitates before firing up. Dimming Headlights and Interior Lighting: Headlights appear noticeably dim when idling at a stoplight but brighten when pressing the accelerator pedal. White Powder or Corrosion on Terminals: Crusty white, blue, or greenish powder builds up around the battery posts, restricting current flow between the terminals and battery cables. Battery Age Exceeding Three Years: Conventional flooded batteries past their third year of service lose significant internal capacity and struggle under winter thermal stress. Swollen or Bulging Battery Case: Severe heat exposure from past summer driving causes the outer plastic case to swell, indicating internal structural damage. Sporadic Electrical Glitches: Digital displays reset unexpectedly, power windows operate slowly, or instrument cluster warning symbols illuminate during start-up. Repeated Jump-Starts Required: Needing more than one jump-start within a week indicates the battery can no longer hold a charge while parked. Drivers navigating the suburban routes and rolling terrain along State Route 170 in Calcutta frequently subject vehicle charging systems to short, intermittent trips. These brief drives often do not allow the alternator sufficient time to fully replenish the charge used during engine ignition, especially when operating heavy winter loads like heated seats, defrosters, and cabin blowers. Replacing an aging unit proactively ensures uninterrupted starting reliability throughout sub-freezing weather. Vehicle owners can easily arrange routine battery testing and maintenance or order a genuine Motorcraft battery online to maintain factory-grade starting power. How Do Voltage Readings and CCA Ratings Reveal Battery Health? A fully charged, healthy 12-volt battery registers between 12.6 and 12.8 volts when tested at rest, whereas a reading of 12.4 volts represents a partial 75 percent charge state and anything below 12.2 volts indicates a discharged battery cell. Cold Cranking Amps ( CCA) measure the exact discharge current a battery delivers for 30 seconds at 0°F without dropping below 7.2 volts, serving as the essential industry benchmark for winter starting performance. Battery Metric Healthy Target Reading Weak / Warning Reading Critical Failure Threshold Static Resting Voltage 12.6V to 12.8V 12.2V to 12.4V Below 12.0V Starting Voltage Drop Stays above 10.0V Drops to 9.0V–9.5V Drops below 8.5V CCA Output Percentage 90% to 100% of rated CCA 60% to 80% of rated CCA Below 50% of rated CCA Understanding the technical distinction between Cold Cranking Amps ( CCA) and standard Cranking Amps ( CA) is vital when selecting a replacement component. While CCA is tested at 0°F to evaluate extreme cold capability, Cranking Amps ( CA) are measured at 32°F. A battery displaying a high CA rating may seem impressive on paper, but it might lack the necessary CCA rating required to crank an engine during zero-degree winter mornings. In the river valley climate surrounding East Liverpool, sub-zero winter blasts rapidly expose hidden battery weaknesses. Professional technicians use specialized conductance testers to evaluate both static voltage and internal resistance. This diagnostic process determines whether a battery can deliver its advertised CCA under heavy electrical load or if internal plate degradation warrants immediate replacement before winter begins. Is the Battery or the Alternator Causing Your Electrical Issues? Determining whether electrical issues stem from a bad battery or a failing alternator is achieved through a jump-start test: if the engine starts with jumper cables and continues running smoothly after removing them, the alternator is generating adequate voltage and the battery is failing; if the engine stalls shortly after cable removal, the alternator is failing to power the ignition system. A healthy alternator delivers between 13.8 and 14.7 volts while the engine runs, supplying operational electricity to cabin components while simultaneously recharging the battery. When an alternator develops failing internal diodes or worn brushes, it can create a partial charging deficiency or produce an AC voltage ripple that causes dash lights to flicker, headlights to dim during driving, and the battery warning light to illuminate on the instrument panel. Conversely, a failing battery fails to accept or retain the electrical charge sent by a functional alternator. Continuous short-distance driving, loose terminal clamps, or a parasitic electrical draw—such as an electronic module remaining active after key-off—can drain a healthy battery overnight, mimicking alternator failure. Advanced Ford models equipped with a 3.5L EcoBoost V6 or a 2.3L engine feature sophisticated battery monitoring sensors that measure charging system output, ensuring accurate diagnosis during routine service checks. What Is the Price Difference and Advantage of AGM vs Standard Lead-Acid Batteries? Absorbed Glass Mat ( AGM) batteries cost roughly 40 to 100 percent more upfront than standard flooded lead-acid batteries—pricing varies by battery type and availability—but deliver up to three times longer operating life and superior cold-weather resistance. AGM designs suspend liquid electrolyte within saturated fiberglass mat separators, creating a spill-proof, highly vibration-resistant battery engineered for modern high-drain vehicles. Standard Lead-Acid: [ $100 - $180 ] --> 3-5 Year Lifespan --> Basic Electrical Duty Absorbed Glass Mat: [ $200 - $350 ] --> 4-7 Year Lifespan --> Start-Stop & Heavy Electronics The structural construction of AGM technology provides distinct performance benefits over traditional flooded options: Fast Recharging Capability: Recharges up to five times faster than standard lead-acid units, recovering quickly after cold-engine starts. Deep Discharge Resistance: Tolerates repeated deep discharging without suffering permanent loss of overall storage capacity. Enhanced Vibration Resistance: Glass mat construction holds internal lead plates firmly in place, protecting against road vibration damage. Sub-Zero Cranking Power: Delivers reliable starting current in extreme freezing weather where conventional fluid electrolytes slow down. Spill-Proof Sealed Design: Eliminates free liquid acid, preventing acid leaks and reducing terminal oxidation risk. Modern crossover models like the Ford Escape featuring a 1.5L engine and auto start-stop technology require the durable charge acceptance of an AGM battery. Installing a conventional flooded battery in a vehicle designed for AGM specs leads to rapid battery degradation and potential electronic system errors. Investing in an AGM replacement protects sensitive vehicle modules and delivers consistent starting power through several consecutive winters. Common Questions About Battery Testing and Charger Costs Q: How much does a quality car battery charger cost? Basic manual trickle chargers cost between $25 and $50, while multi-stage smart battery maintainers equipped with automatic float modes cost between $60 and $150. A smart charger monitors internal battery voltage, automatically adjusting charge rates to prevent overcharging while maintaining proper static voltage during extended parking periods. Q: What is the main operational difference between CCA and CA ratings? Cold Cranking Amps ( CCA) measure the electrical current a battery supplies for 30 seconds at 0°F without dropping below 7.2 volts, evaluating extreme winter starting capability. Cranking Amps ( CA) measure current output under identical test conditions at 32°F, representing mild-weather performance rather than severe cold resilience. Q: Why does winter weather accelerate car battery failure? Summer heat evaporates internal electrolyte liquid and accelerates plate grid corrosion, weakening the battery's internal structure. When winter arrives, sub-freezing temperatures slow internal chemical reactions and thicken engine oil, placing extreme physical demand on the previously damaged battery and causing sudden starting failure. Q: Can a parasitic electrical draw drain a healthy battery overnight? Yes, an active parasitic draw caused by a sticking relay, damaged glovebox light switch, or faulty electronic module can continuously drain electrical current after the key is turned off. This steady discharge depletes static battery voltage below 12.2 volts, preventing the engine from cranking the following morning. Q: How long should you drive to help maintain a battery's charge in cold weather? Driving continuously for at least 30 minutes once or twice a week helps the alternator replace the substantial charge used during cold-engine startup. Frequent short trips lasting under 10 minutes do not provide enough runtime for full charge recovery, especially when running high-draw accessories like defrosters and heated seats. How to Schedule Winter Battery Service Scheduling a professional battery inspection before sub-zero temperatures arrive protects your vehicle's starting system and prevents unexpected breakdowns during severe weather. Certified technicians test static voltage, measure CCA output, inspect terminal connections, and confirm alternator charging rates using factory-calibrated diagnostic equipment. Replacing a weakened battery with a factory-specified Motorcraft component backed by a 24-month/unlimited-mileage warranty provides complete starting confidence. Vehicle owners can drop by our East Liverpool service facility, contact our team directly at (330) 462-7578, or schedule a service appointment online to keep their vehicle winter-ready. © 2026 Tri State Ford. All rights reserved. Vehicle specification data © JATO Dynamics Limited. Car Battery Health Tips in East Liverpool OH | Tri State Ford
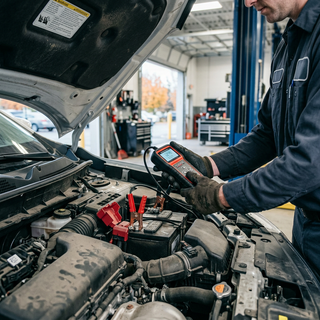
b

When Should You Replace Your Car Tires?

Replace your tires when the tread depth drops to 2/32 inch, when the rubber reaches six years of age, or immediately if you spot sidewall bulges, severe cracking, or deep cuts. The built-in tread wear indicators become level with the tread surface at 2/32 inch, signaling the absolute safety minimum. However, wet-weather stopping distance increases significantly once tread wears below 4/32 inch. Routine monthly checks help identify shallow tread, uneven wear, or structural rubber damage before a tire fails on the road. Tires serve as the single physical link between your vehicle and the pavement, bearing the entire vehicle weight while transferring steering, braking, and acceleration forces. Over time, friction wears down the outer rubber compound, reducing the depth of the circumferential grooves designed to channel water away from the contact patch. The National Highway Traffic Safety Administration (NHTSA) reports that worn tread and tire failures contribute to thousands of highway incidents annually, emphasizing the critical importance of timely tire replacement. Driving conditions around northeastern Ohio place heavy demands on vehicle rubber throughout the year. For example, navigating the riverfront bluffs and elevated steep grades in East Liverpool demands strong traction during seasonal rain, sleet, and winter ice. When rubber hardens from age or wears thin from mileage, stopping distances expand, and cornering grip degrades rapidly. Monitoring tire health involves checking air pressure cold at least once a month, inspecting the sidewalls for physical injury, and verifying that the remaining tread meets safety standards. If you suspect an issue or experience unusual steering wheel vibration, our team at Tri State Ford is available at (330) 462-7578 to conduct a comprehensive tire safety inspection. You can also visit our East Liverpool service center for professional tire balancing, alignment, and tread measurements. Table of Contents How Low Can Tire Tread Get and How Do You Measure It? What Physical Damage and Aging Require Buying New Tires? How Do Worn Tires Impact Braking and Driving Performance? Where Should Two New Tires Be Installed on a Front-Wheel-Drive Car? Common Tire Replacement Questions Answered Schedule Professional Tire Care at Tri State Ford How Low Can Tire Tread Get and How Do You Measure It? Tires must be replaced when tread depth reaches 2/32 inch, which represents the legally enforced safety minimum across most of the United States. Safety experts and original equipment manufacturers strongly advise replacing tires at 4/32 inch to preserve essential wet-road traction and emergency braking performance. As tires wear down, the depth of their tread channels decreases, limiting the volume of water the tire can clear from under the contact patch. When driving at highway speeds through heavy rain, a tire with 2/32 inch of tread takes drastically longer to stop than a new tire with full depth. Measuring Tread Depth with the Penny Test The penny test provides a quick, accessible method to estimate remaining tread depth at home: Select a standard U.S. penny and locate a main tread groove where the rubber appears most worn. Turn the coin so Abraham Lincoln’s head points upside down and faces toward you. Insert the coin straight into the center tread groove. Observe whether the top of Lincoln’s head is covered by the tread rubber. If the entire top of Lincoln’s head remains visible, your tread depth is at or below 2/32 inch, meaning the tire is worn out and requires immediate replacement. Using the Quarter Test for Extended Wet Safety The quarter test measures whether your tires have reached the recommended replacement threshold of 4/32 inch: Insert a U.S. quarter upside down into a primary tread groove with George Washington’s head facing you. Check if the top of Washington’s head is obscured by the rubber. If the top of his head is fully visible, the tread depth has dropped below 4/32 inch. While legally permissible, rubber at this level loses significant traction on wet roads, indicating it is time to start shopping for replacement tires. Identifying Built-In Tread Wear Indicator Bars Modern passenger tires feature built-in tread wear indicator bars molded directly into the primary circumferential grooves. These indicator bars consist of narrow bridges of raised rubber set at exactly 2/32 inch above the bottom of the groove. When the surrounding tread rubber wears down flush with these indicator bars, the tire has reached its legal wear limit and must be taken out of service. Utilizing Digital and Mechanical Tread Depth Gauges For precise readings, technicians use a dedicated tread depth gauge calibrated in thirty-seconds of an inch. To use a manual or digital gauge: Push the gauge probe all the way out. Place the base of the gauge flat against the outer tread block surrounding a main groove. Press the central probe down into the lowest point of the groove until it rests flush against the base rubber. Read the measurement displayed on the barrel or digital screen. Measure across three distinct locations on the tire—the inner shoulder, center tread, and outer shoulder—to identify uneven wear patterns caused by improper alignment or inflation issues. What Physical Damage and Aging Require Buying New Tires? A tire requires immediate replacement if it displays sidewall bulges, severe rubber cracking, deep cuts that expose internal steel belts, or if it reaches six years of age regardless of remaining tread depth. Physical damage to the tire carcass weakens its structural integrity, making it unsafe for high-speed driving. Rubber degrades over time due to exposure to atmospheric oxygen, ultraviolet light, ozone, and thermal changes. Even if a vehicle is driven infrequently and retains deep tread, the internal chemical bonds within the rubber compound break down over time. Ford guidelines recommend replacing tires every six years, or sooner if physical wear dictates, and replacing unused spare tires after six years in storage. Identifying Structural Sidewall Damage Sidewall injuries represent a severe safety hazard because the sidewall absorbs flexing forces during cornering and load carrying. Common forms of structural damage include: Sidewall Bulges and Blisters: A outward bubble on the sidewall indicates that internal fabric cords have snapped after a pothole or curb impact, allowing pressurized air to push through the inner liner. This condition cannot be repaired and requires immediate replacement. Deep Cuts and Gouges: Scrapes or punctures that slice deep enough into the sidewall or shoulder rubber to reveal cord fabric or steel plies compromise the strength of the tire casing. Radial Weather Cracking: Dry rot manifests as fine networks of cracks along the sidewall or inside the tread grooves, signaling that the rubber compounds have dried out and lost elasticity. Tread Separation: Ripples, bulges, or localized elevated areas on the tread surface indicate that the outer tread layer is detaching from the underlying steel belt structure. Reading the DOT Date Code Every tire stamped with a Department of Transportation (DOT) code displays its manufacturing date within the final four digits of the Tire Identification Number (TIN) located on the lower sidewall: DOT PJ8X L5R1 2523 In the example above, the final four digits ( 2523) indicate that the tire was manufactured during the 20th week of 2023. Checking this code ensures you know the exact age of your tires. Puncture Repair Limits According to United States Tire Manufacturers Association (USTMA) industry standards, punctures are only repairable if they occur within the central tread area and measure 1/4 inch or less in diameter. Punctures located on the tire shoulder, sidewall, or bead area cannot be safely patched or plugged, as these flexible zones endure extreme structural loads. Additionally, driving on a flat or underinflated tire causes internal heat damage and rubber shaving, rendering the casing unsuitable for repair. When physical damage or advanced age requires getting new tires, you can use our online tire finder tool to filter exact original equipment tire sizes and speed ratings for your specific vehicle. How Do Worn Tires Impact Braking and Driving Performance? Worn tire tread increases stopping distances on wet roads, degrades cornering grip, and drastically raises the risk of hydroplaning by reducing the tire’s ability to evacuate water from under the contact patch. Shallow tread grooves cannot clear accumulated water, forcing the tire to ride on a thin film of liquid and losing contact with the road surface. Emergency braking tests demonstrate the severe performance penalty of driving on worn rubber. Vehicles stopping on wet pavement at 60 mph on tires worn down to 4/32 inch require an average of 87 additional feet to come to a complete stop compared to vehicles on new tires. That additional stopping distance equals roughly a full second of travel time at highway speeds, which can mean the difference between a safe stop and a severe rear-end collision. Reduced Handling and Cornering Traction Beyond straight-line braking, shallow tread negatively impacts overall handling stability: Steering Response: Worn tires exhibit sluggish turn-in response, causing the steering wheel to feel loose or uncommunicative during lane changes. Lateral Grip: Reduced tread block height lowers lateral grip, causing the vehicle to slide outward during tight cornering maneuvers. Accelerative Traction: Slippery or wet pavement causes worn tires to spin easily under power, triggering traction control intervention and reducing momentum. Elevated Heat Build-Up: Reduced tread depth means less rubber mass to dissipate heat generated during high-speed driving, increasing thermal strain on the internal casing. The rolling terrain and wooded roads near Calcutta demand reliable traction during seasonal rain and freezing weather. Vehicles such as the 2026 Ford Escape equipped with All-wheel drive and a 1.5L EcoBoost engine rely on deep, aggressive tread blocks to distribute power effectively across all four wheels. When tread wears thin, even advanced driver-assist safety technology like anti-lock braking and electronic stability control cannot overcome the fundamental loss of mechanical grip. Where Should Two New Tires Be Installed on a Front-Wheel-Drive Car? When replacing only two tires on a front-wheel-drive vehicle, the new tires must always be installed on the rear axle. Installing fresh tires with full tread depth on the rear wheels maintains directional stability and prevents dangerous rear-end fishtailing on wet or slick roads. Many drivers assume that because a front-wheel-drive car uses its front tires for steering, acceleration, and the majority of braking force, fresh rubber belongs on the front. However, automotive safety engineers, tire manufacturers, and the NHTSA unanimously advise placing new tires on the rear axle regardless of whether the vehicle is front-wheel-drive, rear-wheel-drive, or all-wheel-drive. The Physics of Rear Traction and Hydroplaning Placing worn tires on the rear axle creates a critical traction imbalance during rain or emergency maneuvers: Oversteer Risk: If the rear tires have shallower tread than the front tires, the rear wheels will lose grip first when driving through standing water or making a sudden lane change. Loss of Control: When the rear tires hydroplane, the back end of the car slides outward, causing sudden oversteer (fishtailing). Oversteer is extremely difficult for most drivers to correct. Understeer Management: Conversely, if fresh tires sit on the rear and worn tires remain on the front, the front tires may lose traction first during hard cornering (understeer). Understeer causes the car to push straight ahead, which is easily managed by simply easing off the accelerator pedal. Tire Replacement Rules for All-Wheel-Drive Systems Vehicles equipped with full-time or automatic all-wheel-drive systems, such as the 2026 Ford Explorer featuring a 2.3L EcoBoost engine and a SelectShift® automatic transmission, operate under stricter tire replacement requirements. AWD transfer cases and center differentials require all four tires to roll at virtually identical circumferences. Variations in tread depth greater than 2/32 inch between tires cause the front and rear axles to rotate at slightly different speeds, generating constant friction and heat within the mechanical transfer case. On AWD models, replacing all four tires simultaneously is standard practice to protect complex drivetrain components from expensive mechanical damage. If you ever experience a sudden blowout, flat tire, or severe vibration while driving, remember that complimentary roadside assistance coverage is available for covered Ford owners by contacting Ford Roadside Assistance: 1-800-241-3673. If you suspect uneven tire wear or wish to evaluate your vehicle's overall road performance, you can schedule a test drive or vehicle safety evaluation with our service team to review your tire condition and suspension geometry. Common Tire Replacement Questions Answered Understanding tire care helps you protect your investment, maintain vehicle safety, and prevent premature wear. Below are concise answers to common questions about tire lifespan, repair safety, and driving diagnostics. Q: How do you read the DOT date code on a tire sidewall to check its age? Look at the outer sidewall for the DOT Tire Identification Number, which ends in a four-digit numerical code. The first two digits represent the calendar week of production, while the final two digits indicate the year. For example, a code reading 4222 indicates the tire was produced during the 42nd week of 2022. Tires older than six years should be inspected annually by a professional, and those reaching ten years should be replaced regardless of tread depth. Q: Is it safe to drive on a tire with a plug after a puncture? A plug applied from the outside without removing the tire from the wheel is considered a temporary emergency repair only. Safe puncture repair requires a combination plug-patch installed from inside the tire casing after taking the tire off the rim. This process seals the inner liner and fills the puncture path through the tread plies, preventing moisture from rusting the internal steel belts. Q: Why does my vehicle pull to one side even when tire pressures are balanced? A persistent vehicle pull can be caused by uneven tread wear, internal tire conicity, improper wheel alignment, or dragging brake components. Conicity occurs when manufacturing variations or internal belt shifts cause a tire to roll slightly cone-shaped, creating a lateral pulling force. Swapping the front tires from left to right can help determine if the pull stems from a tire structural issue or suspension alignment misalignment. Q: What tire maintenance helps extend tread life between replacements? Rotating your tires every 5,000 to 8,000 miles promotes balanced rubber wear across all four positions, while maintaining correct cold inflation pressures prevents shoulder or center wear. Additionally, scheduling a four-wheel alignment after hitting harsh potholes or curbs prevents uneven edge scrubbing. For owners performing routine garage maintenance or replacing damaged wheel hardware, our service counter provides quick access for ordering genuine Ford parts and tires engineered specifically for your model. Schedule Professional Tire Care at Tri State Ford Maintaining healthy tires is essential for keeping your vehicle safe, responsive, and efficient through every season. Whether your vehicle needs a routine rotation, wheel alignment, or a fresh set of factory-recommended tires, our team is equipped to handle all your maintenance needs with certified care. We invite you to visit our state-of-the-art facility for quick, transparent tire inspections and expert advice on choosing the right replacement rubber for your driving habits. You can stop by our dealership location at 1503 Pennsylvania Ave, East Liverpool, OH 43920 or speak directly with a service advisor by calling (330) 462-7578. Ready to make sure your vehicle is prepared for the road ahead? Take a moment to schedule a service appointment online today and let our service team keep your vehicle running smoothly and safely. © 2026 Tri State Ford. All rights reserved. Vehicle specification data © JATO Dynamics Limited. Car Tire Replacement Guide in East Liverpool OH | Tri State Ford
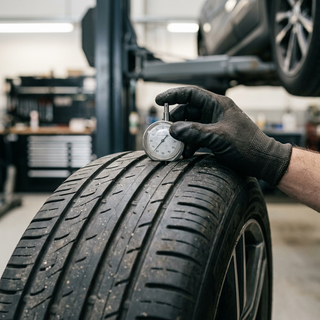
l

What Causes Uneven Tire Wear on a Vehicle?

Uneven tire wear is primarily caused by incorrect wheel alignment, improper inflation pressures, worn suspension components, and unperformed tire rotations. Mechanical stress from bad ball joints or failing struts alters how tread blocks contact the road surface. Potholes, curb impacts, and heavy payload hauling also distort tire geometry, leading to accelerated wear that compromises braking distance and overall driving stability. When a tire rolls along the pavement, its rubber contact patch should distribute the vehicle's weight uniformly across the entire tread width. If wheel alignment angles drift out of factory specification, the tire drags at an angle rather than rolling flat. This friction concentrated on a single edge or rib strips away rubber rapidly. Vehicle manufacturer specifications emphasize that even minor alignment deviations, such as a fraction of a degree off in toe or camber, will cause noticeable diagonal or shoulder wear over just a few thousand miles. Tire pressure plays an equally vital role in tread longevity. Underinflated tires sag in the center, transferring weight outward and wearing down both outer shoulders prematurely. Overinflated tires balloon outward in the middle, causing rapid center tread loss while leaving the shoulders untouched. Routine maintenance, including checking inflation levels monthly with an accurate gauge, prevents these uneven wear profiles from forming. Suspension wear and chassis impacts further compound tread breakdown. Driving over rough pavement or potholed back roads in Calcutta subjects steering linkages and control arms to severe shocks that can bend tie rods or knock alignment out of position. If you notice irregular tread patterns, pulling to one side, or steering wheel vibration, our team at 1503 Pennsylvania Ave, East Liverpool, OH 43920 can perform a comprehensive multi-point inspection. You can also give our service center a call directly at (330) 462-7578 or check current Ford service information before booking your visit. Table of Contents What Do Different Tire-Wear Patterns Reveal About Your Suspension and Alignment? How Do Bad Ball Joints, Shocks, and Suspension Parts Cause Inner Tire Wear? How Many 32nds of an Inch Difference Is Allowed on AWD Tires? How Often Should You Check Tire Pressure and Rotate Your Tires? Common Questions About Diagnosing and Fixing Uneven Tire Wear Protect Your Tires and Vehicle Stability at Tri State Ford What Do Different Tire-Wear Patterns Reveal About Your Suspension and Alignment? Visual tire-wear patterns serve as a precise diagnostic roadmap, signaling specific alignment errors, pressure issues, or worn mechanical components. Examining tread block shapes and wear location allows technicians to isolate problems before they destroy your tires. Different mechanical failures generate distinct physical signatures on the tread surface. Understanding what these patterns mean helps drivers spot potential hazards early: Center Tread Wear: Rapid wear concentrated strictly down the center rib indicates chronic overinflation. High pressure causes the center of the tire to bulge outward and carry the vast majority of the vehicle's load. Shoulder Wear on Both Edges: Heavy wear on both the inner and outer edges with deeper tread remaining in the center signifies chronic underinflation. Lacking sufficient air pressure, the tire carcass collapses inward, forcing the outer shoulders to absorb road contact. Inner or Outer Edge Wear: Heavy rubber loss on only one edge points directly to alignment trouble, specifically improper camber setting or incorrect toe angle. Excessive negative camber leans the top of the wheel inward, grinding down the inside shoulder. Feathered Tread Edges: When individual tread blocks feel smooth when sliding your hand across them in one direction but rough and sharp in the opposite direction, the tire suffers from feathering. This condition is caused by incorrect toe alignment, which forces the tire to scrub sideways while rolling forward. Tire Cupping or Scalloping: Deep, repeating scooped dips or valleys around the circumference of the tread indicate worn shock absorbers, struts, or loose wheel bearings. Worn dampeners fail to keep the tire firmly planted, allowing the wheel to bounce down the road like a basketball. Ignoring irregular tread patterns causes secondary damage to wheel bearings, steering racks, and suspension bushings over time. Driving on cupped or feathered tires also increases stopping distances on wet pavement and reduces resistance to hydroplaning. Catching these patterns early allows technicians to perform adjustments before the rubber is permanently ruined. When tread wear is identified in its beginning stages, correcting the mechanical root cause and rotating the tires can help balance out future wear. To have your tread inspected and corrected by factory-trained specialists, feel free to schedule a service appointment online or inquire about specialized equipment checks for custom vehicle factory orders. How Do Bad Ball Joints, Shocks, and Suspension Parts Cause Inner Tire Wear? Failing ball joints, worn control arm bushings, and leaking struts allow front wheels to lean inward, shifting the vehicle's weight onto the tire's inside shoulder. This misalignment creates excessive negative camber and improper toe angles, rapidly grinding down inner tread blocks until internal casing cords become exposed. Ball joints act as the critical pivot points connecting your vehicle's control arms to the steering knuckles. As ball joints wear down internally, microscopic play develops within the socket. This looseness allows the wheel assembly to tilt outward or inward under load. When a lower ball joint deteriorates, the wheel splays outward at the bottom, creating an aggressive negative camber angle. This forces the inner edge of the tire to bear the brunt of vehicle weight and cornering friction. Worn shock absorbers and struts exacerbate inner tire wear by failing to control wheel rebound. Struts hold the wheel at a precise angle relative to the body chassis. As internal hydraulic fluid leaks or valving degrades, the strut can no longer maintain structural rigidity during cornering or braking. The tire begins to wobble and bounce erratically, gouging out inner tread rubber while creating severe steering wheel vibrations. Drivers frequently ask our technicians why inside shoulder wear often goes unnoticed until a tire fails. Because inner edge wear occurs on the hidden underside of the vehicle, a tire can look healthy from the outside while severely compromised on the inside edge. If rubber wears down to the internal steel belts or nylon body cords, the tire loses structural integrity and becomes a blowout risk. Correcting inner tire wear requires replacing degraded steering parts—such as ball joints, tie rod ends, or control arm bushings—and performing a four-wheel laser alignment to reset factory geometric tolerances. Our department can quickly supply genuine OEM Ford suspension parts built specifically for your model's exact chassis requirements. How Many 32nds of an Inch Difference Is Allowed on AWD Tires? Engineering guidelines for all-wheel-drive systems require all four tires to have matching tread depths within 2/32 of an inch to 3/32 of an inch of one another. Exceeding this variance forces the transfer case and center differential to work continuously to compensate for differing wheel rotation speeds, leading to severe mechanical overheating and premature drivetrain failure. All-wheel-drive systems, such as Ford Intelligent AWD, monitor wheel speed sensors dozens of times per second to distribute torque precisely where traction is needed. Tire tread depth directly determines the overall rolling circumference of the wheel. A brand-new tire typically starts with 10/32 of an inch to 12/32 of an inch of tread depth, whereas a partially worn tire might measure 5/32 of an inch. This difference of 5/32 of an inch reduces the overall tire diameter by nearly a third of an inch, causing the worn tire to rotate faster than the new tire at identical vehicle speeds. When tires on an AWD vehicle rotate at different speeds on dry pavement, the driveline computer interprets the speed differential as wheel slip. The system continuously engages clutch packs inside the center differential or power transfer unit to correct the non-existent slip. This constant binding generates extreme heat, degrades differential fluid, and can destroy expensive drivetrain components in a short period. Tread Depth Variance Drivetrain Impact Recommended Action 0/32 to 2/32 of an inch Safe operational range; no driveline binding Maintain normal rotation schedule 3/32 of an inch Maximum allowable variance on most AWD systems Inspect tread regularly; plan replacement 4/32 of an inch or more High risk of transfer case and differential damage Replace all four tires or shave new tire Commuters in Boardman who rely on all-wheel-drive traction during wet spring rains or icy winter storms must keep tread variance top of mind when replacing damaged tires. If a single tire suffers an unrepairable puncture, installing one brand-new tire alongside three worn tires can compromise the AWD transfer case. In these situations, replacing all four tires or sourcing a shaved replacement tire matches rolling circumferences safely. Drivers can check tire sizes and tread options using our online tire lookup tool. How Often Should You Check Tire Pressure and Rotate Your Tires? Drivers should inspect cold tire inflation pressure at least once a month and perform tire rotations every 5,000 miles to 7,500 miles or at every scheduled oil change. Maintaining this interval ensures uniform tread wear across front and rear axles, extending tire life and maintaining optimal fuel economy. Tire air pressure fluctuates constantly due to ambient temperature changes and natural permeability through the tire's inner liner. For every 10-degree drop in outside air temperature, tire pressure decreases by approximately 1 PSI. Checking tire pressure monthly—and always before long highway trips—prevents undetected underinflation. Always measure pressure when the tires are cold, meaning the vehicle has been parked for at least three hours or driven less than one mile. The correct recommended inflation figure is located on the tire specification decal inside the driver's door jamb, not the maximum pressure stamped on the tire sidewall. Tire rotation is critical because front and rear tires perform vastly different duties: Front Tires: Bear the weight of the engine, absorb front-wheel steering angles, and handle over 60 percent of all braking forces. Rear Tires: Primarily follow the front wheels in front-wheel-drive vehicles, experiencing straight-line rolling friction without steering stress. By rotating tire positions periodically, wear patterns are distributed evenly across all four tires. Front-wheel-drive vehicles typically utilize a forward-cross rotation pattern, moving front tires straight to the rear and crossing rear tires to opposite front sides. Rear-wheel and four-wheel-drive trucks utilize a rear-cross pattern, moving rear tires straight forward and crossing front tires to opposite rear sides. Individual tire rotations are an affordable maintenance service, and many tire manufacturers or service departments offer complimentary rotations over the life of the tires when purchased as a set. Combining rotations with your regular oil change keeps your maintenance schedule organized and ensures your tires wear down evenly over thousands of miles. Common Questions About Diagnosing and Fixing Uneven Tire Wear Q: Is it safe to drive with tires worn down on the inner edge? No, driving with severe inner edge tire wear is unsafe because it structurally weakens the internal tire carcass. Excessive inner edge wear grinds away protective rubber layers, exposing internal steel belts and body cords to moisture, dirt, and road friction. Exposed cords quickly rust and fray, which dramatically increases the risk of a sudden highway blowout. If you spot exposed metal or fabric on any part of your tire tread, replace the tire immediately. Q: Does tire rotation cost money or is it free with new tires? Individual tire rotation services typically cost $20 to $50 when performed as a standalone service at a service center. However, many service departments and tire retailers offer lifetime complimentary tire rotations when you purchase a complete set of four new tires from them. Bundling your tire rotation with scheduled oil changes or multi-point vehicle inspections is a practical way to keep maintenance organized. Q: What causes tire feathering and how is it corrected? Tire feathering occurs when the individual tread blocks wear down at an angle, creating a sharp edge on one side and a rounded edge on the other. This condition is caused by improper toe alignment, which forces the tire to scrub sideways across the road while rolling forward. Feathering is corrected by placing the vehicle on an alignment rack and adjusting the steering tie rods back to factory toe settings. Q: Why does cupping occur on rear tires of trucks and SUVs? Cupping or scalloping on rear tires is caused by worn rear shock absorbers, out-of-balance wheel assemblies, or loose suspension bushings that allow the tire to bounce up and down repeatedly at highway speeds. Every time the tire bounces and lands on the pavement, rubber is carved out of the contact patch. Fixing rear tire cupping requires replacing worn shocks or struts and rebalancing the wheel assembly. Q: Can misaligned tires lower fuel economy during daily driving? Yes, misaligned tires increase rolling resistance, forcing your engine to work harder and consume more fuel. When wheels are not aligned parallel to each other, the misaligned tire drags across the pavement rather than rolling freely. This mechanical drag places continuous strain on the drivetrain, reducing fuel efficiency by up to 10 percent depending on how severely the alignment angles are off. If you have additional questions about tire maintenance or need directions to our department, visit our dealership map and location page or speak with a service advisor directly at (330) 462-7578. Protect Your Tires and Vehicle Stability at Tri State Ford Catching uneven tire wear early saves money, protects your steering and suspension systems, and keeps your vehicle handling safely in all road conditions. Whether your vehicle needs a four-wheel alignment adjustment, new ball joints, routine tire rotations, or a fresh set of factory-approved tires, professional maintenance ensures long-term reliability. Our certified technicians use specialized diagnostic tools and alignment equipment to restore your vehicle's factory specifications. Routine multi-point inspections catch worn control arm bushings, failing shocks, and pressure imbalances before they permanently ruin your tires. Take the next step in caring for your vehicle today. Contact our service team to schedule a professional tire inspection and wheel alignment, ensuring your vehicle remains dependable for every commute and weekend journey ahead. © 2026 Tri State Ford. All rights reserved. Uneven Tire Wear Solutions in East Liverpool OH | Tri State Ford
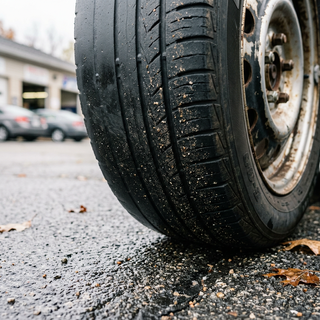
3

How Do You Prepare Your Car for Winter?

To prepare your car for winter, inspect the battery charge, adjust tire pressure to factory specifications, verify tire tread depth is at least 6/32 of an inch, flush engine coolant with a sub-zero freeze-protected mixture, install winter wiper blades with sub-zero washer fluid, and test your heating and defroster systems. Taking these preventative maintenance steps before freezing temperatures arrive prevents unexpected vehicle breakdowns and ensures maximum traction on icy roads. Sub-freezing temperatures put intense physical strain on every mechanical system in your vehicle. Engine oil thickens, battery chemical reactions slow down, and air pressure inside your tires drops continuously as outdoor temperatures fall. Drivers navigating the riverfront bluffs and steep hills of East Liverpool face unique winter challenges where slick roads require immediate braking response and consistent wheel grip. Proper seasonal vehicle preparation transforms how your vehicle handles slush, black ice, and freezing rain. Systematically checking key components ahead of the first winter storm preserves safety systems, protects critical engine components from costly damage, and gives you complete confidence behind the wheel all season long. You can stop by our dealership location or give our service department (330) 462-7578 a call to confirm your vehicle is ready for the cold weather ahead. Table of Contents What Key Vehicle Components Should Be Inspected Before the First Snow? What Is the Ideal Tire Tread Depth and Pressure for Winter Driving Conditions? What Battery Voltage and Cold Cranking Amps Are Required for Cold Weather? Which Winter Preparation Maintenance Tasks Can You Do at Home at Home? Quick Answers to Common Winter Vehicle Maintenance Questions Schedule Your Pre-Winter Inspection Today What Key Vehicle Components Should Be Inspected Before the First Snow? Before the first snowfall, inspect the vehicle battery, brake system, tire tread and pressure, engine coolant concentration, serpentine belts, radiator hoses, wiper blades, and exterior lighting. Evaluating these core mechanical systems ensures your vehicle maintains traction, visibility, and reliable engine operation during severe winter weather. Cold weather causes rubber materials to harden and contract, which accelerates cracking on aging serpentine belts and radiator hoses. A worn belt that snaps in sub-zero weather cuts power to your alternator and water pump, leading to sudden engine failure. Likewise, engine coolant must maintain a precise 50/50 mixture of antifreeze and water to protect the engine block from cracking when temperatures drop well below freezing. Brake performance demands thorough inspection before winter arrives. Technicians measure friction lining to verify at least 3/32 inch of pad material remains and inspect brake rotors for severe rust pitting or scoring. Advanced driver-assist technologies and drive modes rely on healthy mechanical components to function properly. For instance, Ford Explorer models equipped with Intelligent 4WD feature a Terrain Management System with Slippery mode and Deep Snow/Sand settings that modulate engine torque and transmission shift points to reduce wheel spin on packed snow [1.1.7]. Battery and charging system voltage output Brake pad lining thickness and rotor surface condition Coolant freeze-point protection and hose elasticity Serpentine drive belt tension and wear Headlight, tail light, and turn signal clarity Windshield wiper blade condition and washer fluid level If you prefer to perform maintenance repairs yourself, you can easily order OEM Ford parts online directly through our service portal. For drivers planning ahead for future seasonal travel needs, exploring the custom factory order options allows you to select winter-ready features like heated seats, remote start, and all-wheel drive straight from the factory. What Is the Ideal Tire Tread Depth and Pressure for Winter Driving Conditions? The ideal tire tread depth for winter driving is 6/32 of an inch or deeper on winter tires and at least 4/32 of an inch on all-season tires, maintained at the vehicle manufacturer's recommended cold inflation pressure listed on the driver-door placard. Tire pressure drops approximately 1 to 2 PSI for every 10-degree Fahrenheit decrease in outside temperature. Driving on underinflated tires compromises vehicle handling, reduces fuel efficiency, and causes uneven tread wear. Pressure checks must always be conducted when the tires are cold, meaning the vehicle has been parked for at least three hours. Never adjust tire inflation to the maximum pressure stamped on the tire sidewall, as that number reflects maximum load capacity rather than your vehicle's engineered inflation spec. Tread depth directly determines how effectively a tire channels slush, snow, and water away from the contact patch. While tires are legally considered worn out at 2/32 of an inch, that minimal tread depth cannot clear snow or prevent hydroplaning on wet highways. Suburban commuters driving daily routes through Calcutta along State Route 170 encounter mixed slush and packed snow where deep tread grooves are vital for maintaining steering control and stopping distance. To ensure your tires are prepared for slippery road surfaces, you can schedule a service appointment online to have our technicians check tire pressure, perform a computerized wheel alignment, and rotate your tires. What Battery Voltage and Cold Cranking Amps Are Required for Cold Weather? A healthy 12-volt automotive battery must maintain a resting voltage of 12.6 volts or higher and meet or exceed the factory rating for cold cranking amps to start reliably in freezing weather. Cold weather places a double burden on your electrical starting system. Freezing temperatures slow the internal chemical reaction inside lead-acid battery cells, reducing available cranking power by as much as 50 percent at zero degrees Fahrenheit. Simultaneously, low temperatures cause engine oil to thicken, which demands significantly more electrical current from the battery to turn over the crankshaft. Battery Health Metric Ideal Specification Cold Weather Impact Resting Voltage 12.6 volts or higher Dropping below 12.4V indicates a weak charge Charging Voltage 13.8 to 14.7 volts Alternator output must maintain charge under heater load Cold Cranking Amps Matches OEM specification Cold reduces effective amperage output significantly Testing your battery's state of charge and reserve capacity before winter identifies weak cell plates before you get stranded in a cold parking lot. Technicians clean corrosion from battery terminals, inspect hold-down brackets, and verify that the alternator charges between 13.8 and 14.7 volts while powering high-draw winter accessories like defrosters and heated seats. You can learn more about our comprehensive battery testing and battery replacement maintenance offerings to ensure your vehicle starts on the coldest mornings. Which Winter Preparation Maintenance Tasks Can You Do at Home at Home? You can check tire inflation pressure, measure tread depth using a coin, inspect wiper blade rubber for tearing, top off freezing-rated washer fluid, visually inspect belts and hoses for cracks, and test exterior safety lights at home without specialized tools. Performing a visual safety audit takes less than twenty minutes in your driveway: The Quarter Test: Insert a quarter upside down into the tread grooves of your tires. If the top of Washington's head is covered by the tread, you have at least 4/32 of an inch of tread depth remaining. Wiper and Washer Inspection: Lift each wiper arm and slide your finger along the rubber edge to feel for tears or stiff, cracked edges. Fill the windshield washer reservoir with winter-grade fluid rated for sub-zero temperatures. Belt and Hose Visual Check: With the engine off and cold, press down on engine drive belts to verify tension and look for fraying or longitudinal cracks along the V-ribs. Squeeze radiator hoses to ensure they feel firm rather than soft or spongy. Lighting Audit: Turn on your headlights, hazard flashers, and parking lights, then walk around the vehicle to verify every bulb illuminates clearly through clean lenses. Emergency Kit Setup: Pack an emergency kit containing jumper cables, an ice scraper, a flashlight, heavy blankets, bottled water, and sand or cat litter for tire traction. Quick Answers to Common Winter Vehicle Maintenance Questions Q: At what temperature do all-season tires lose flexibility and traction? All-season tire tread compounds begin to harden and lose elasticity at temperatures below 45 degrees Fahrenheit. As the rubber stiffens, it loses its ability to conform to small road imperfections, which significantly reduces traction on dry and wet pavement even before snow or ice falls. Specialized winter tires utilize flexible silica compounds designed specifically to remain pliable in sub-freezing temperatures. Q: Is a professional winter vehicle inspection worth the cost? A professional winter vehicle inspection identifies hidden mechanical vulnerabilities such as weak battery cell voltage, hairline belt cracks, and uneven brake lining wear before subzero weather leaves you stranded. Factory-trained technicians use specialized diagnostic tools to load-test electrical systems, measure coolant freeze points, and evaluate suspension components that cannot be adequately checked at home. Q: How do you inspect vehicle brakes for winter readiness? Inspect brake pads to confirm at least 3/32 inch of friction lining remains, check rotors for severe rust pitting or scoring, and verify that the brake fluid is clean and filled to the reservoir line. Clean brake fluid prevents internal moisture accumulation that can freeze inside hydraulic lines during extreme cold spells, ensuring smooth and consistent pedal feel. Q: What items should be in a winter emergency vehicle kit? A winter emergency kit should include heavy blankets, jumper cables, a flashlight with extra batteries, an ice scraper with a snow brush, a collapsible shovel, traction sand or kitty litter, non-perishable snacks, drinking water, and a mobile phone charger. Keeping these items in your cargo area ensures you remain safe and warm if your vehicle experiences a roadside delay during severe weather. Q: What should you do if your vehicle stalls during a winter storm? Stay inside your vehicle, turn on interior lights, and tie a bright marker cloth to your antenna or window. Check that your exhaust pipe remains completely clear of snow banks to prevent dangerous carbon monoxide gas from backing up into the cabin, and run the engine intermittently just long enough to keep warm. If you need emergency roadside service, you can reach Ford Roadside Assistance at 1-800-241-3673 for 24/7 towing, battery jump-starts, and flat tire assistance. You can also view our current Ford service specials for routine winter care. Schedule Your Pre-Winter Inspection Today Schedule a comprehensive pre-winter vehicle inspection at Tri State Ford to ensure your car, truck, or SUV is fully prepared for winter driving conditions. Taking care of routine maintenance before snow hits protects your vehicle's long-term reliability and keeps your family safe on slick roads. Our factory-trained technicians test battery health, evaluate brake system wear, analyze tire tread depth, flush essential engine fluids, and install fresh wiper blades using genuine OEM parts. We provide transparent service recommendations so you can make informed decisions about your vehicle's care. Visit our service center at 1503 Pennsylvania Ave, East Liverpool, OH 43920 or give our service team a quick call at (330) 462-7578 to reserve your inspection appointment before the first winter freeze. © 2026 Tri State Ford. All rights reserved. Vehicle specification data © JATO Dynamics Limited. Winter Car Prep in East Liverpool OH | Tri State Ford
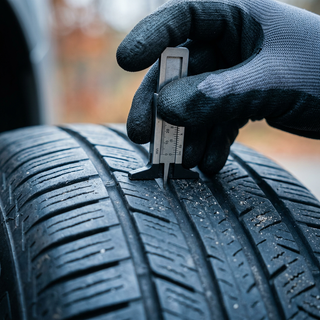
3

Why Does a Car Struggle to Start on Cold Mornings?

A car struggles to start on cold mornings because freezing temperatures slow down the chemical reactions inside the battery, drastically reducing its electrical output while simultaneously thickening engine oil and increasing internal mechanical resistance. This combination requires the starting motor to draw significantly more power from a battery that is operating at a reduced capacity. When temperatures drop to 32°F, a standard lead-acid car battery loses roughly 20% of its total cranking strength, and at 0°F, that output plunges by nearly 60%. At the exact moment your battery has the least power to offer, your engine demands up to twice as much energy to rotate. Cold weather thickens internal engine lubricants, causing pistons, bearings, and valve trains to resist movement. If your vehicle has a marginal electrical connection, an aging battery, or worn ignition components, these cold-weather physical forces reveal those hidden weaknesses immediately. Vehicles equipped with larger powertrains or higher compression engines require optimal voltage to fire reliably. For example, a 2026 Ford F-150 with a 3.5L EcoBoost® V6 or a 2026 Ford Explorer with a 2.3L EcoBoost® engine relies on precise starter speeds to build initial fuel rail pressure and generate combustion heat. When morning frost coats the windshield, any loss of electrical current leads directly to slow cranking or a complete failure to turn over. In suburban areas like Calcutta, where vehicles often sit outside overnight amidst rolling hills and cold valley air along State Route 170, a weak starting system is quick to surface. Taking time to inspect your starting system before winter settles in prevents unexpected delays. If your morning commute begins with an unusually sluggish start, you can stop by our service center in East Liverpool for a comprehensive electrical load check, or give our technicians a call at (330) 462-7578 to discuss your vehicle's symptoms. Table of Contents How Do Weakening Batteries and Extreme Cold Affect Engine Cranking? How Does Engine Oil Viscosity Cause Slow Morning Starts? Can Worn Spark Plugs or Fuel Delivery Issues Cause Extended Cranking? What Sound Does a Bad Starter Relay Make Compared to a Failing Starter Motor? How Much Does It Cost to Replace a Starter Motor or Alternator? Common Questions About Slow Morning Starts and Electrical Repairs Keep Your Vehicle Starting Dependably Every Morning How Do Weakening Batteries and Extreme Cold Affect Engine Cranking? A weakening battery cranks slowly on cold mornings because low ambient temperatures lower its Cold Cranking Amps (CCA) output while internal engine resistance peaks. As chemical activity slows inside traditional lead-acid cells, battery voltage drops rapidly during ignition, leaving insufficient current to spin the starter motor at normal operational speed. Batteries are rated by Cold Cranking Amps, which measures the number of amperes a battery can deliver at 0°F for 30 seconds while maintaining a minimum voltage of 7.2 volts. Standard passenger cars and compact SUVs like the 2026 Ford Escape generally require between 400 CCA and 600 CCA, while larger trucks and utility vehicles demand 700 CCA or higher. As a battery ages over three to five years, chemical sulfation builds up on the internal lead plates, reducing total active surface area. A battery that operates adequately during mild autumn weather may suddenly drop below its required threshold during the first hard freeze. Battery construction plays a critical role in winter performance. Standard flooded batteries contain liquid electrolyte solution that can stratify and freeze in extreme sub-zero conditions, potentially cracking internal plates or damaging the outer casing. In contrast, Absorbed Glass Mat (AGM) batteries bind the electrolyte inside fine fiberglass cell mats. This design eliminates free-flowing liquid, resists internal freezing, provides faster recharge acceptance, and delivers higher surge currents during cold starts. Our service team often sees drivers get caught off guard on the first sub-zero morning when a battery that passed summer checks suddenly fails. Corrosion at the cable terminals further compounds cold-weather starting issues. White or greenish powdery deposits created by lead sulfate build up resistance at the battery posts, blocking electrical flow to the starter. Cleaning terminals, verifying ground connections, and selecting an upgraded battery rating ensure dependable morning starts. Drivers looking to replace an aging unit can order genuine Motorcraft® replacement parts directly through our component department. How Does Engine Oil Viscosity Cause Slow Morning Starts? Engine oil viscosity directly causes slow morning starts because lower temperatures increase fluid thickness, creating severe parasitic drag on the engine crankshaft and pistons. When oil thickens into a heavy, gel-like consistency, the starter motor must work twice as hard to rotate the internal engine assembly until proper operating temperatures are reached. Motor oil is classified using a multi-grade rating system developed by the Society of Automotive Engineers (SAE), such as 0W-20 or 5W-30. The number preceding the "W" represents the oil's winter viscosity rating, indicating how easily fluid flows at sub-zero temperatures. Lower numbers mean thinner, more fluid oil during cold starts: 0W viscosity: Formulated to flow instantly at temperatures as low as -31°F, drastically reducing cold-start friction and providing rapid oil pressure to upper valvetrain components. 5W viscosity: Suitable for winter temperatures down to -22°F, offering strong protection for standard daily commuting needs. 10W viscosity: Thicker at sub-freezing temperatures, which can add substantial fluid drag during extreme cold starts if used outside recommended factory guidelines. Using motor oil with a higher cold-viscosity rating than recommended by the vehicle manufacturer forces the starter motor to overcome massive fluid friction. Modern engine designs rely on rapid oil pressure during the first few seconds of ignition. For example, variable valve timing actuators require immediate oil flow to set camshaft positioning for efficient combustion. Delayed oil flow prolongs cranking times and increases wear on internal bearings. For daily commuters traveling along Market Street in Boardman, where morning traffic requires quick, reliable vehicle performance, using full synthetic motor oil helps maintain liquid fluidity on sub-freezing mornings. Full synthetic oils resist cold-temperature thickening far better than conventional mineral oils, protecting internal surfaces and lowering electrical load on the starter. To keep your engine filled with the exact factory-recommended grade, you can schedule a winter service appointment online with our maintenance department. Can Worn Spark Plugs or Fuel Delivery Issues Cause Extended Cranking? Worn spark plugs and fuel delivery issues cause extended morning cranking because cold fuel vaporizes less efficiently, requiring precise fuel pressure and higher electrical voltage to ignite. Worn plug gaps demand more electrical current from an already stressed cold battery, while losing fuel line pressure overnight delays combustion inside the cylinders. When an engine is cold, liquid gasoline does not vaporize as easily as it does at operating temperature. The engine control computer compensates by delivering a richer air-fuel mixture during cold starts. However, if the ignition or fuel delivery systems are compromised, this rich mixture fails to ignite cleanly: Worn Spark Plugs: Over tens of thousands of miles, the electrical gap between the spark plug center and ground electrode widens. A wider gap requires significantly higher voltage from the ignition coils to jump. On a cold morning, when battery voltage is already suppressed, the ignition system may fail to produce a strong enough spark, causing extended cranking or engine misfires. Loss of Fuel Pressure: The fuel system relies on a check valve inside the fuel pump module to hold pressure in the fuel rail after the engine turns off. If this valve leaks, fuel drains back into the gas tank overnight. When you turn the key the next morning, the fuel pump must run for several seconds just to purge air from the lines and build pressure before the injectors can mist fuel into the combustion chambers. Clogged Fuel Injectors: Leaking or dirty fuel injectors alter the fuel spray pattern from a fine mist into large liquid droplets. Cold air cannot vaporize large droplets, resulting in wet spark plugs and delayed engine ignition. Taking advantage of modern convenience features can help manage winter driving routines. Remote start systems—activated on Ford models by pressing the door lock button once and the remote start button twice—allow the engine to warm up safely in an open outdoor area. If your vehicle exhibits hesitation or extended cranking when starting, our technicians can evaluate ignition components and fuel rail pressure. To make routine maintenance easier during busy winter months, customers can utilize our Ford Pick Up & Delivery service options to have their vehicle serviced without interrupting their workday. What Sound Does a Bad Starter Relay Make Compared to a Failing Starter Motor? A bad starter relay or solenoid typically produces a rapid series of metallic clicking sounds or a single faint click without turning the engine over, whereas a failing starter motor generates a heavy single thud, a high-pitched whirring sound, or a harsh metallic grinding noise. Distinguishing between these distinct acoustic symptoms allows technicians to isolate electrical control issues from mechanical starter hardware failures: Component Condition Primary Sound Produced Root Physical Cause Weak Battery / Low Voltage Rapid, continuous clicking ("click-click-click-click") The solenoid engages, voltage drops, the solenoid releases, and the cycle repeats rapidly. Bad Starter Relay / Solenoid Single soft click or complete silence Internal electrical contacts are pitted or burned, preventing high-amperage current from reaching the motor. Failing Starter Motor Brushes Single loud thud or dull clunk with no rotation Current reaches the starter, but worn carbon brushes or shorted armature windings fail to spin the shaft. Worn Starter Pinion Gear High-pitched whirring or screeching sound The starter motor spins at high speed, but the Bendix drive fails to extend and engage the flywheel. Damaged Flywheel Ring Gear Harsh metallic grinding noise Broken or rounded teeth on the engine flywheel prevent proper gear mesh during cranking. When you turn the ignition key or press the engine start button, a small control signal travels through the starter relay to energize the starter solenoid. The solenoid acts as an electromagnetic switch: it closes heavy internal contacts to feed full battery current directly to the starter motor while simultaneously pushing the starter pinion gear into mesh with the engine flywheel. If you hear a rapid chatter, the battery voltage is usually too low to keep the solenoid engaged. If you hear a single solid click accompanied by dimming interior lights, the solenoid is working, but the starter motor armature is locked or mechanically jammed. If you hear a high-pitched spinning sound without the engine turning over, the starter motor is functioning, but its internal drive clutch has failed. Maintaining complete vehicle health during winter includes inspecting all supportive chassis systems. While checking your electrical system, evaluating tire condition is equally vital for cold-weather traction. You can check your current tire sizes and tread options using our online tire lookup tool. How Much Does It Cost to Replace a Starter Motor or Alternator? Replacing a starter motor generally costs between $300 and $700 for parts and labor, while replacing an alternator typically ranges from $400 to $900 depending on vehicle make, engine packaging, and component accessibility. The total repair investment varies based on mechanical design factors and component quality: Starter Motor Replacement Factors: Parts Cost: A high-quality or original equipment replacement starter costs between $150 and $400. Labor Expense: Labor charges depend on location and accessibility. On straightforward inline-four or V6 engine layouts, replacement takes 1 to 2 hours. On dense engine bays where intake manifolds, steering shafts, or exhaust heat shields must be removed, labor can extend to 3 hours or more. Alternator Replacement Factors: Parts Cost: Replacement alternators range from $200 to $500 depending on amperage output requirements (such as high-output units needed for vehicles with extensive electronic accessories). Labor Expense: Replacing an alternator typically involves releasing serpentine belt tension, disconnecting electrical harnesses, and unbolting mounting brackets, requiring 1.5 to 3 hours of shop time. Accurate diagnostic testing before replacing major components prevents unnecessary expense. A blown starter fuse, corroded ground wire, or degraded battery cable can perfectly mimic a failed starter or alternator. For example, if an alternator's internal diode bridge fails, it may allow a small AC voltage leak that drains the battery overnight while parked, causing slow morning starts despite the battery itself being in good condition. Our factory-trained service technicians use specialized diagnostic tools to measure starter current draw, charging system ripple voltage, and battery conductance. Using genuine OEM Motorcraft® starters and alternators ensures exact bolt-on alignment, proper electrical plug compatibility, and long-term durability. If your vehicle is exhibiting slow cranking, flickering battery warning lights, or abnormal starting noises, bring it to our local dealership workshop for an accurate diagnosis, or give our service advisors a call at (330) 462-7578 to receive a detailed estimate. Common Questions About Slow Morning Starts and Electrical Repairs Q: What Cold Cranking Amps (CCA) rating does my vehicle need for winter? Most standard passenger cars and compact SUVs require a battery rated between 400 CCA and 600 CCA, while larger trucks like the 2026 Ford F-150 often require 700 CCA or higher. Choosing a battery with a CCA rating equal to or slightly higher than original factory specifications ensures your starter motor receives sufficient electrical current during sub-zero mornings. Q: How can I test my car battery's Cold Cranking Amps at home? You can test battery strength at home using a digital battery conductance tester connected directly to the positive and negative terminals. A reading significantly lower than the rated CCA printed on the battery label indicates internal plate degradation, signaling that the battery should be replaced before cold weather causes a complete failure. Q: Why does my Ford remote start fail to turn on the vehicle in extreme cold? Ford remote start systems automatically disable ignition when battery voltage drops below a safe operational threshold or if diagnostic trouble codes are stored in the engine computer. If your remote start fails on a freezing morning, unlock and lock the doors using your key fob, then press the remote start button twice to test system response. Q: Does extreme cold weather permanently damage a vehicle battery? Sub-zero cold reduces battery charge capacity and can freeze liquid electrolyte inside a discharged flooded battery, cracking internal lead plates and destroying the battery structure. Keeping your battery fully charged and upgrading to an AGM battery prevents internal freezing and extends battery life throughout harsh winters. Q: How do I know if my starting issue is a dead battery or a bad alternator? A dead battery causes slow cranking or rapid clicking when turning the key, but the engine will run normally once jump-started. A failing alternator often triggers a battery warning light on the dashboard, causes dimming headlights during night driving, or causes the engine to stall shortly after starting because the charging system cannot maintain operational voltage. Keep Your Vehicle Starting Dependably Every Morning Addressing slow starting symptoms early prevents unexpected breakdowns when winter weather is at its worst. Whether your vehicle requires a fresh battery with a higher Cold Cranking Amps rating, a system diagnostic to test starter current draw, or an engine oil change using the ideal winter viscosity grade, taking proactive steps preserves electrical health and extends starter motor longevity. Our factory-certified service center provides comprehensive battery load testing, charging system inspections, and genuine Motorcraft® replacement parts installed by trained technicians. If your car hesitates, clicks, or cranks slowly in the morning, schedule a professional diagnostic inspection or contact our team to ensure your vehicle remains completely dependable on every drive. Should you ever encounter an unexpected roadside emergency, manufacturer-backed emergency support is available directly through Ford Roadside Assistance: 1-800-241-3673. © 2026 Tri State Ford. All rights reserved. Vehicle specification data © JATO Dynamics Limited. Car Starting Issues in East Liverpool OH | Tri State Ford
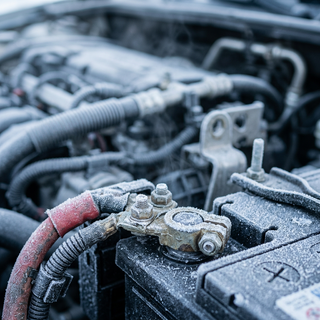
l

Why Does Cold Weather Trigger Your Tire Pressure Warning Light?

Cold weather causes air inside tires to contract, reducing tire pressure by approximately 1 PSI for every 10°F drop in outside temperature. When ambient temperatures plunge overnight, a tire that was already slightly underinflated drops below the Tire Pressure Monitoring System (TPMS) threshold—typically set at 25% below recommended cold PSI—activating the dashboard light even without a puncture. As autumn transitions into winter, daily temperature fluctuations frequently surprise vehicle owners. Gas operates according to basic thermal principles: when ambient air cools, gas molecules slow down and draw closer together. This contraction decreases the outward force exerted against the inner liner of the tire casing. In addition to natural thermal drops, tires naturally lose about 1 PSI per month through normal rubber permeability. When seasonal ambient temperature loss combines with gradual air seepage, a tire set correctly in mild autumn weather can cross the warning threshold on the first freezing morning. Understanding how quickly overnight temperatures shift helps prevent unnecessary worry about punctures. Along the Ohio River, near the riverfront bluffs and rolling terrain of East Liverpool, sub-freezing morning temperatures regularly drop pressure by 3 to 4 PSI before sunrise. Drivers who notice the warning light illuminating early in the morning may observe it shutting off after driving a few miles. As rolling tires flex against the pavement, internal friction generates heat, raising internal air temperature and restoring internal pressure above the warning cutoff. However, a dashboard light that extinguishes itself after highway driving does not mean the tire has returned to its proper cold inflation specification. The warning light disappearing simply means pressure temporarily cleared the minimum threshold. Once the car sits parked and cools down again, the pressure drops right back into the danger zone. Setting tire pressure when the rubber is completely cold ensures maximum safety, proper tire wear, and optimal fuel economy throughout winter. For personalized assistance or routine maintenance, visit our East Liverpool dealership address or give our service department a quick call at (330) 462-7578. Table of Contents What Is the Difference Between Direct and Indirect TPMS in Cold Weather? Where Is the Recommended Cold Tire Pressure PSI Located on Your Vehicle? How Much Fuel Economy Is Lost from Underinflated Tires in Winter? What Does a Blinking Tire Pressure Warning Light Mean? Common Questions About Winter Tire Pressure and TPMS Operation Schedule Professional Winter Tire Service What Is the Difference Between Direct and Indirect TPMS in Cold Weather? Direct TPMS relies on battery-powered hardware sensors mounted inside each wheel to measure actual PSI directly, whereas indirect TPMS utilizes anti-lock brake system (ABS) wheel speed sensors to monitor wheel rotation speed and estimate pressure changes based on wheel diameter. Both systems alert drivers to dangerous pressure loss, but they respond differently during sudden winter cold snaps. Direct TPMS monitors deliver exact, real-time pressure values to the vehicle instrument cluster. Each wheel sensor contains a tiny pressure transducer and RF transmitter powered by an internal lithium battery. When cold weather strikes overnight, a direct system measures the exact physical pressure drop immediately upon turning the ignition key. Many modern vehicles equipped with direct TPMS display the exact numeric PSI for all four individual tires right on the instrument display, making it easy to identify whether a single tire has a puncture or all four tires have dropped uniformly due to ambient cold. Indirect TPMS operates without wheel-mounted pressure sensors. Instead, it measures how fast each tire rotates relative to the others. An underinflated tire has a slightly smaller overall diameter, forcing it to rotate faster than a properly inflated tire to cover the same distance. In cold weather, indirect systems exhibit distinct characteristics: Delayed Alerts: Because indirect systems require vehicle motion to process wheel speed data, the low-pressure light won't illuminate while the car sits parked in the driveway. It triggers only after driving a short distance. Uniform Pressure Drops: If cold weather lowers pressure equally across all four tires, every wheel shrinks by the exact same proportion. Because all four wheels continue spinning at the same relative speed, an indirect TPMS might not immediately trigger a warning even though all four tires are significantly underinflated. Calibration Requirements: Indirect systems must be manually reset through the vehicle settings menu whenever air is added or tires are rotated so the ABS computer can relearn baseline rolling circumferences. Maintaining direct TPMS hardware requires periodic servicing, especially as wheel sensor batteries reach the end of their typical life cycle. When replacement sensors or valve service kits are needed during seasonal tire rotations, vehicle owners can easily order genuine OEM Ford replacement parts directly through our parts center. Where Is the Recommended Cold Tire Pressure PSI Located on Your Vehicle? The recommended cold tire inflation pressure is printed on the Tire and Loading Information label fixed to the driver-side door jamb or door pillar, as well as inside the vehicle owner's manual. Drivers should never use the pressure figure stamped into the tire sidewall, as that number represents the maximum pressure the tire casing can safely handle, not the vehicle manufacturer's recommended operating specification. Automotive engineers calculate ideal recommended tire pressure based on specific vehicle weight distribution, suspension tuning, braking dynamics, and cargo ratings. Filling a tire to the maximum PSI printed on the sidewall creates a harsh, uncomfortable ride, reduces traction on slick winter roads, and leads to premature center tread wear. To achieve accurate readings and maintain peak vehicle safety, follow these established pressure-checking standards: Define "Cold": Check pressure when the vehicle has been parked out of direct sunlight for at least three hours, or driven less than one mile at moderate speed. Account for Warm Expansion: If tire pressure must be checked immediately after driving, readings will naturally appear 4 to 6 PSI higher than cold specifications due to heat expansion. Do not bleed air from a warm tire to meet the door placard baseline. Use a Quality Pressure Gauge: Vehicle dashboard readouts provide convenient estimates, but a dedicated digital or pencil-style pressure gauge calibrated in 1 PSI increments provides the most reliable measurement. Checking tire pressure at least once a month and before long highway road trips keeps vehicle safety systems operating exactly as engineered. How Much Fuel Economy Is Lost from Underinflated Tires in Winter? Fuel efficiency drops by approximately 0.2% for every 1 PSI drop across all four tires, while driving on severely underinflated tires can reduce total fuel economy by up to 3%. In winter conditions—where cold engines and dense air already lower mileage—soft tires add unnecessary drag and increase weekly fuel costs. When tire pressure falls below specification, the tire tread flattens out against the road, expanding its contact patch. This expanded contact area generates increased rolling resistance, forcing the engine to consume extra fuel to maintain cruising speed. Beyond wasted fuel, underinflation severely affects overall vehicle durability and highway safety: Uneven Tread Wear: Underinflated tires wear heavily on the outer shoulders while leaving the center tread underutilized, prematurely destroying tread life. Excessive Heat Generation: Flexing sidewalls create internal friction and thermal buildup, increasing the risk of sudden tire casing failure. Compromised Handling and Braking: Underinflated sidewalls squirm during cornering, degrading steering response and increasing stopping distances on wet or icy pavement. Suburban commuters traveling along State Route 170 in Calcutta rely on proper tire inflation to maintain efficient daily driving during freezing weather. Capable family vehicles like the 2026 Ford Escape, rated at 26 city / 32 hwy MPG with its 1.5L engine and all-wheel drive, or the spacious 2026 Ford Explorer with its 300 hp 2.3L powertrain depend on correct cold inflation pressures to achieve their rated efficiency. Similarly, working trucks like the 2026 Ford F-150 featuring a 3.5L engine and SelectShift® transmission need proper tire support to deliver full towing performance and stable handling when hauling heavy loads. When tire tread wears thin or sidewalls show aging, drivers can use our convenient online tire lookup tool to locate factory-approved replacement tires built specifically for their vehicle trim. What Does a Blinking Tire Pressure Warning Light Mean? A tire pressure warning light that flashes for 60 to 90 seconds upon starting your vehicle before remaining continuously illuminated signals a TPMS system fault or dead sensor battery rather than simple low air pressure. When the light remains steady from the moment you start the engine, it indicates that at least one tire has low pressure. Understanding the distinction between a steady light and a flashing light prevents improper diagnostic steps. A flashing light indicates that the onboard computer has lost communication with one or more wheel sensors. Common triggers for a blinking TPMS light include: Expired Sensor Batteries: Direct TPMS sensors use integrated lithium batteries with a typical lifespan of 5 to 10 years. Once the battery depletes, the sensor stops transmitting data, triggering a system malfunction alert. Seasonal Wheel Swaps: Installing winter wheels and tires without transferring or reprogramming electronic TPMS sensors prevents the vehicle computer from reading pressure signals. Corroded or Damaged Hardware: Road salt and moisture can corrode valve stems or damage internal electronic components. Electronic Interference: Unapproved aftermarket electronic accessories installed near the dash can occasionally disrupt radio frequency signals sent from wheel sensors. If your dashboard displays a flashing warning light, check air pressure manually across all four tires using a pressure gauge to ensure immediate driving safety, then schedule a professional inspection to identify and replace faulty system components. Common Questions About Winter Tire Pressure and TPMS Operation Q: Is nitrogen better than regular compressed air for preventing winter tire pressure drops? Nitrogen molecules are larger than oxygen molecules and contain virtually no moisture, which reduces air migration through tire rubber and minimizes internal pressure fluctuations caused by humidity changes. However, dry nitrogen gas still obeys basic thermal laws, expanding and contracting as outside temperatures change. While pure nitrogen reduces gradual pressure loss, it still experiences pressure drops during severe cold snaps, making routine manual pressure checks necessary regardless of which inflation gas is used. Q: Does the tire pressure warning light go off by itself after driving? Yes, driving generates internal tire friction that warms the air inside, increasing internal pressure. If a tire was sitting just below the warning threshold, thermal expansion while driving can raise pressure enough to temporarily turn off the dashboard light. However, once the vehicle parks and the rubber cools back down, pressure drops right back below recommended levels. Drivers should add air to match recommended cold PSI ratings rather than relying on temporary driving heat. Q: Should you overinflate tires beyond the door sticker rating during winter? No, tires should always be inflated to the exact cold pressure specification listed on the driver's door jamb sticker. Overinflating tires to compensate for expected cold snaps reduces tire contact area on snow and ice, causing harsh ride quality, accelerated center tread wear, and reduced traction. Adjust pressure regularly to match recommended placard values as seasonal weather changes. Q: Why does only one tire trigger a warning light after a cold night? While cold weather affects all four tires equally, individual tires may sit at slightly different baseline pressures prior to a temperature drop. A tire that was already 2 PSI lower than the others due to normal seepage will cross the 25% underinflation threshold first when freezing weather hits. If one tire reads significantly lower than the rest, inspect the tread and valve stem carefully to rule out a nail, valve leak, or rim damage. Q: What should you do if a tire loses pressure rapidly on the road? If a tire loses pressure rapidly while driving, pull over safely to a flat, secure location away from traffic. Do not continue driving on a severely deflated tire, as doing so damages the wheel rim and tire sidewall structure. Drivers covered by factory warranty or extended protection plans can access dedicated manufacturer support by contacting Ford Roadside Assistance at 1-800-241-3673 for professional towing, flat tire changes, or emergency assistance. Schedule Professional Winter Tire Service Proper tire care is one of the most effective ways to ensure family safety, precise vehicle handling, and maximum fuel economy throughout the cold winter months. Whether your vehicle requires seasonal air pressure adjustments, TPMS sensor diagnostics, tire rotations, or complete replacement with brand-new snow-rated tires, our certified service department delivers expert care using factory-approved equipment and genuine OEM parts. Our factory-trained technicians can quickly inspect your tire tread depth, evaluate rubber condition, balance wheels, and reset your Tire Pressure Monitoring System to ensure worry-free winter driving. Visit our East Liverpool facility today, give our service team a quick call at (330) 462-7578, or conveniently schedule a service appointment online to keep your vehicle running smoothly and safely all season long. © 2026 Tri State Ford. All rights reserved. Vehicle specification data © JATO Dynamics Limited. Tire Pressure Tips for Cold Weather in East Liverpool OH | Tri State Ford
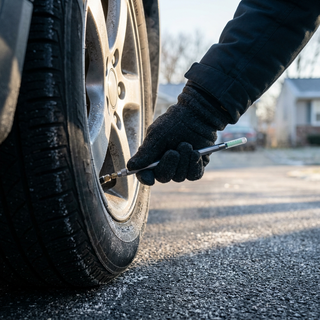
Contact Us

Fill out this form below and we'll contact you shortly
*Required Fields