


Blog / Maintenance & Service, Expert Repairs & Diagnostics, Genuine Parts & Accessories, Engine Care &

How Do You Diagnose a Steering Wheel Shaking at 60 MPH?

d

Diagnosing a steering wheel shaking at 60 mph requires isolating when the vibration occurs and where you feel it. Cruising smoothly at 60 mph with a shaking steering wheel points to front tire imbalance or a bent front wheel, whereas shaking that happens only while pressing the brake pedal signals warped front brake rotors. If the vibration transfers through the seat or floorboard rather than the steering wheel, the issue resides in the rear wheels or driveline.

Highway speeds around 55 to 65 mph expose minor wheel and suspension flaws because the rotation frequency of your tires matches the resonant frequency of your vehicle's front suspension. At city speeds, an out-of-balance wheel rotates slow enough that the suspension dampens the movement. Once you reach 60 mph, even an imbalance as small as a quarter to half an ounce creates repetitive centrifugal forces that travel through the steering column and into your hands.

To diagnose the problem systematically, observe how your vehicle behaves under three specific driving conditions:

  • Constant Highway Cruise: A steady vibration in your hands between 55 and 70 mph that remains constant whether coasting or maintaining speed typically indicates a front tire balance issue, a bent rim, or uneven tire wear.
  • Pedal Depress under Braking: A steering wheel that remains smooth at cruising speeds but vibrates intensely the moment you step on the brake pedal points directly to brake rotor thickness variation or rotor warping.
  • Cornering and Lane Changes: Vibration accompanied by a low growling or humming noise that changes tone when turning indicates a failing front wheel bearing.

Checking tire inflation pressure on all four tires is the best first step. Driving on underinflated or unevenly inflated tires accentuates tread irregularities and makes existing balance issues feel far more severe. If setting all tires to the recommended manufacturer pressure does not resolve the vibration, your vehicle requires a hands-on mechanical check. You can visit our service center address or give our team (330) 462-7578 a call to schedule a professional wheel and front-end evaluation.

Table of Contents

How Do You Tell If Steering Wheel Shake Is From Brakes or Tires?

You can tell whether steering wheel shake stems from your brakes or your tires by paying attention to pedal engagement. Cruising at 60 mph with a steady wheel tremor indicates a tire imbalance or wheel runout, while a steering wheel that vibrates exclusively when you apply the brake pedal points directly to uneven brake rotor wear.

Tire-related shaking is velocity-dependent rather than pedal-dependent. When a tire loses a balance weight or suffers from tread cupping, the vibration begins as you accelerate past 50 mph, peaks near 60 mph, and stays present as long as you maintain that highway speed. Pressing the gas pedal or coasting in neutral does not eliminate tire-induced vibration because the wheels are still spinning at high velocity against the pavement. Commuters navigating the daily drive along State Route 170 in Calcutta frequently notice tire balance issues first because the smooth, steady highway pavement makes subtle wheel oscillations obvious.

Brake-related shaking occurs only when friction is applied to the rotating disc assemblies. As front brake pads clamp down on a rotor with non-uniform thickness or heat distortion, the pads jump across high and low spots on the disc face. This hydraulic backpressure pulses up through the brake lines, pedal, and steering rack. Drivers typically feel a distinct pulsation in both the brake pedal and the steering wheel simultaneously during deceleration.

Diagnostic Factor Tire & Wheel Imbalance Warped Brake Rotors
Primary Trigger Constant cruising speed (55-65 mph) Pressing the brake pedal at speed
Feedback Location Steering wheel, seat, or vehicle floor Steering wheel and brake pedal pulsation
Sound Indications Thumping, rhythmic buzzing, or silence Squealing, grinding, or quiet pulsation
Pedal Feel Normal pedal resistance and travel Pulsing or push-back against your foot
Tread Condition Cupping, scalloping, or flat spots Normal wear (unless alignment is off)

If you suspect uneven tire wear or missing weights are behind your highway shake, you can schedule a service appointment with our certified technicians. Drivers looking for exact replacement tires can also utilize our online tire lookup tool to compare original equipment fitments tailored specifically for their vehicle model.
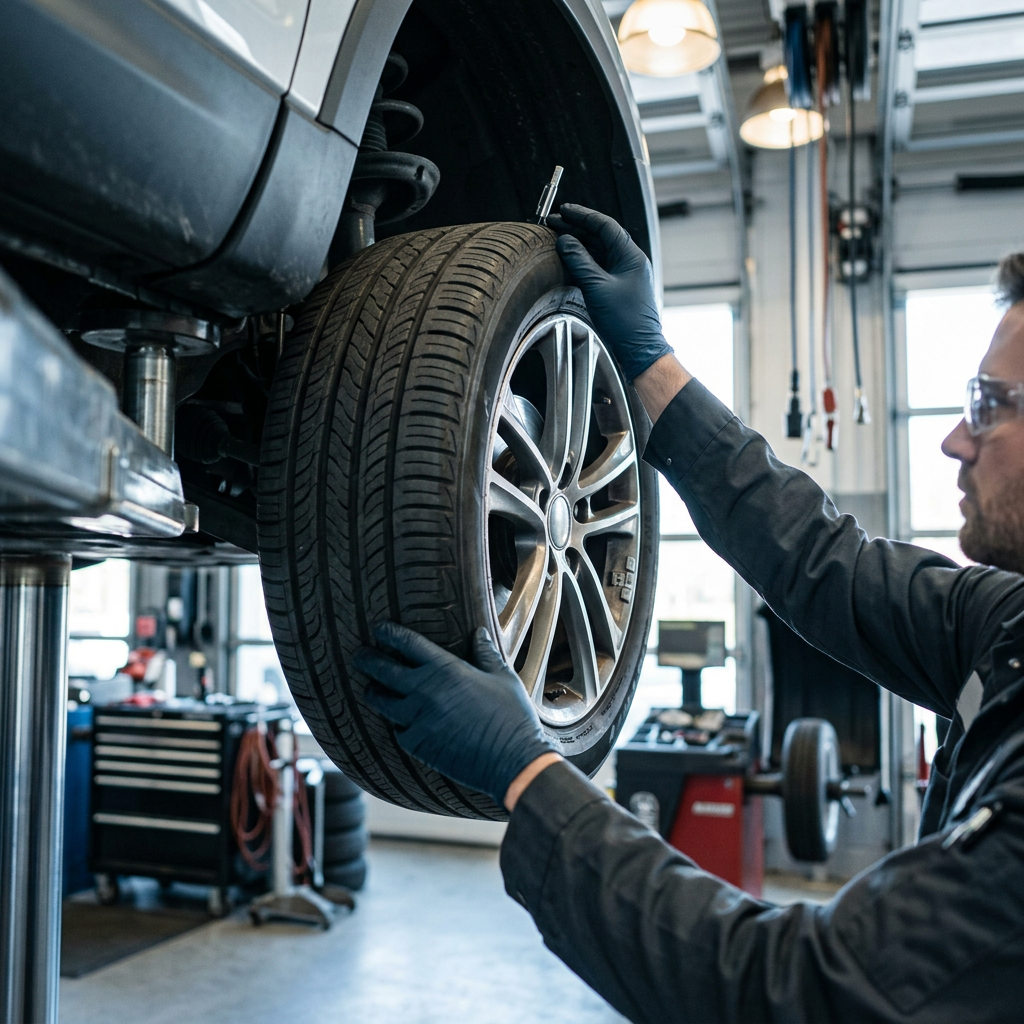
Mechanic wearing gloves checking tire tread depth on an elevated vehicle in an auto repair shop. (Representative image for illustration purposes only. Actual vehicle may vary based on trim and configuration.)

What Is the Difference Between Steering Wheel Shake and Floorboard Vibration?

The primary difference between steering wheel shake and floorboard vibration lies in which axle is transmitting the rotational force. Steering wheel vibration signals a mechanical defect in the front wheels, front suspension, or steering linkage, whereas floorboard or seat vibration indicates an issue in the rear tires, rear suspension, or drive shaft.

Front wheels connect directly to the steering knuckle, tie rod ends, and steering column. When a front tire has a flat spot, dynamic imbalance, or bent wheel rim, the horizontal and vertical forces travel upward through the rack-and-pinion assembly. Because your hands are sensitive to micro-movements, even slight front-end wobble creates a rapid tremor in the steering wheel rim long before the cabin structure starts to move.

Rear wheel issues travel a completely different path into the passenger space. Unbalanced rear tires or damaged rear wheel bearings transfer vibration through the rear axle beams or subframe mounts, into the unibody floorpan, and up through the seat frame. You will feel a lower-frequency buzz in your legs, seat cushion, or center console rather than a rhythmic tugging in your hands.

Drivetrain components also create distinct floorboard vibrations. On rear-wheel-drive or all-wheel-drive vehicles, worn universal joints, unbalanced driveshafts, or damaged transfer case bearings produce a dense, high-frequency hum felt beneath the floor matrix. This floor vibration often intensifies under hard acceleration and subsides when you let off the throttle, setting it apart from tire-based vibrations that persist regardless of engine load.

How Does Tire Imbalance Cause High-Speed Vibration and What Does Balancing Cost?

Tire imbalance causes high-speed vibration when an uneven weight distribution along the tread creates centrifugal forces that match the resonant frequency of your suspension at 55 to 65 mph. Balancing four tires at a professional service facility averages between $30 and $100 total, or roughly $10 to $25 per tire.

Every tire and wheel assembly has slight mass variations from manufacturing and normal rubber wear. If one spot on the tire is heavier by even a fraction of an ounce, that extra mass acts like a hammer pulling outward every time the tire rotates. At 60 mph, an average passenger car tire rotates approximately 800 times per minute. That rapid rotation turns a tiny mass variance into substantial upward and side-to-side force, bouncing the tire against the road surface.

Service technicians correct mass discrepancies using two primary methods of balancing:

  • Static Balancing: Measures heavy spots along a single vertical plane. Technicians place weights on the inner wheel rim to eliminate up-and-down tire hopping.
  • Dynamic Balancing: Measures mass distribution across two planes—both inner and outer rim edges. Dual-plane balancing counters vertical hop and side-to-side wheel shimmy at highway speeds.

Over time, daily driving wears away tread rubber, changing the balance dynamics of the wheel assembly. Losing a clip-on rim weight after hitting a bump instantly creates an imbalance. Having your tire assemblies dynamically balanced once a year or every 6,000 miles prevents premature tire wear and keeps your highway drive smooth.

What Steering and Suspension Components Cause High-Speed Wobble?

High-speed steering wobble is caused by worn mechanical links—specifically inner and outer tie rod ends, upper and lower ball joints, control arm bushings, and front wheel bearings—that allow excessive play in the front assembly. When these parts loosen, even minor tire forces translate into pronounced wheel oscillation on the highway.

The front suspension holds the front wheels precisely aligned under heavy dynamic loads. When rubber bushings degrade or ball joints lose their factory grease seal, looseness enters the assembly. A minor tire imbalance that would normally be dampened by tight suspension joints causes worn components to move back and forth, turning a faint tire vibration into a violent steering wobble.

Key components to inspect for high-speed wobble include:

  • Tie Rod Ends: Connect the steering rack to the wheel steering knuckle. Worn tie rod sockets cause vagueness at the wheel center and allow the tires to flutter side-to-side at highway speeds.
  • Ball Joints: Act as the pivot point between control arms and steering knuckles. Loose ball joints allow unpredictable tire movement and dangerous camber shifts.
  • Control Arm Bushings: Dampen road impacts and maintain lower suspension geometry. Cracked or torn rubber bushings allow the wheel assembly to move fore and aft during high-speed cruising.
  • Wheel Bearings: Allow the wheel hub to spin freely on the spindle. Front wheel bearings typically have an operational window around 85,000 to 100,000 miles before inner race wear causes play, humming noises, and wheel instability.

Navigating the elevation changes and riverfront bluffs around East Liverpool places added stress on steering knuckles and control arm bushings over time. Inspecting these mechanical parts during routine oil changes identifies worn components before they ruin your tires. When replacement parts are needed, our service team uses genuine OEM replacement parts to restore factory handling and long-term durability.

Why Is Professional Diagnostic Care Essential for Highway Speed Vibrations?

Professional diagnostic care is essential for highway speed vibrations because visual inspections often miss internal tire belt separation, hub runout, and subtle wheel bends. Certified technicians use specialized electronic wheel balancers and dial indicators to pinpoint root mechanical causes safely and accurately.

Attempting to ignore a steering wheel shake or guessing at the cause leads to costly secondary damage. A persistent highway vibration severely stresses steering racks, strut mounts, wheel bearings, and tie rod ends. What starts as a simple missing wheel weight can quickly wear out expensive front-end parts if driven uncorrected for months. Furthermore, internal tire tread separation—where structural steel belts detach inside the casing—can present as a standard high-speed shake before causing a sudden tire failure.

Our service team frequently notes that drivers notice a steady 60 mph vibration right after hitting a pothole, assuming a simple rebalance will solve it when the wheel flange actually has measurable runout. Precision electronic road-force balancers press a roller against the spinning tire to simulate the weight of the vehicle, measuring structural stiffness and rim straightness that standard spin balancers miss completely.

If your vehicle suffers a severe sudden wobble or tire failure on the highway, do not risk driving it to a shop. Eligible owners can take advantage of Ford Roadside Assistance: 1-800-241-3673 for towing support to authorized service centers, protecting your vehicle's warranty and safety systems.

Frequently Asked Questions About Steering Wheel Shakes

Q: Can a bad wheel alignment cause my steering wheel to shake at 60 mph?

A bad wheel alignment primarily causes your vehicle to pull to one side, sit with an off-center steering wheel, or develop rapid edge tread wear. Alignment angles like toe and camber do not usually generate an isolated vibration on their own. However, prolonged severe misalignment creates uneven tire wear patterns like feathering or cupping, and those tread irregularities eventually cause a steady steering wheel shake at highway speeds.

Q: Why does my steering wheel shake at 60 mph only when accelerating?

A steering wheel or cabin shake that occurs exclusively while pressing the accelerator at 60 mph points toward inner constant-velocity (CV) joint wear or a worn driveline component rather than tire balance. Inner CV joints transfer engine torque to the front wheels. When the internal joint housing develops wear grooves, engine load forces the axle shaft off-center, creating a heavy wobble that disappears the moment you release the gas pedal.

Q: Will driving with an unbalanced tire damage my car?

Yes, driving continuously with an unbalanced tire causes accelerated, irregular tread wear and places unnecessary shock loads on your vehicle's front suspension. The constant hammering force of an unbalanced wheel degrades front wheel bearings, wears out lower ball joints, and prematurely destroys rubber control arm bushings. Fixing a tire balance issue promptly prevents expensive secondary suspension repairs down the road.

Q: How long does it take for a shop to balance four tires?

Balancing four tires on standard vehicle wheels typically takes a professional service technician between 30 and 45 minutes using modern electronic wheel balancers. If the technician discovers bent wheel rims, frozen lug nuts, or worn steering components during the pre-balance inspection, additional diagnostic time may be required to resolve the root cause safely.

Q: What should I do if my steering wheel starts shaking violently all of a sudden?

If your steering wheel begins shaking violently without warning, reduce your speed immediately, safely signal, and pull off the roadway onto a firm shoulder. Violent shaking can indicate loose lug nuts, a separating tire tread belt, or a severely damaged suspension component. Avoid heavy braking or sudden steering adjustments, turn on your hazard lights, and arrange for professional inspection or towing assistance.

Schedule Your Front-End Inspection at Tri State Ford

Resolving a highway steering wheel vibration promptly restores your driving comfort, protects your vehicle's steering components, and ensures your family stays safe on every trip. Whether your vehicle requires precision wheel balancing, front brake rotor replacement, or a thorough suspension inspection, our factory-trained technicians at Tri State Ford are equipped with the specialized tools to diagnose and fix the issue accurately.

Visit our service center location or give our service department a quick call at (330) 462-7578 to speak with an advisor and book your front-end diagnostic service today.
© 2026 Tri State Ford. All rights reserved.

Steering Wheel Vibration Repair in East Liverpool OH | Tri State Ford
Posted in:

Related Posts

5

Do OBD-II Trouble Codes Tell You Which Part to Replace?

An OBD-II diagnostic trouble code does not specify which part needs to be replaced. Instead, a code identifies a specific system, circuit, or operational threshold where the vehicle computer detected readings outside normal parameters. Determining the exact failing component requires hands-on physical inspection, electrical testing, and live sensor monitoring to distinguish between a broken part, a failed sensor, a wiring defect, or a mechanical engine issue. Modern vehicles contain dozens of electronic sensors constantly transmitting operational data to the powertrain control module. When a sensor reports a value that falls outside pre-programmed parameters for a set duration, the module stores a five-character code and illuminates the check engine light. A code such as P0171 indicates that the system is running lean on bank one, meaning the engine computer is detecting excess oxygen in the exhaust. That lean condition could stem from a torn intake boot, a stuck-open purge valve, low fuel pressure, or a leaking vacuum hose. Replacing the oxygen sensor simply because it reported the lean mixture wastes money without resolving the underlying air or fuel imbalance. Relying solely on a code reader leads drivers to replace perfectly functioning components. Diagnostic trouble codes serve as a starting map for professional technicians rather than a direct prescription. Proper vehicle care involves using specialized diagnostic equipment to trace electrical continuity, check vacuum integrity, and monitor live sensor signals under real load conditions. To get a precise diagnosis for your vehicle, visit our East Liverpool service center or contact our team directly at (330) 462-7578 to speak with a factory-certified technician. Table of Contents What Information Is Contained Within a Standard 5-Digit DTC? Why Can Multiple Trouble Codes or Wiring Issues Mask the Real Problem? Can a Clogged Catalytic Converter Cause Codes That Look Like Engine Misfires? How Much Does Professional Diagnostic Testing Cost and How Does It Save Money? Does Replacing the Part Named in a Trouble Code Fix Your Vehicle? Frequently Asked Questions About Vehicle Diagnostics Schedule Comprehensive Vehicle Diagnostics at Tri State Ford What Information Is Contained Within a Standard 5-Digit DTC? A standard five-character Diagnostic Trouble Code ( DTC) contains structured data that reveals the affected vehicle system, whether the code is standardized or manufacturer-specific, and the precise subsystem experiencing an anomaly. Each position in the alphanumeric code narrows down the electrical or mechanical monitoring parameter without pinpointing the exact physical component failure. Understanding how a five-digit code is constructed helps clarify what the vehicle computer is actually reporting. The Society of Automotive Engineers established a uniform structure for all OBD-II compliant vehicles: First Character (System Category): A letter designating the primary system. P represents the Powertrain (engine, transmission, and fuel systems), B denotes the Body (airbags, climate control, lighting), C covers the Chassis (anti-lock brakes, steering, suspension), and U signifies Network and Communication systems. Second Character (Code Type): A number indicating standardized versus enhanced diagnostic definitions. A 0 or 2 represents a generic code standardized across all vehicle manufacturers, whereas a 1 or 3 indicates a manufacturer-specific code tailored to proprietary software logic. Third Character (Subsystem Category): A number identifying the specific vehicle subsystem. Within powertrain codes, 1 and 2 specify fuel or air metering, 3 indicates the ignition system or misfire detection, 4 covers auxiliary emission controls, 5 relates to vehicle speed and idle control, 6 points to computer output circuits, and 7 or 8 references the transmission system. Fourth and Fifth Characters (Fault Identifier): A two-digit number pinpointing the specific failure condition, such as a particular cylinder misfire or a circuit high/low voltage state. For example, code P0301 translates to a powertrain system fault ( P), generic standard ( 0), ignition or misfire subsystem ( 3), occurring specifically on cylinder one ( 01). While this structure directs attention to cylinder one, it does not reveal whether the misfire stems from a worn spark plug, a failed ignition coil, a clogged fuel injector, or lost cylinder compression. Drivers noticing an active warning light can schedule a professional diagnostic appointment to have certified technicians analyze stored codes alongside live system data. Why Can Multiple Trouble Codes or Wiring Issues Mask the Real Problem? Multiple trouble codes and wiring defects mask the underlying problem because modern vehicle control units rely on shared electrical circuits, common sensor grounds, and cascading feedback loops. A single physical failure—such as a corroded ground wire, a blown fuse, or a damaged harness—can alter reference voltages across several sensors simultaneously, triggering a cascade of false diagnostic codes for completely functional parts. When an engine management system detects an initial failure, secondary systems often react to compensate for the malfunction. An unmetered vacuum leak creates an improper air-fuel ratio, prompting the powertrain control module to log a P0171 lean condition. As the engine computer attempts to correct the fuel mixture by adjusting fuel delivery, combustion becomes unstable, subsequently setting a P0300 random misfire code. Replacing ignition components based on the misfire code leaves the vacuum leak active, causing the replacement parts to foul quickly while the original issue persists. Vehicle computers record diagnostic data in distinct stages that aid in sorting primary faults from secondary reactions: Pending Codes: Stored when the control module detects an operational anomaly during a single driving cycle. Pending codes do not immediately illuminate the check engine light, as the computer waits to verify whether the fault persists across subsequent drive cycles. Confirmed Codes: Established when an anomaly recurs across mandatory evaluation cycles, illuminating the malfunction indicator lamp on the instrument cluster. Freeze-Frame Data: A stored snapshot of real-time engine parameters captured at the exact moment a code sets. This includes engine speed, coolant temperature, fuel trim percentage, vehicle speed, and intake manifold pressure. Reviewing freeze-frame data allows technicians to determine whether multiple codes occurred simultaneously or developed sequentially over time. Physical wiring damage, such as a chafed harness touching an engine block, can pull sensor reference lines to ground and set five or six unrelated sensor codes at once. Identifying these electrical anomalies requires digital multimeters and circuit testing before attempting to order OEM replacement parts for components that may be entirely healthy. Can a Clogged Catalytic Converter Cause Codes That Look Like Engine Misfires? A clogged catalytic converter can directly cause fault codes that resemble primary engine misfires by creating excessive exhaust backpressure that prevents cylinders from expelling spent gases. This trapped exhaust gas dilutes the incoming air-fuel charge during the intake stroke, resulting in incomplete combustion and triggering random cylinder misfire codes like P0300. Inside a catalytic converter, a dense ceramic honeycomb substrate processes engine exhaust to reduce harmful emissions. Over time, internal melting from unburned fuel or heavy carbon accumulation can block the narrow passages within the substrate. When exhaust flow is restricted, spent gases back up into the exhaust manifold and cylinder head. During the exhaust stroke, the piston encounters high physical resistance pushing against trapped exhaust. When the intake valve opens for the next cycle, residual exhaust gas occupies space intended for fresh air and fuel, causing misfires across multiple cylinders. Diagnosing this condition requires distinguishing between a primary misfire that damages the converter and a restricted converter that causes misfires: Primary Misfire leading to Converter Damage: Raw fuel from a failing spark plug enters the hot catalytic converter, igniting inside the substrate and melting the ceramic core. In this scenario, misfire codes like P0301 appear first, followed later by a P0420 catalyst efficiency code. Converter Restriction leading to Misfires: Physical internal collapse or carbon clogging creates backpressure first, generating a P0420 or catalyst pressure condition before secondary P0300 random misfire codes appear due to poor cylinder scavenging. Technicians verify exhaust restrictions by removing the upstream oxygen sensor and connecting a dedicated pressure gauge to measure exhaust manifold backpressure. Normal backpressure remains below 1.5 PSI at engine idle and below 3.0 PSI at 2,500 RPM. When driving across the gently rolling hills around Calcutta, high engine loads can make an exhaust restriction noticeably worse, causing severe power loss when trying to accelerate up grade. How Much Does Professional Diagnostic Testing Cost and How Does It Save Money? A professional vehicle diagnostic test typically costs between $85 and $150 at independent repair facilities and $100 to $250 at factory-authorized dealerships, representing roughly one to one-and-a-half hours of certified technician labor. This investment saves vehicle owners hundreds or thousands of dollars by accurately identifying the root cause of a failure before replacing expensive components unnecessarily. A basic code scan offered by retail auto parts stores merely retrieves the five-digit alphanumeric string stored in computer memory. A full professional diagnostic testing session goes significantly deeper, utilizing specialized equipment to test components directly. Diagnostic testing includes connecting advanced scan tools to monitor live-data streams, checking sensor signal waveforms with digital oscilloscopes, performing smoke tests to locate vacuum or evaporative emissions leaks, and executing pinpoint pin-out voltage checks at harness connectors. Consider the financial comparison between guessing based on a code and investing in proper diagnosis: Scenario A (Parts Replacement Based on Code): A vehicle sets code P0135, defined as an oxygen sensor heater circuit malfunction. Assuming the sensor is bad, a car owner purchases and installs a new OEM oxygen sensor for $200. The check engine light returns immediately because the actual cause was a melted wiring harness or a $5 blown circuit fuse. Total spent: $205+ with the problem unresolved. Scenario B (Professional Pinpoint Diagnostics): A certified technician charges $120 for a diagnostic testing session. The technician checks voltage at the oxygen sensor connector, identifies zero voltage supply, traces the circuit back to a blown fuse caused by a pinched wire, repairs the wire, and replaces the fuse. Total spent: $125 with the vehicle fully repaired. Our service advisors frequently observe drivers arriving with a stored P0300 code assuming they need four new ignition coils, only for our diagnostic pinpoint testing to reveal a simple vacuum leak at an intake manifold gasket. Spending money on systematic diagnosis eliminates trial-and-error parts replacement, protecting your repair budget while ensuring long-term vehicle reliability. Does Replacing the Part Named in a Trouble Code Fix Your Vehicle? Replacing the part named in a trouble code description fails to fix the vehicle problem in a substantial number of cases because diagnostic codes identify system conditions rather than broken parts. A code definition describes the symptom detected by an electronic control unit, leaving the underlying cause—whether electrical, mechanical, or sensor-related—unresolved until thorough diagnostic testing is performed. A common example involves code P0420, defined as "Catalyst System Efficiency Below Threshold." The code name mentions the catalytic converter, leading many drivers to assume the converter must be replaced immediately. In practice, a P0420 code sets when the downstream oxygen sensor detects oxygen levels fluctuating too rapidly behind the catalyst. That condition can be caused by an upstream exhaust manifold leak drawing in outside air, a contaminated oxygen sensor, a sticking fuel injector, or an engine misfire. Replacing a $1,200 catalytic converter while ignoring an air leak or an rich-running fuel condition will destroy the new converter in short order. A complete repair process follows a structured path beyond part installation: Code Extraction and Freeze-Frame Analysis: Retrieving stored, pending, and historical codes while recording operational metrics at the time of failure. Pinpoint Component and Circuit Testing: Using specialized tools to verify ground integrity, power supply, signal output, and physical mechanical function. Targeted Repair or Component Replacement: Fixing the verified root cause, whether it is a sensor, wiring repair, hose replacement, or internal engine component. Verification and Drive Cycle Reset: Clearing stored codes and performing a controlled test drive under conditions matching the original freeze-frame data to verify that all onboard monitors complete and the fault does not recur. When navigating steep riverfront bluffs near East Liverpool, a vehicle that has only had a code cleared without root-cause repair will quickly trigger the check engine light again under heavy climb conditions. Before spending money on unneeded components, visit our service department location or give our service advisors a call to discuss your vehicle's symptoms. You can also explore current service offers and specials to save on essential routine maintenance and professional diagnostic testing. Frequently Asked Questions About Vehicle Diagnostics Q: What is the difference between a pending code and a confirmed code? A pending trouble code indicates that the engine control module detected a system malfunction during a single driving cycle, but the fault has not yet persisted long enough to confirm a persistent failure. A confirmed code occurs after the same fault is detected across multiple consecutive driving cycles, which then officially triggers the check engine light on your dashboard. Q: Why does a check engine light flash instead of staying solid? A flashing check engine light indicates a severe engine misfire that is actively allowing unburned fuel to pass into the exhaust system. This raw fuel ignites inside the catalytic converter, driving temperatures above safe operating thresholds and causing irreversible thermal damage to the converter substrate within minutes. Drivers should reduce speed immediately and pull over safely when the light flashes. Q: Can a weak or dying car battery cause random trouble codes to appear? Yes, low system voltage or a failing battery can cause vehicle control modules to record multiple spurious trouble codes. Electronic sensors rely on stable reference voltages from the engine control unit; when battery voltage drops during cranking or driving, sensors send erratic signals that the computer interprets as system faults across chassis, body, and powertrain circuits. Q: What is freeze-frame data and how do technicians use it? Freeze-frame data is an automated snapshot of vehicle sensor parameters recorded by the engine control module at the exact instant a diagnostic trouble code is triggered. It captures operational metrics including engine speed, vehicle speed, engine load, fuel trim values, and coolant temperature. Technicians review this data to recreate the exact driving conditions under which an intermittent fault occurred. Q: Will clearing a trouble code with an OBD-II scanner fix my car for an emissions inspection? Clearing a trouble code with a basic scanner resets the check engine light, but it also erases all internal OBD-II readiness monitors. State emissions inspection programs check whether these readiness monitors have completed their self-diagnostic cycles. The vehicle computer will register an "incomplete" status until the vehicle is driven through specific drive cycles, at which point any unaddressed fault will illuminate the check engine light again. Schedule Comprehensive Vehicle Diagnostics at Tri State Ford Accurate vehicle repair begins with thorough, professional diagnostics rather than guesswork. Diagnostic trouble codes provide valuable direction, but identifying the true cause of an illuminated check engine light requires expert inspection, advanced diagnostic tools, and pinpoint electrical testing. Addressing warning lights promptly prevents minor sensor or vacuum issues from escalating into costly mechanical repairs. Our factory-trained service technicians at Tri State Ford possess the specialized scanning equipment, factory technical databases, and hands-on experience necessary to diagnose complex driveability issues correctly the first time. Whether your vehicle displays a steady warning light or experiences subtle performance changes, our service team provides transparent evaluation and dependable repair solutions tailored to your vehicle's exact needs. Take the next step in protecting your vehicle's performance and long-term reliability. To book a diagnostic evaluation, call our team at (330) 462-7578, visit our service center at 1503 Pennsylvania Ave in East Liverpool, or use our convenient online service scheduling portal to reserve your appointment today. © 2026 Tri State Ford. All rights reserved. OBD-II Diagnostic Insights in East Liverpool OH | Tri State Ford

d

Why Are Your Car Tires Wearing Down Unevenly?

Uneven tire wear on a car is primarily caused by incorrect tire inflation pressure, misaligned suspension angles, unbalanced wheel assemblies, and worn mechanical components such as shocks, struts, or ball joints. When a tire does not maintain flat, uniform contact with the road surface, friction concentrates along specific bands of the tread. Over time, this targeted friction produces distinct wear patterns—such as shoulder baldness, center tread thinning, cupping, or diagonal feathering—that compromise overall driving performance. Identifying the specific pattern on your tires provides clear insight into underlying mechanical needs. For instance, when tire inflation is not regularly adjusted, rubber degrades prematurely across either the center line or both outer edges. Similarly, hitting potholes or curb edges during daily drives can easily alter factory alignment settings, causing the tires to drag at unintended angles across the asphalt. Routine inspection allows driver's options to address these mechanical discrepancies before permanent tire damage occurs. When tires begin showing irregular tread depth, resolving the issue promptly preserves handling precision and braking reliability. Drivers can search available replacement options using our online tire lookup tool to explore factory-recommended sizes and load ratings. For in-person diagnostic support, our service team is available at our East Liverpool facility to inspect suspension components, verify alignment angles, and measure remaining tread depth across every groove. If you prefer to discuss your vehicle's symptoms before visiting, give our service counter a quick call at (330) 462-7578. In suburban areas like Calcutta, frequent stop-and-go driving along State Route 170 combined with moderate elevation changes can accelerate tread degradation whenever pressures or alignment angles drift outside factory specifications. Table of Contents Is Uneven Tire Wear Dangerous to Drive On? How Does Improper Pressure Cause Center or Shoulder Wear? What Is Camber Angle and How Do Worn Suspension Parts Cause Wear? Should Wheel Alignment, Balancing, and Tire Rotation Be Done Together? Common Questions About Tire Wear and Wheel Alignment Schedule Expert Tire and Wheel Maintenance at Tri State Ford Is Uneven Tire Wear Dangerous to Drive On? Driving on unevenly worn tires is dangerous because it significantly reduces wet-weather traction, lengthens stopping distances, increases hydroplaning risks, and dramatically elevates the possibility of a sudden tire blowout. Tread grooves are precisely engineered to channel water away from the tire footprint; when uneven wear erodes those channels unevenly, water becomes trapped beneath the rubber, causing the vehicle to slide across wet pavement. As tire tread wears down unevenly, the structural integrity of the tire carcass becomes compromised. Severe edge wear or inner-shoulder thinning exposes internal steel belts and fabric plies to moisture, road debris, and thermal stress. This degradation creates localized hot spots during highway travel, making the tire vulnerable to structural separation. Furthermore, modern driver-assist systems—including anti-lock braking and electronic stability control—rely on uniform tire diameter and predictable friction coefficients to function properly. Irregular tread depth alters individual wheel rotation speeds, which can cause safety systems to miscalculate available grip during emergency maneuvers. Elevated Hydroplaning Vulnerability: Shallow tread areas fail to clear standing water, causing tires to float off the road surface at lower speeds. Reduced Emergency Braking Efficiency: Uneven contact patches decrease rubber-to-asphalt friction, adding critical feet to total stopping distance. Unpredictable Vehicle Handling: Misaligned or cupped tires cause vehicle pulling, steering wheel drift, and delayed response during sudden steering inputs. Risk of Sudden Structural Failure: Extreme wear on tread edges weakens sidewall support and exposes internal cords to high-speed blowouts. Our factory-trained technicians evaluate tread depth profile and tire casing health during every multi-point inspection. To experience how proper alignment and balanced tires restore smooth, responsive handling, consider scheduling a road test evaluation with our service department. How Does Improper Pressure Cause Center or Shoulder Wear? Improper tire inflation directly alters the shape of the tread footprint, causing overinflated tires to bulge outward and wear rapidly along the tread center, while underinflated tires collapse inward and concentrate road friction on both outer shoulders. Maintaining correct air pressure allows the tire casing to support vehicle weight uniformly across the entire tread width. When a tire is overinflated above the manufacturer recommendation, internal air pressure forces the center portion of the tread to expand outward. As a result, the outer shoulders carry minimal weight, and the center line absorbs the majority of road friction, resulting in rapid central tread loss. Conversely, an underinflated tire lacks sufficient air pressure to keep the center tread firmly pressed against the road. The vehicle's weight forces the center to bow inward slightly, shifting heavy loads directly onto both outer edges. This causes double-shoulder wear, accelerates heat accumulation, and increases rolling resistance, which also lowers fuel economy. Finding the correct air pressure for your vehicle requires checking the official tire information placard located on the driver-side door jamb or reviewing the owner's manual. The pressure stamped directly onto the tire sidewall represents the maximum inflation limit of the tire casing, not the engineered setting for your specific vehicle. Checking inflation when tires are cold—before driving more than one mile—ensures accurate pressure readings. Outdoor temperature fluctuations also impact internal pressure; ambient cold causes air to contract, dropping tire pressure by roughly 1 PSI for every 10-degree Fahrenheit decrease in temperature. What Is Camber Angle and How Do Worn Suspension Parts Cause Wear? Camber angle refers to the inward or outward vertical tilt of the wheel when viewed from the front of the vehicle, where incorrect tilt angles force excessive vehicle weight onto either the inner or outer edge of the tire tread. Worn suspension components—such as degraded shock absorbers, loose ball joints, or deteriorated control arm bushings—allow the wheel assembly to move unpredictably, producing distinct scalloped or cupped wear patterns across the tread surface. When a wheel has negative camber, the top of the tire tilts inward toward the engine bay, concentrating load and road friction along the inside edge of the tread. When a wheel exhibits positive camber, the top tilts outward, causing rapid wear along the outside shoulder. Alignment technicians adjust camber using adjustable control arm bolts or strut mounts to ensure the tire stands perpendicular to the road surface during cornering and straight-line driving. In addition to camber, incorrect toe alignment —where tires point inward or outward relative to the vehicle centerline—causes feathering, a condition where tread blocks develop sharp edges on one side and rounded edges on the other as the tire scrubs across the pavement. Suspension wear creates a different type of damage known as cupping or scalloping. Shock absorbers and struts function to dampen spring oscillations and keep the tire firmly planted on the road surface. When shock dampening fails or internal valving degrades, the wheel bounces continuously at highway speeds. Every time the tire lands back on the asphalt, road friction scoops out small, repeating patches of rubber around the tire perimeter. Loose wheel bearings and worn steering tie rods also allow unwanted wheel play, leading to erratic diagonal wear patches. Maintaining precise suspension geometry requires replacing worn components with high-quality parts engineered for your vehicle's specific chassis specifications. Drivers seeking replacement components can explore ordering OEM Ford replacement suspension parts directly through our dedicated parts department. Should Wheel Alignment, Balancing, and Tire Rotation Be Done Together? Combining wheel alignment, wheel balancing, and tire rotation during a single maintenance appointment provides the most effective protection against premature tread wear, even though each service addresses a completely different mechanical function. Alignment adjusts suspension angles, balancing neutralizes weight imbalances in the wheel assembly, and rotation changes wheel positions to equalize tread wear across all four tires. Tire rotation moves wheels from high-stress positions to lower-stress positions according to engineered patterns, such as a forward cross for front-wheel-drive vehicles or a rearward cross for rear-wheel and four-wheel-drive trucks. While rotation distributes future tread wear evenly, rotating tires cannot fix existing alignment wear patterns; once rubber is scrubbed away unevenly by incorrect camber or toe settings, the physical shape of the tread block remains altered. Resolving the root cause requires performing a precision wheel alignment alongside rotation. Service Procedure Primary Mechanical Function Symptoms Addressed Recommended Service Frequency Tire Rotation Changes wheel position to distribute position-specific friction across all four tires Uneven front-to-rear tread depth variance Every 5,000 to 7,500 miles (or every oil change) Wheel Alignment Adjusts camber, toe, and caster suspension angles to factory specifications Vehicle pulling, off-center steering wheel, edge wear Annually or after hitting major road hazards Wheel Balancing Places small counterweights on the rim to equalize total mass distribution High-speed steering wheel wobble, cupped tread Whenever mounting new tires or every 10,000 miles When evaluating alignment needs, technicians differentiate between a 2-wheel alignment and a 4-wheel alignment. A 2-wheel alignment adjusts only the front steering axle angles, whereas a 4-wheel alignment measures and recalibrates camber, toe, and tracking angles on both front and rear independent suspensions relative to the vehicle's geometric thrust line. Vehicles equipped with solid rear axles often require 2-wheel adjustments, while most modern crossover SUVs, sedans, and trucks with independent rear suspension require 4-wheel alignment to ensure straight tracking. The price difference reflects the additional labor and sensor calibration involved in aligning both axles. Commuters travelling daily from Boardman toward regional highways often encounter uneven pavement transitions that can knock front or rear wheels out of factory alignment, making combined tire maintenance essential for maintaining high-speed driving stability. Common Questions About Tire Wear and Wheel Alignment Q: How do you find the correct tire pressure for your vehicle? The correct cold tire pressure for your vehicle is listed on the official tire information placard affixed to the driver-side door jamb, as well as in the owner's manual. Avoid using the maximum PSI figure stamped into the tire sidewall, as that number represents the maximum pressure the tire structural casing can hold, rather than the ideal inflation setting calculated by vehicle engineers for optimal tread wear, safety, and fuel economy. Q: Can rotating your tires fix an existing alignment wear pattern? Tire rotation cannot fix or reverse an existing alignment wear pattern because rubber that has already been scrubbed off the tread cannot be restored. Rotating tires merely shifts the damaged rubber to a different wheel position, which can temporarily slow down further localized damage. To permanently stop irregular tread wear, the underlying mechanical alignment fault or loose suspension component must be repaired before performing a rotation. Q: What is the typical price difference between a 2-wheel and 4-wheel alignment? A 2-wheel alignment generally costs less because service technicians only measure and adjust the front steering axle angles. A 4-wheel alignment involves calibrating suspension geometry on both front and rear axles to align all four wheels to the vehicle thrust line. Please contact the dealership for current service pricing, as costs may vary by vehicle and service needs. Q: Why do worn shocks or struts cause scalloped tire wear? Worn shocks or struts lack the dampening force needed to control suspension spring bounce over road bumps. As a result, the tire repeatedly lifts slightly off the pavement and slaps back down at speed. This continuous bouncing creates a series of shallow, scooped-out dips or scalloped patches around the tread perimeter, leading to high-speed cabin vibration and increased road noise. Q: How frequently should tire balancing and alignment be checked on a Ford F-150? Tire rotation and balance checks should occur every 5,000 to 7,500 miles, making it convenient to schedule alongside routine oil changes. Alignment angles on a Ford F-150 should be verified at least once per year or immediately after heavy off-road use, hauling maximum payload capacities, or impacting deep potholes and curbs that can shift factory suspension settings. Schedule Expert Tire and Wheel Maintenance at Tri State Ford Protecting your vehicle investment requires proactive tire care, precise computerized alignment, and timely replacement of worn suspension components. Regularly inspecting your tread depth, keeping air pressure set to factory specifications, and addressing handling vibrations early prevents premature tire failure and maintains dependable driving control in all road conditions. Our factory-certified technicians utilize specialized diagnostic alignment racks and precision balancing tools designed specifically for your vehicle model. Whether your vehicle requires a routine tire rotation, a comprehensive 4-wheel alignment, or suspension component replacements, our team provides transparent guidance and quality care to keep your vehicle running smoothly. Take control of your vehicle's safety and tread longevity today by scheduling your next service appointment online. You can also visit our service department directly at 1503 Pennsylvania Ave, East Liverpool, OH 43920, or give our service advisors a call at (330) 462-7578 to discuss your tire wear concerns and reserve a convenient inspection time. © 2026 Tri State Ford. All rights reserved. Tips to Prevent Uneven Tire Wear in East Liverpool OH | Tri State Ford

f

How Often Do Brake Pads Need to Be Replaced?

Brake pads typically last between 40,000 and 60,000 miles under normal driving conditions, though overall wear ranges from 20,000 to 70,000 miles depending on friction material, driving habits, and vehicle weight. Physical pad thickness determines safety far more accurately than odometer readings: replacement planning should begin when friction material wears down to 1/4 inch (approximately 6 mm), and new pads must be installed before the lining reaches 3 to 4 mm (or 3/32 of an inch). Friction lining on a brand-new brake pad measures about 12 mm thick. As you drive, the friction material gradually wears away against the spinning metal rotor to bring your vehicle to a controlled stop. Front brake pads handle roughly 60% to 70% of the stopping load due to forward weight transfer during deceleration, causing them to wear out faster than rear pads. Routine multi-point inspections provide the most dependable way to track pad wear over time. During standard maintenance services, our technicians measure remaining pad material across all four wheels using specialized thickness gauges. Catching thin pad lining early prevents severe metal-on-metal contact, preserving the smooth surface of your brake rotors and preventing costly damage to brake calipers. Vehicle size and regular cargo weight also play a significant role in wear schedules. For instance, a compact crossover like the Ford Escape with a 1.5L engine and all-wheel drive experiences different braking friction demands than a fully loaded three-row Ford Explorer equipped with a 2.3L engine and four-wheel drive. Drivers navigating steep riverfront bluffs in East Liverpool place extra thermal strain on their braking systems, making regular physical thickness measurements essential. If you suspect your vehicle requires a brake check, you can visit our East Liverpool service center on Pennsylvania Ave or give our team a quick call to consult with an advisor. Table of Contents What Factors Cause Brake Pads to Wear Out Faster? How Does Ceramic Brake Pad Lifespan Compare to Semi-Metallic? What Is the Average Cost to Replace Both Brake Pads and Rotors? Do OEM Brake Pads Last Longer Than Aftermarket Alternatives? Common Questions About Brake Maintenance and Lifespan Schedule Professional Brake Service at Tri State Ford What Factors Cause Brake Pads to Wear Out Faster? Driving environment, vehicle load, braking technique, and pad compound directly dictate how quickly brake pad lining degrades over time. Aggressive stop-and-go traffic, frequent high-speed braking, carrying heavy payloads, and navigating steep terrain all accelerate friction wear, causing pads to need replacement far earlier than the 60,000-mile mark. Urban commuting involves constant acceleration and deceleration cycles that create sustained heat buildup within the brake caliper assembly. This friction heat breaks down the pad's chemical bonding agents faster than steady open-highway driving. Commuters traveling along State Route 170 in Calcutta frequently encounter traffic light cycles and lower speed limits, which subjects brake components to repeated stop-and-go friction throughout daily driving. Braking habits significantly alter component longevity. Drivers who coast early when approaching red lights or downhill grades allow air to cool the rotors and pads, reducing thermal stress. Conversely, late, heavy foot pressure on the brake pedal generates intense surface friction that rapidly shaves away pad material. Riding the brake pedal continuously while descending long hills keeps the pad pressed against the rotor, generating extreme heat that can glaze pad surfaces and reduce stopping power. Vehicle mass and towed weight create additional stopping resistance. Heavy-duty haulers and full-size trucks like the Ford F-150 require substantially more hydraulic clamping pressure to bring heavy loads to a complete stop. When towing trailers or carrying full passenger loads, the extra kinetic energy converts directly into friction heat, accelerating pad degradation across both axles. Environmental elements like road salt, moisture, and debris also contribute to premature wear. Winter road treatments accelerate corrosion on caliper slide pins and backing plates. Sticky or binding caliper pins prevent the pad from fully retracting away from the rotor after you release the brake pedal, causing the pad to drag continuously and wear down unevenly. How Does Ceramic Brake Pad Lifespan Compare to Semi-Metallic? Ceramic brake pads generally last between 50,000 and 70,000 miles, whereas semi-metallic brake pads typically last between 30,000 and 50,000 miles. Ceramic compounds utilize dense ceramic fibers combined with copper or non-ferrous filler materials, creating a durable surface that withstands daily wear while producing minimal dust and noise. Semi-metallic brake pads contain between 30% and 65% metal content by weight, incorporating steel fibers, iron powder, and graphite alloys. This metallic construction offers superior heat dissipation and high initial bite, making semi-metallic pads well-suited for heavy-duty towing and high-stress applications. However, the harder metallic fibers act more aggressively against the rotor surface and wear down faster under normal passenger vehicle operation than refined ceramic formulations. Organic or non-asbestos organic (NAO) brake pads represent a third category, made from materials like glass, rubber, resin, and Kevlar. Organic pads deliver soft, quiet braking performance but wear out quickly, often lasting only 25,000 to 35,000 miles. They are primarily selected for lighter vehicles or budget applications where high heat resistance is not required. Brake Pad Material Type Typical Service Lifespan Primary Advantages Best Suited For Organic (NAO) 25,000 – 35,000 miles Quiet operation, low rotor wear Light passenger cars, gentle city driving Semi-Metallic 30,000 – 50,000 miles High heat tolerance, excellent stopping power Heavy towing, trucks, performance applications Ceramic 50,000 – 70,000 miles Extended longevity, low dust, ultra-quiet Daily commuting, family crossovers, sedans Choosing the correct friction material depends on your vehicle type and primary driving demands. While ceramic pads provide maximum mileage and cleaner wheels for everyday driving, semi-metallic pads remain the preferred choice for drivers who regularly push their vehicles through heavy work cycles. What Is the Average Cost to Replace Both Brake Pads and Rotors? Replacing both brake pads and rotors averages between $250 and $500 per axle, which translates to $500 to $1,000 for a comprehensive four-wheel service including parts and labor. Exact costs fluctuate based on vehicle classification, rotor design, caliper configuration, and whether specialized ceramic pads are selected. Labor charges typically account for half of the total invoice. Replacing rotors involves removing the wheel assembly, unbolting the brake caliper and mounting bracket, cleaning hub contact surfaces, compressing caliper pistons, and torquing all hardware to precise factory specifications. Larger vehicles with complex rear electronic parking brake mechanisms require electronic service mode activation prior to disassembly, slightly increasing total labor time. Brake rotors do not always require replacement during every pad service. Rotors generally last through two complete sets of brake pads—roughly 50,000 to 70,000 miles—provided the pads are changed before wear indicators scratch or groove the rotor face. During a pad replacement, technicians measure rotor thickness with a micrometer to verify that enough metal remains above the discard-limit spec cast into the rotor housing. If a rotor meets thickness safety standards and exhibits no deep scoring or thermal warping, it can sometimes be resurfaced on a precision brake lathe to restore a flat friction face. However, modern vehicle rotors are manufactured with thinner, lighter castings to optimize fuel efficiency. Consequently, replacing worn rotors with fresh units often provides superior thermal stability and longer service life compared to machining thin metal. Delaying pad replacement past the 3 mm safety mark rapidly escalates repair costs. When pad friction lining disappears completely, the steel backing plate grinds directly against the cast-iron rotor. This metal-on-metal friction destroys the rotor surface in short order and can overheat hydraulic caliper pistons, transforming a routine pad service into a complete system overhaul. Do OEM Brake Pads Last Longer Than Aftermarket Alternatives? Original equipment manufacturer (OEM) brake pads deliver reliable, standardized longevity because they are formulated to match the exact weight, rotor metallurgy, and hydraulic leverage of your specific vehicle. Premium aftermarket ceramic pads can match OEM pad life under ideal conditions, but entry-level aftermarket options often wear unevenly or degrade faster under thermal stress. Factory Ford Motorcraft pads undergo rigorous testing to ensure balanced friction performance across wide temperature ranges. OEM engineers select specific pad friction formulations that balance pad life, rotor preservation, noise suppression, and pedal feel. This precise engineering minimizes premature dusting, squealing, and pad glazing. Generic aftermarket pads frequently use a single friction compound across dozens of different vehicle models to reduce manufacturing costs. A compound designed broadly for multiple vehicle platforms may prove too soft for heavy SUVs or too hard for lighter passenger cars, leading to accelerated wear or increased rotor surface damage. When maintaining your braking system, ordering genuine Motorcraft replacement parts guarantees factory fitment and predictable wear life without guessing about compound compatibility. Matching OEM pads with factory-spec rotors ensures consistent stopping distance and protects your braking hardware over tens of thousands of miles. Common Questions About Brake Maintenance and Lifespan Our service team receives many questions about brake squeals, warning lights, pedal feel, and proper inspection habits. Here are clear answers to common questions regarding brake care. Q: What does a high-pitched squealing sound from brakes indicate? A high-pitched squeal while applying the brakes usually indicates that your brake pads have worn down to approximately 3 mm of remaining friction material. Most quality pads feature built-in metal wear indicators—small spring-steel tabs that contact the spinning rotor to produce a deliberate, high-frequency sound. This noise serves as an acoustic warning that it is time to schedule a pad replacement before metal backing plates contact and ruin the rotor surface. Q: What is the minimum safe thickness for brake pads? The absolute minimum safe brake pad thickness is 3/32 of an inch (roughly 3 mm). Operating a vehicle with pad material thinner than 3 mm significantly increases stopping distances and risks immediate metal-on-metal rotor damage. Service centers recommend planning a pad replacement as soon as measurements show 1/4 inch (about 6 mm) of material remaining, ensuring you schedule maintenance well before hitting critical wear limits. Q: How often should brake rotors be replaced? Brake rotors typically last between 50,000 and 70,000 miles, generally outlasting two sets of brake pads under standard driving conditions. Technicians measure rotor thickness with a precision micrometer during every brake inspection. If the rotor face is grooved, heat-cracked, warped, or worn below the manufacturer's minimum thickness threshold, new rotors must be installed alongside fresh pads to ensure safe braking performance. Q: Why do front brake pads wear out faster than rear brake pads? Front brake pads wear faster because physics shifts vehicle weight forward onto the front axle whenever you press the brake pedal. This dynamic weight transfer forces the front braking assembly to absorb 60% to 70% of the total stopping force. Because rear brakes manage less stopping load, rear pads often last significantly longer than front sets. Q: What causes a brake pedal to feel soft or squishy? A soft or squishy brake pedal points to air trapped within the hydraulic brake lines, degraded brake fluid, or a leaking brake component. As brake fluid ages, it absorbs atmospheric moisture, lowering its boiling point and creating compressible steam pockets under heavy braking. A sinking pedal requires immediate professional inspection to flush the hydraulic fluid or repair master cylinder seals. If your vehicle exhibits squealing, pedal vibration, or thin pad measurements, you can easily schedule a multi-point inspection online with our certified service team. Schedule Professional Brake Service at Tri State Ford Maintaining healthy brake pads and rotors keeps your vehicle stopping safely on every daily commute and family journey. Whether your vehicle requires a routine thickness measurement, fresh fluid, or a complete pad and rotor replacement, our certified technicians provide expert service using factory-approved parts. Our service department provides transparent digital vehicle inspections, thorough hardware cleaning, and precision installation tailored to your specific Ford model. We also handle comprehensive vehicle maintenance, including routine battery checks and multi-point inspections, to keep your vehicle performing reliably year-round. Visit our local Ford dealership at 1503 Pennsylvania Ave, East Liverpool, OH 43920, or call (330) 462-7578 to speak directly with an expert service advisor and book your appointment today. © 2026 Tri State Ford. All rights reserved. Vehicle specification data © JATO Dynamics Limited. Brake Pad Replacement in East Liverpool OH | Tri State Ford